Create an Access Policy
This guide walks you through creating an Access Policy: Access Policies define, enforce, and audit access between Client and Server Workloads by cryptographically verifying workload identity and contextual factors rather than relying on static secrets.Learn more using the Access Policy Builder. The example creates an AWS cloud-native policy that allows EC2 instances in Washington State to access AWS S3 buckets.
Prerequisites
Section titled “Prerequisites”- Access to the Aembit Admin UI
- Appropriate permissions to create Access Policies and their components
Open the Access Policy Builder
Section titled “Open the Access Policy Builder”-
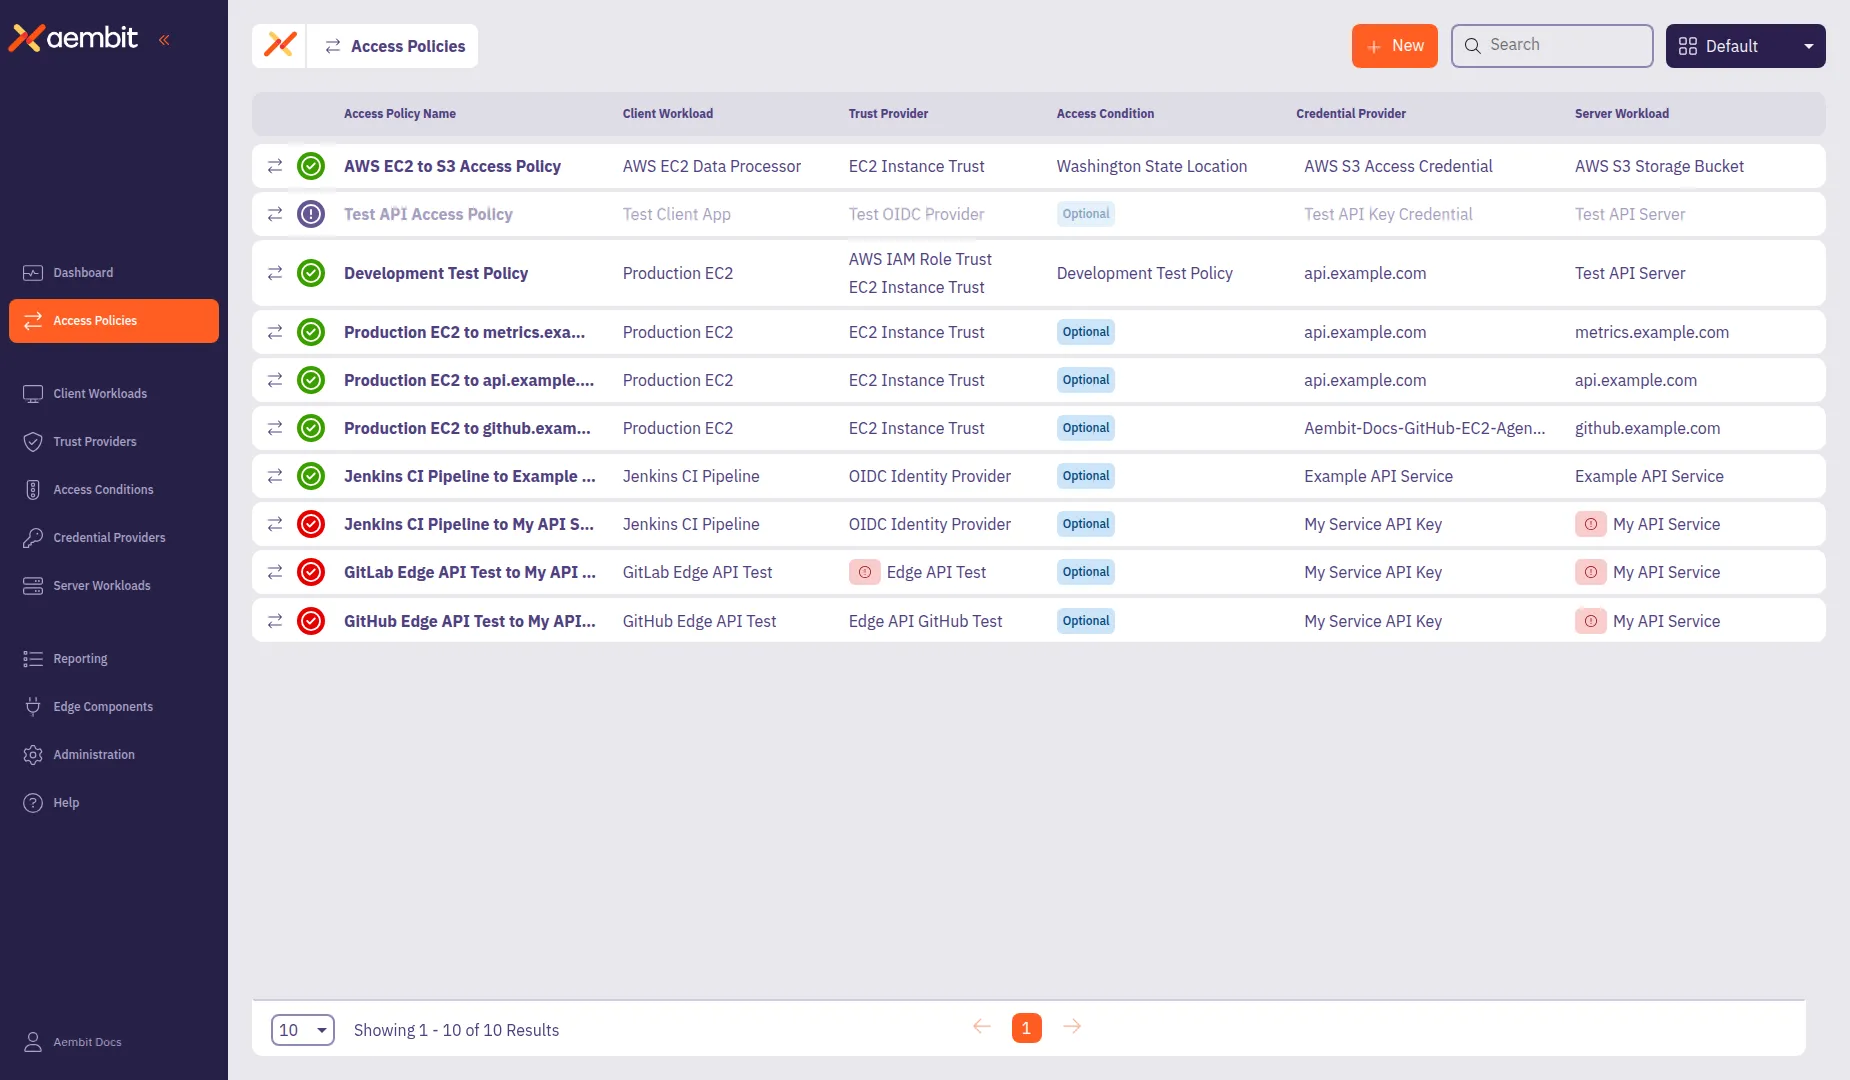
In the Aembit Admin UI, select Access Policies from the left sidebar.
-
Click + New to open the Access Policy Builder.
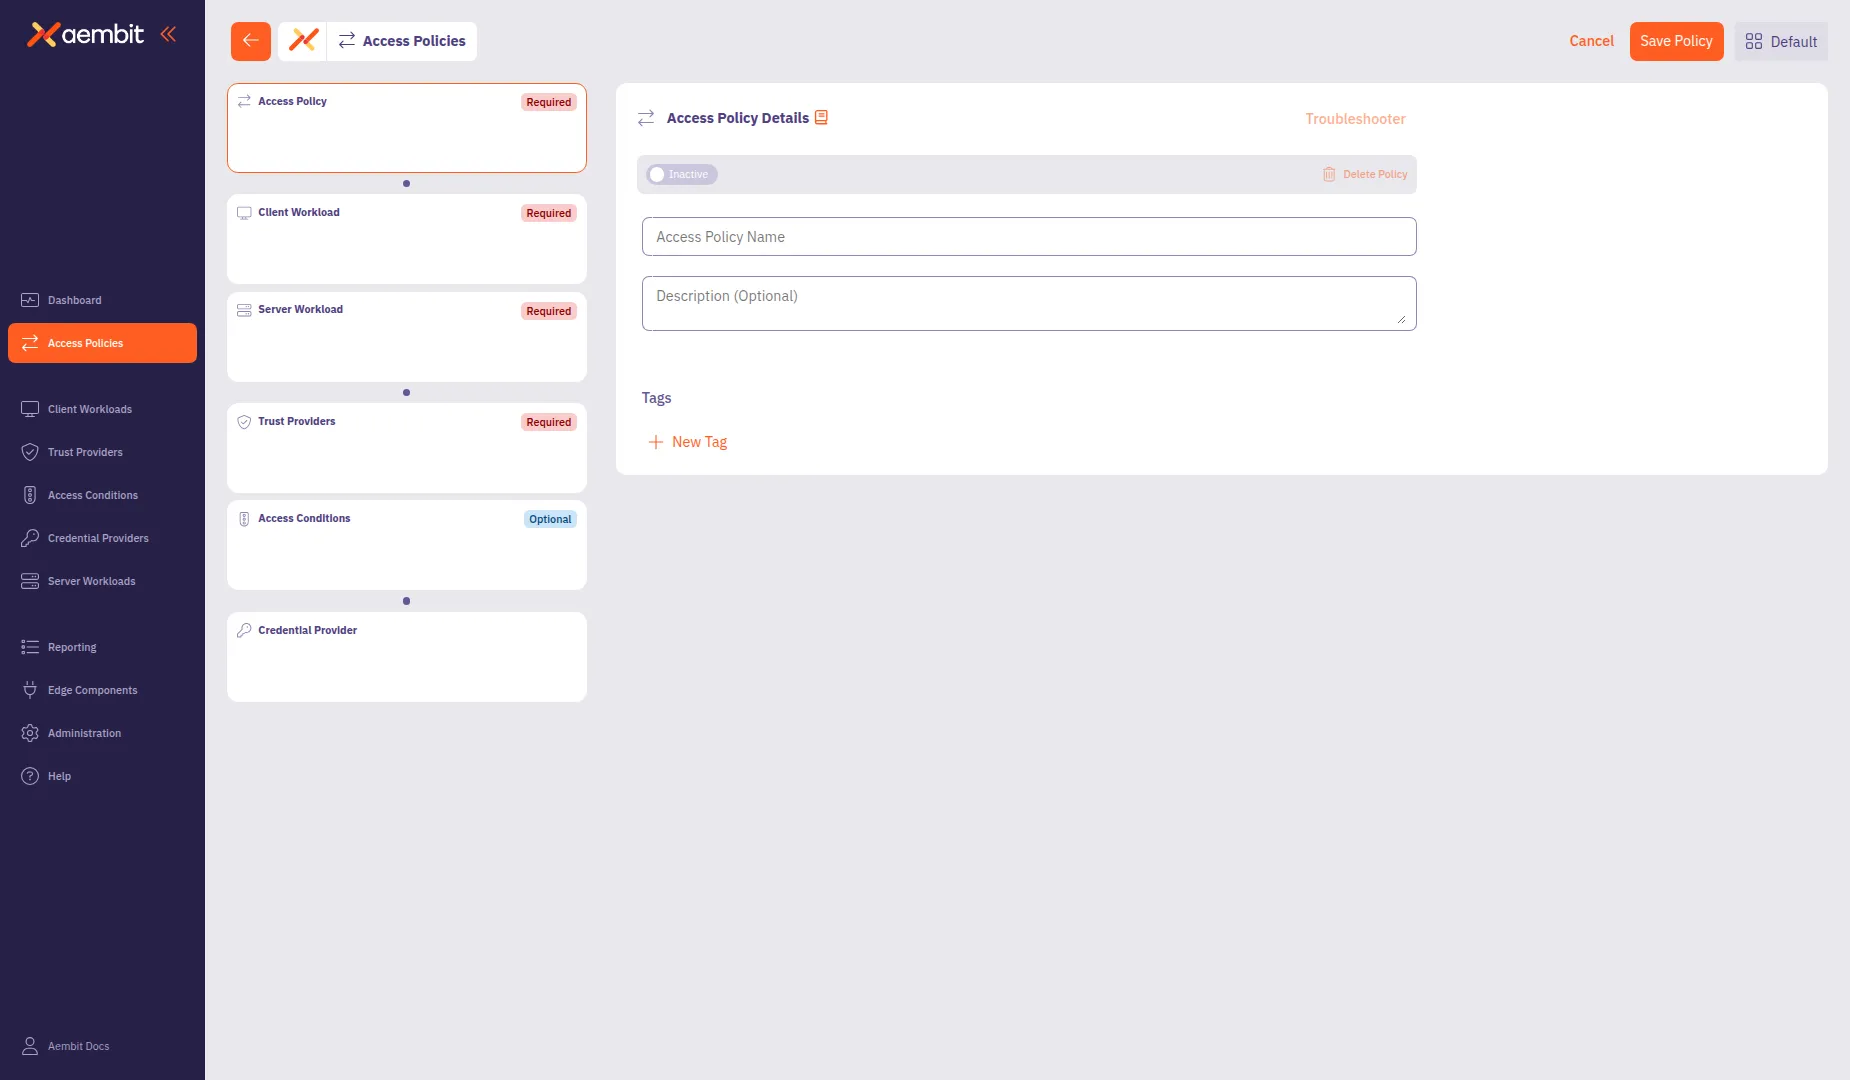
The Access Policy Builder displays a card-based navigation in the left panel with the following components:
- Access Policy (Required) - Policy name and metadata
- Client Workload: Client Workloads represent software applications, scripts, or automated processes that initiate access requests to Server Workloads, operating autonomously without direct user interaction.Learn more (Required) - The application requesting access
- Server Workload: Server Workloads represent target services, APIs, databases, or applications that receive and respond to access requests from Client Workloads.Learn more (Required) - The service being accessed
- Trust Provider: Trust Providers validate Client Workload identities through workload attestation, verifying identity claims from the workload's runtime environment rather than relying on pre-shared secrets.Learn more (Recommended) - Identity verification method
- Access Condition: Access Conditions add dynamic, context-aware constraints to authorization by evaluating circumstances like time, location, or security posture to determine whether to grant access.Learn more (Recommended) - Additional access constraints
- Credential Provider: Credential Providers obtain the specific access credentials—such as API keys, OAuth tokens, or temporary cloud credentials—that Client Workloads need to authenticate to Server Workloads.Learn more (Optional) - How credentials are obtained
Change the requirement of each Access Policy component based on your organization’s compliance needs, using Global Policy Compliance.
Configure the Access Policy details
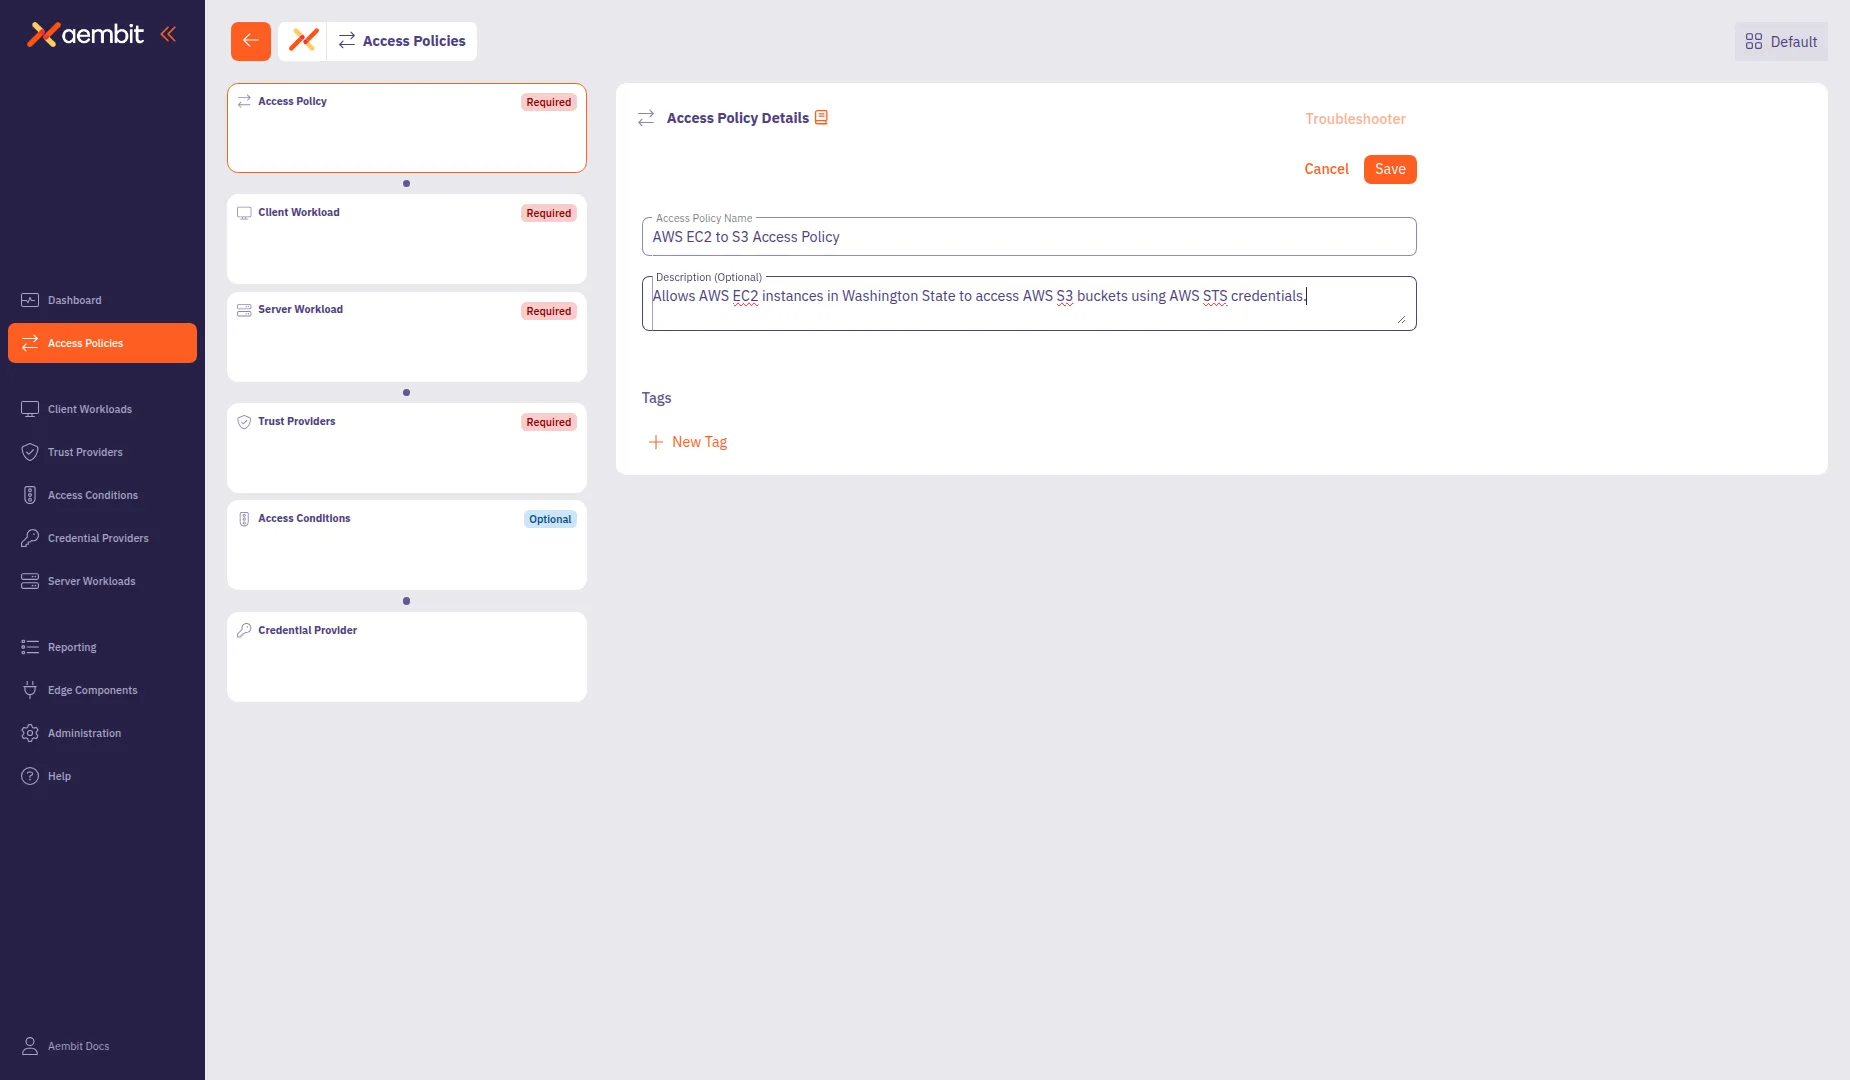
Section titled “Configure the Access Policy details”The Access Policy Details panel displays by default when you open the builder.
-
In the Access Policy Name field, enter a name for your Access Policy.
-
(Optional) In the Description field, add a description to help identify the policy’s purpose.
-
(Optional) In the Tags section, click + New Tag to add tags for organization.
Add a Client Workload
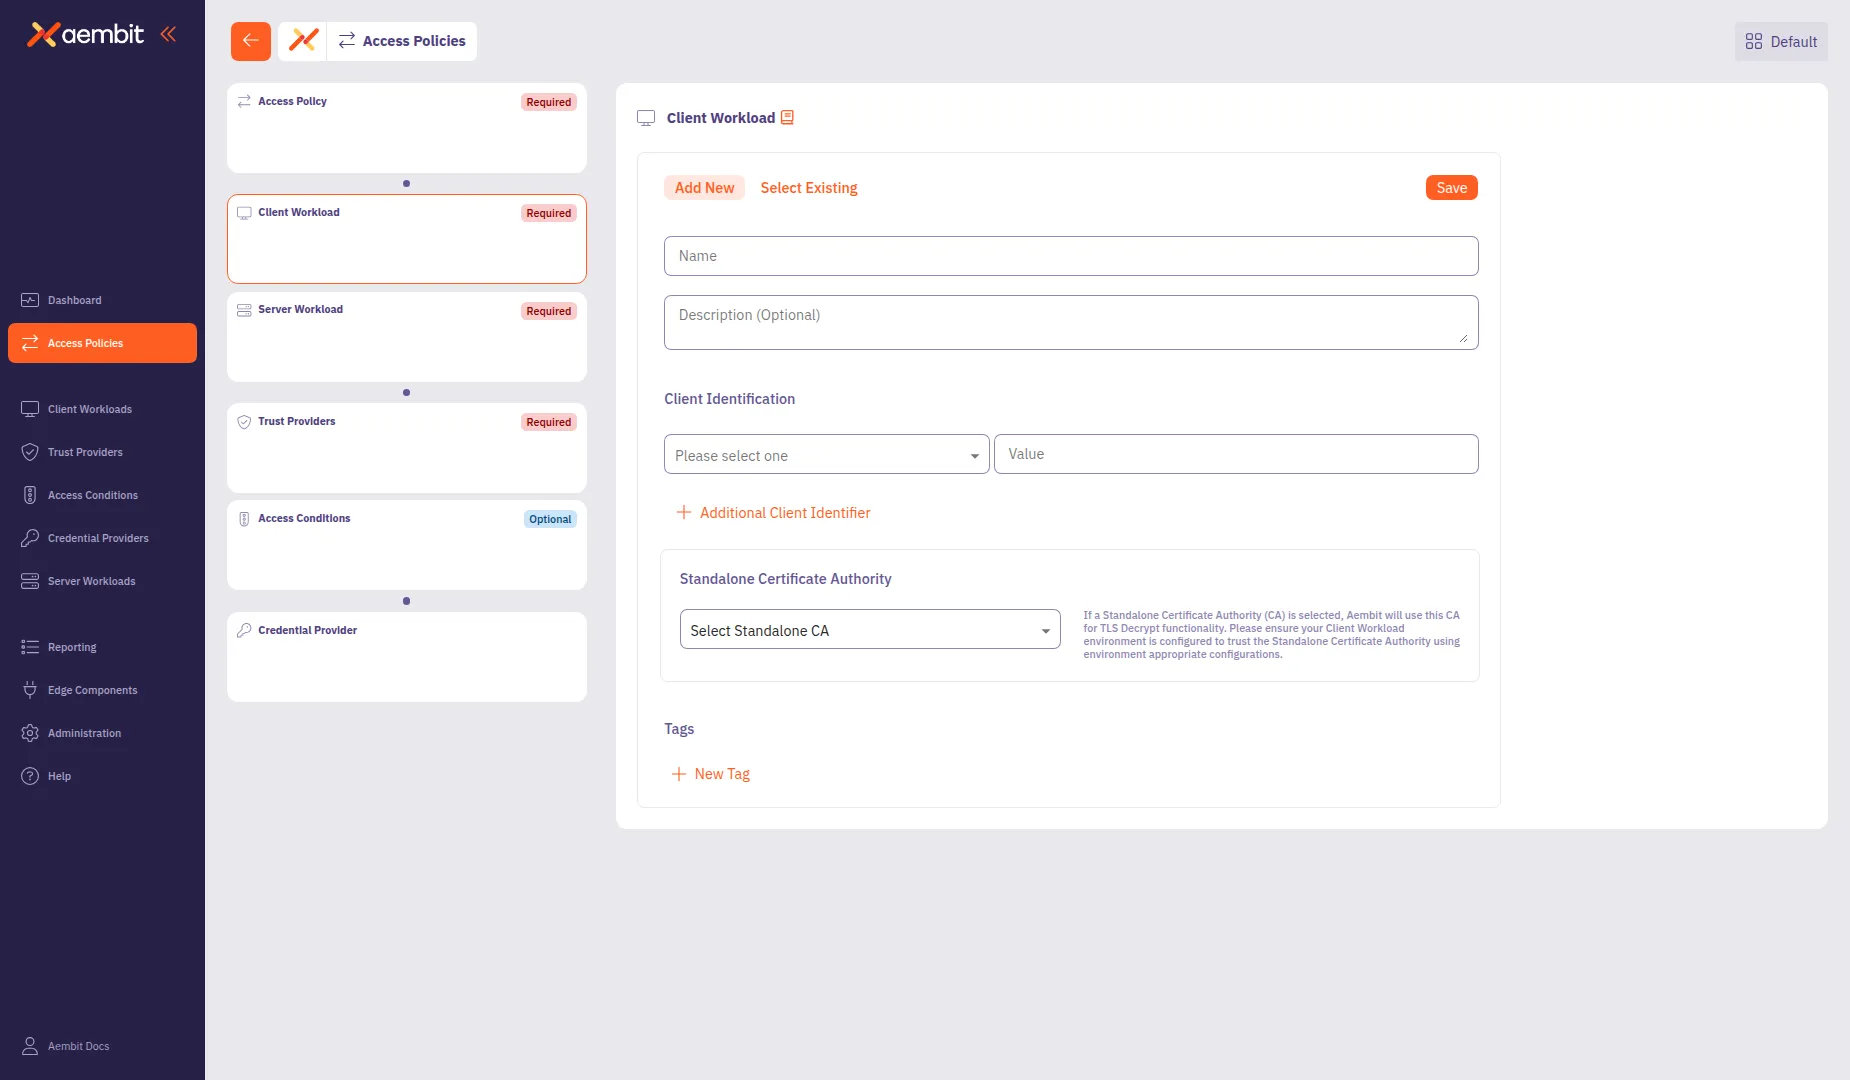
Section titled “Add a Client Workload”Click the Client Workload card in the left panel to configure the client application.
Each component in the Access Policy Builder offers two options:
- Add New - Create a new component directly within the builder. The component saves to your tenant and associates with this policy.
- Select Existing - Choose from components you’ve already created. This lets you reuse components across multiple policies.
For detailed information about Client Workload configuration options and identification types, see Client Workloads.
To create a new Client Workload:
-
Select the Add New tab if not already selected.
-
In the Name field, enter a name for the Client Workload.
-
(Optional) In the Description field, add context about the workload.
-
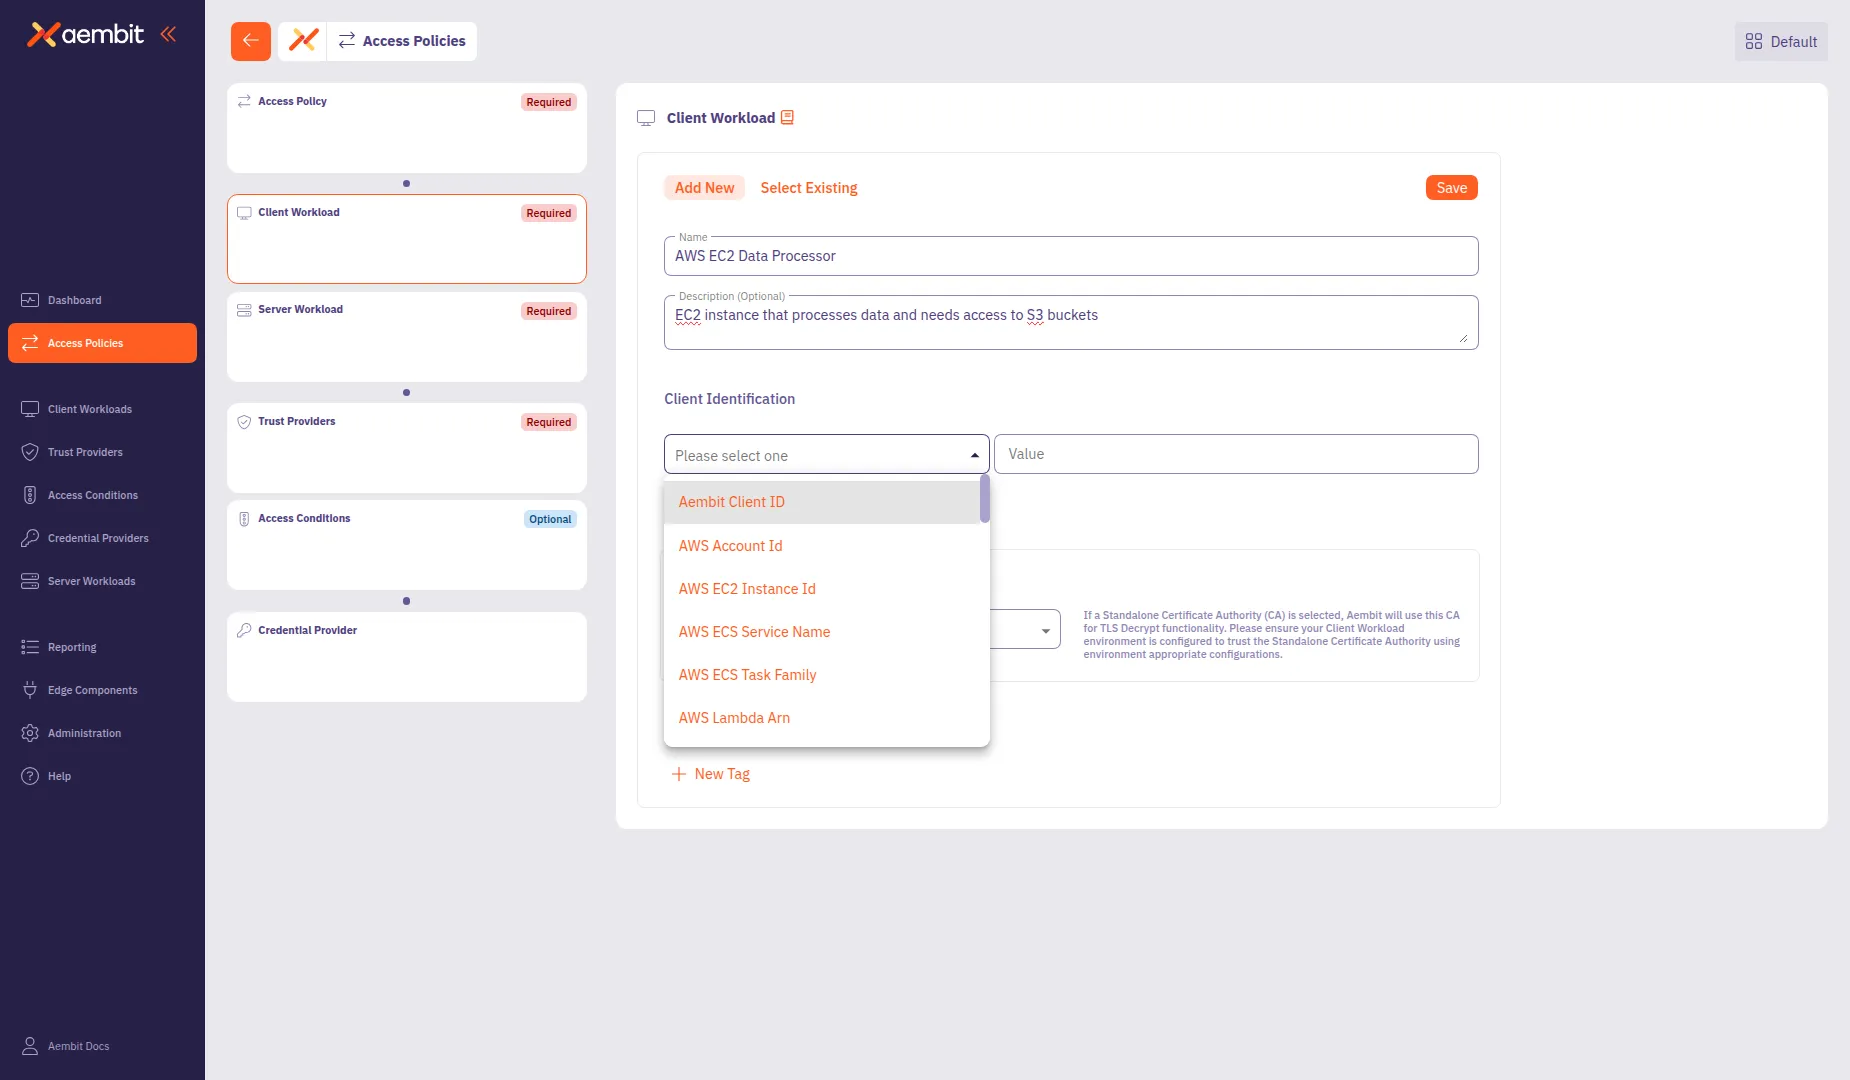
From the Client Identification dropdown, select an identification type. For AWS EC2 instances, select AWS EC2 Instance Id.
-
In the Value field, enter the identification value (for example,
i-0abc123def456789). -
(Optional) Click + Additional Client Identifier to add more identifiers.
-
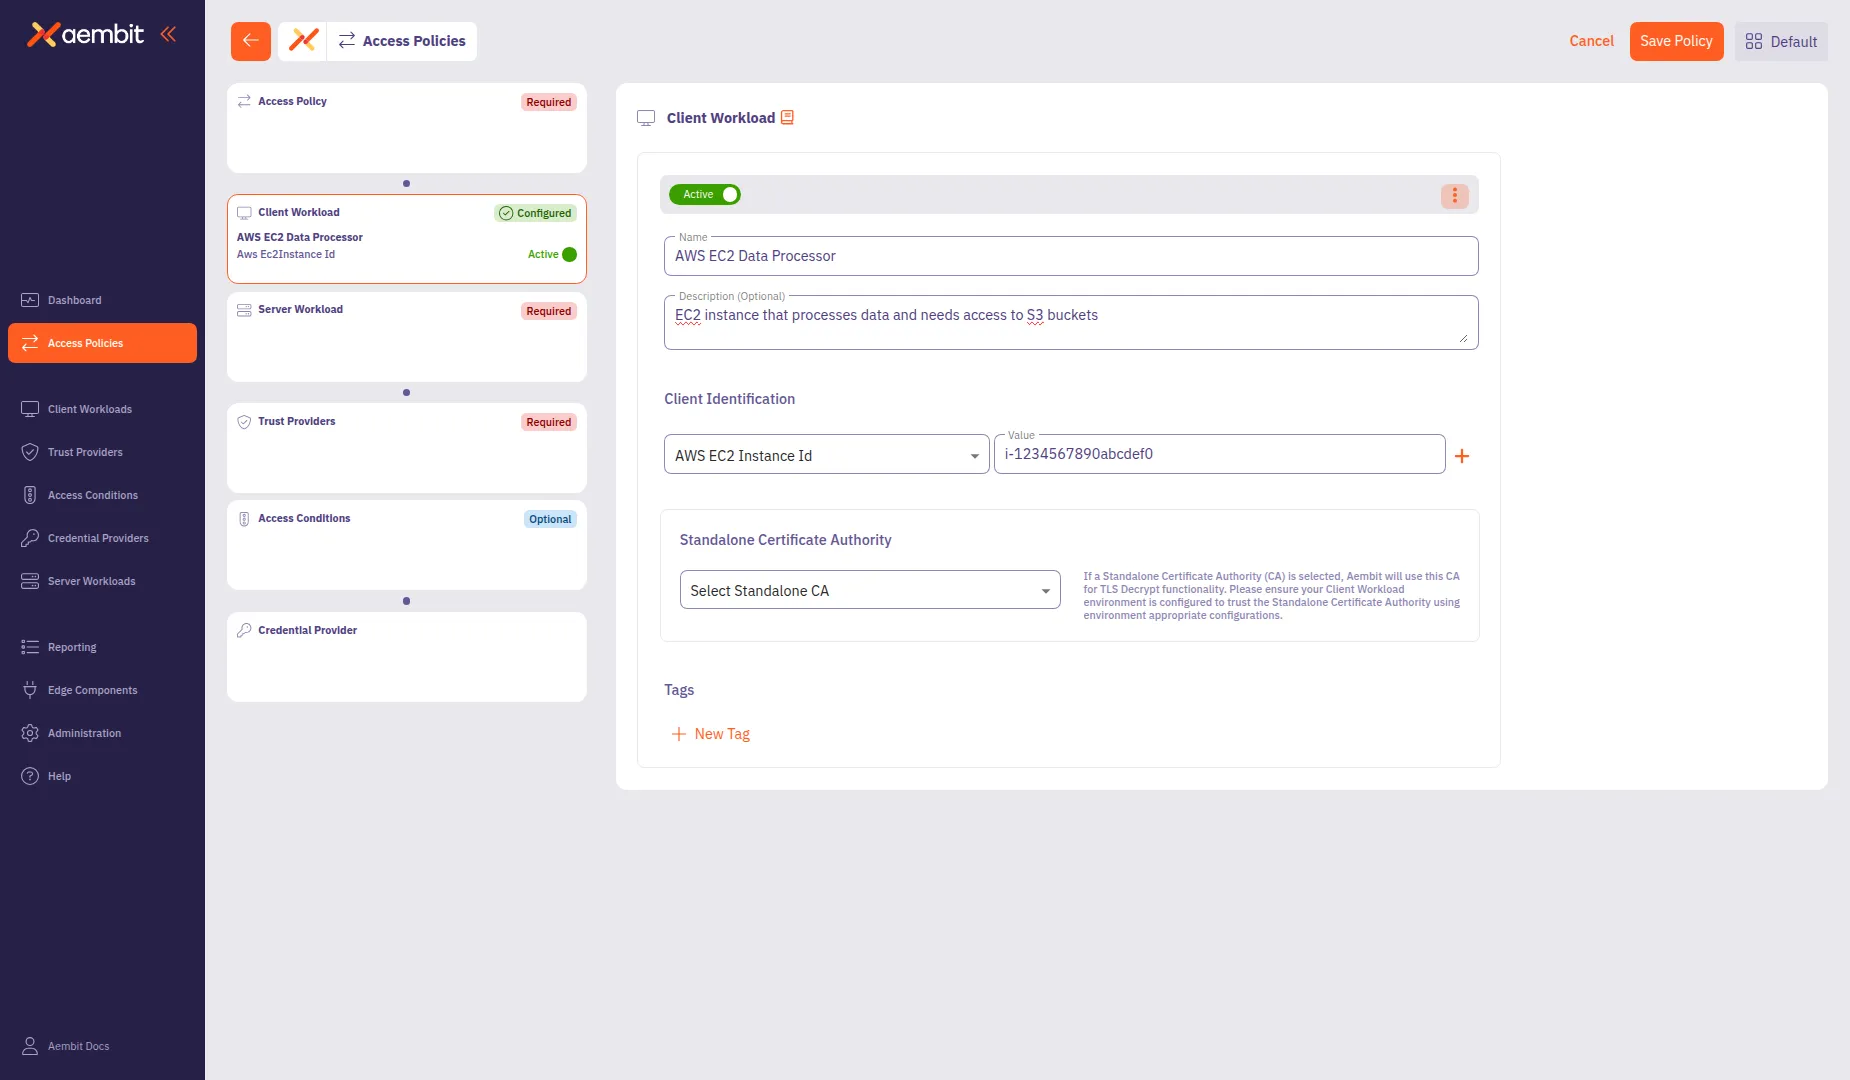
Click Save to add the Client Workload to the policy.
To use an existing Client Workload:
-
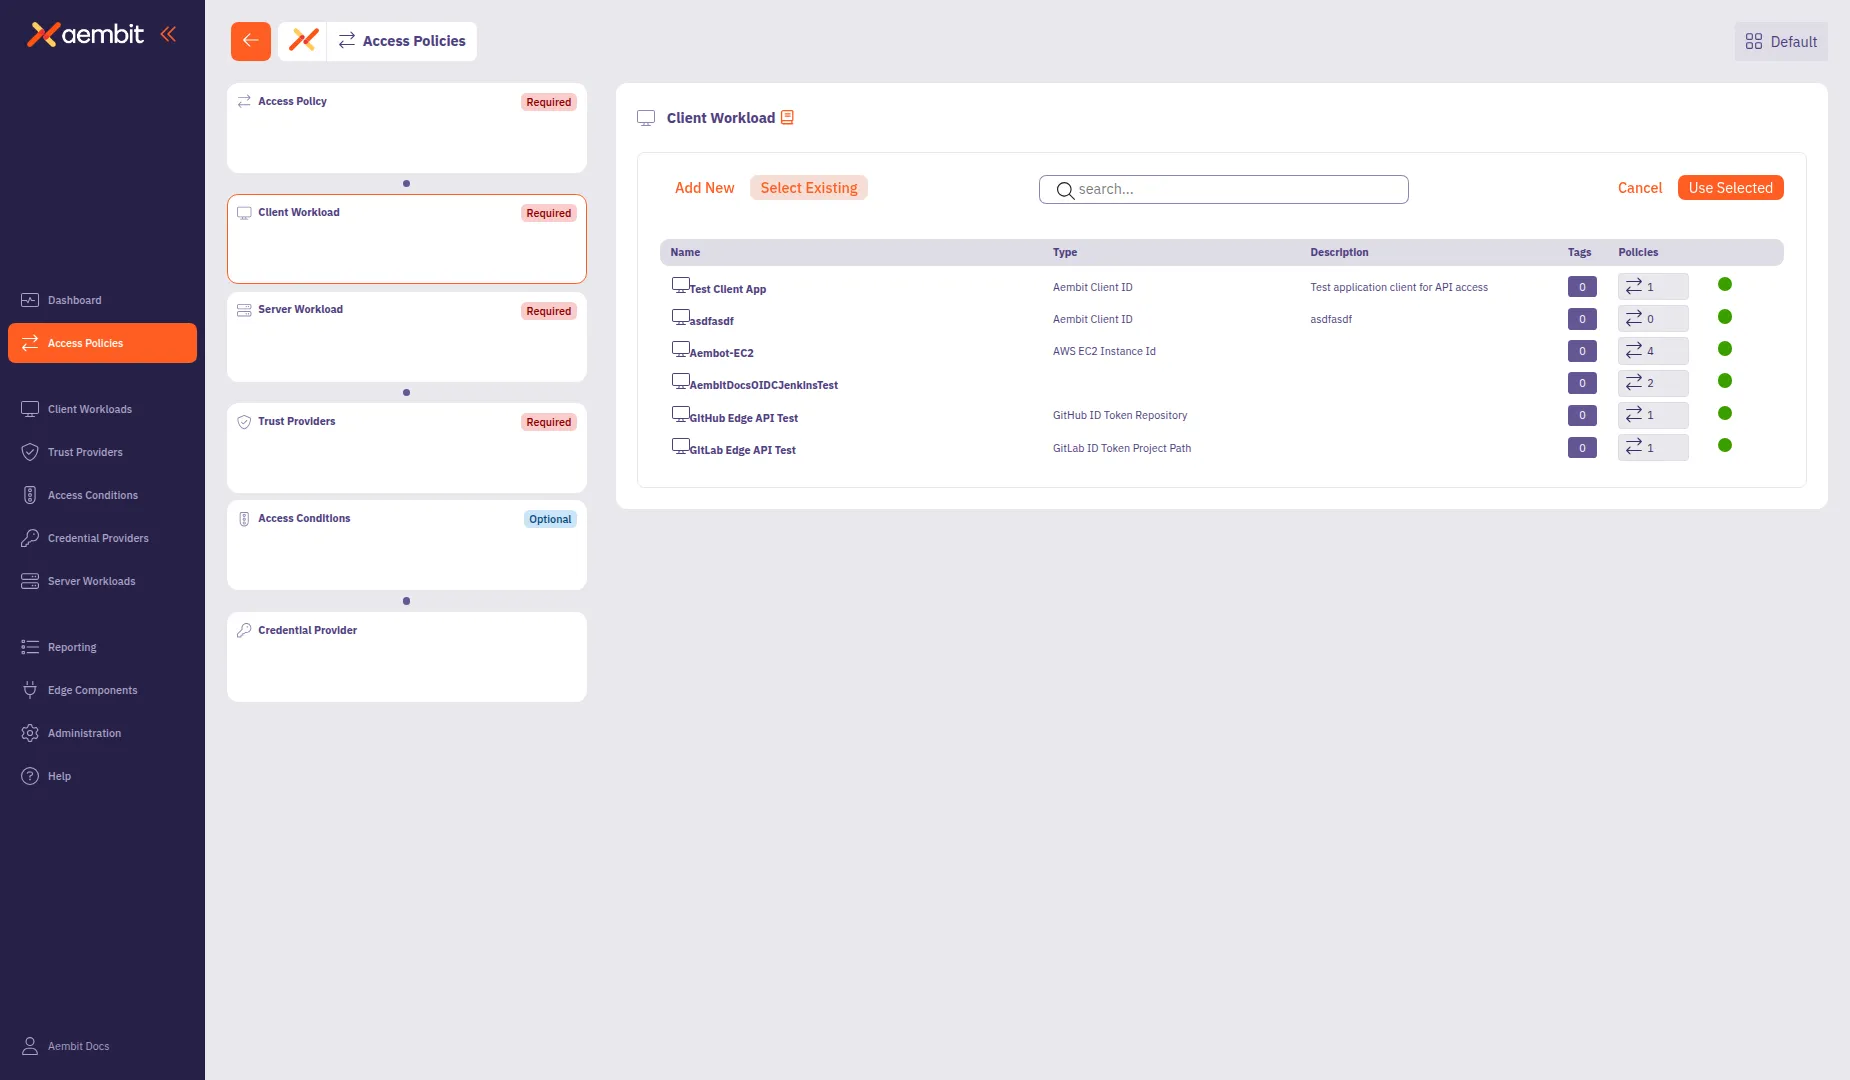
Select the Select Existing tab.
-
Use the search field to filter the list.
-
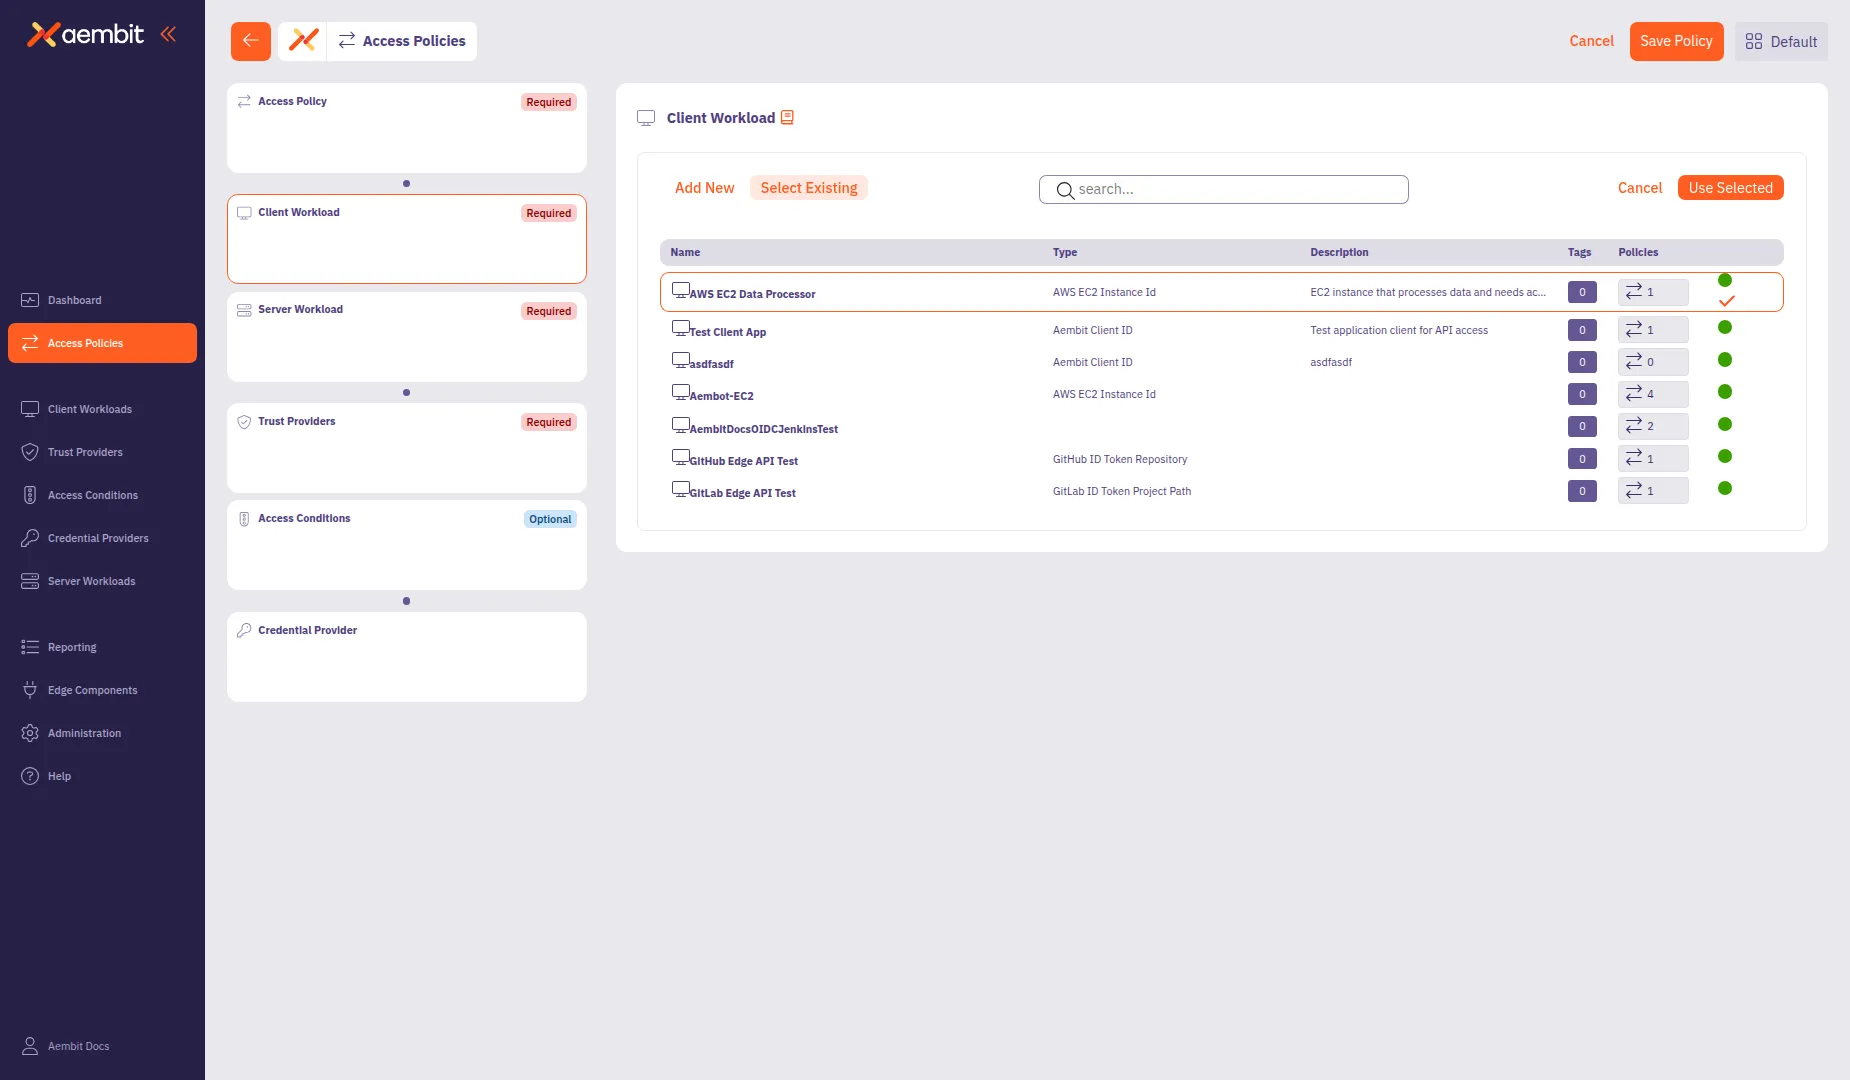
Click a row to select a Client Workload. The selected row highlights with an orange border.
-
Click Use Selected to add it to the policy.
Add a Server Workload
Section titled “Add a Server Workload”Click the Server Workload card in the left panel to configure the target service.
For detailed information about Server Workload configuration options, protocols, and authentication methods, see Server Workloads.
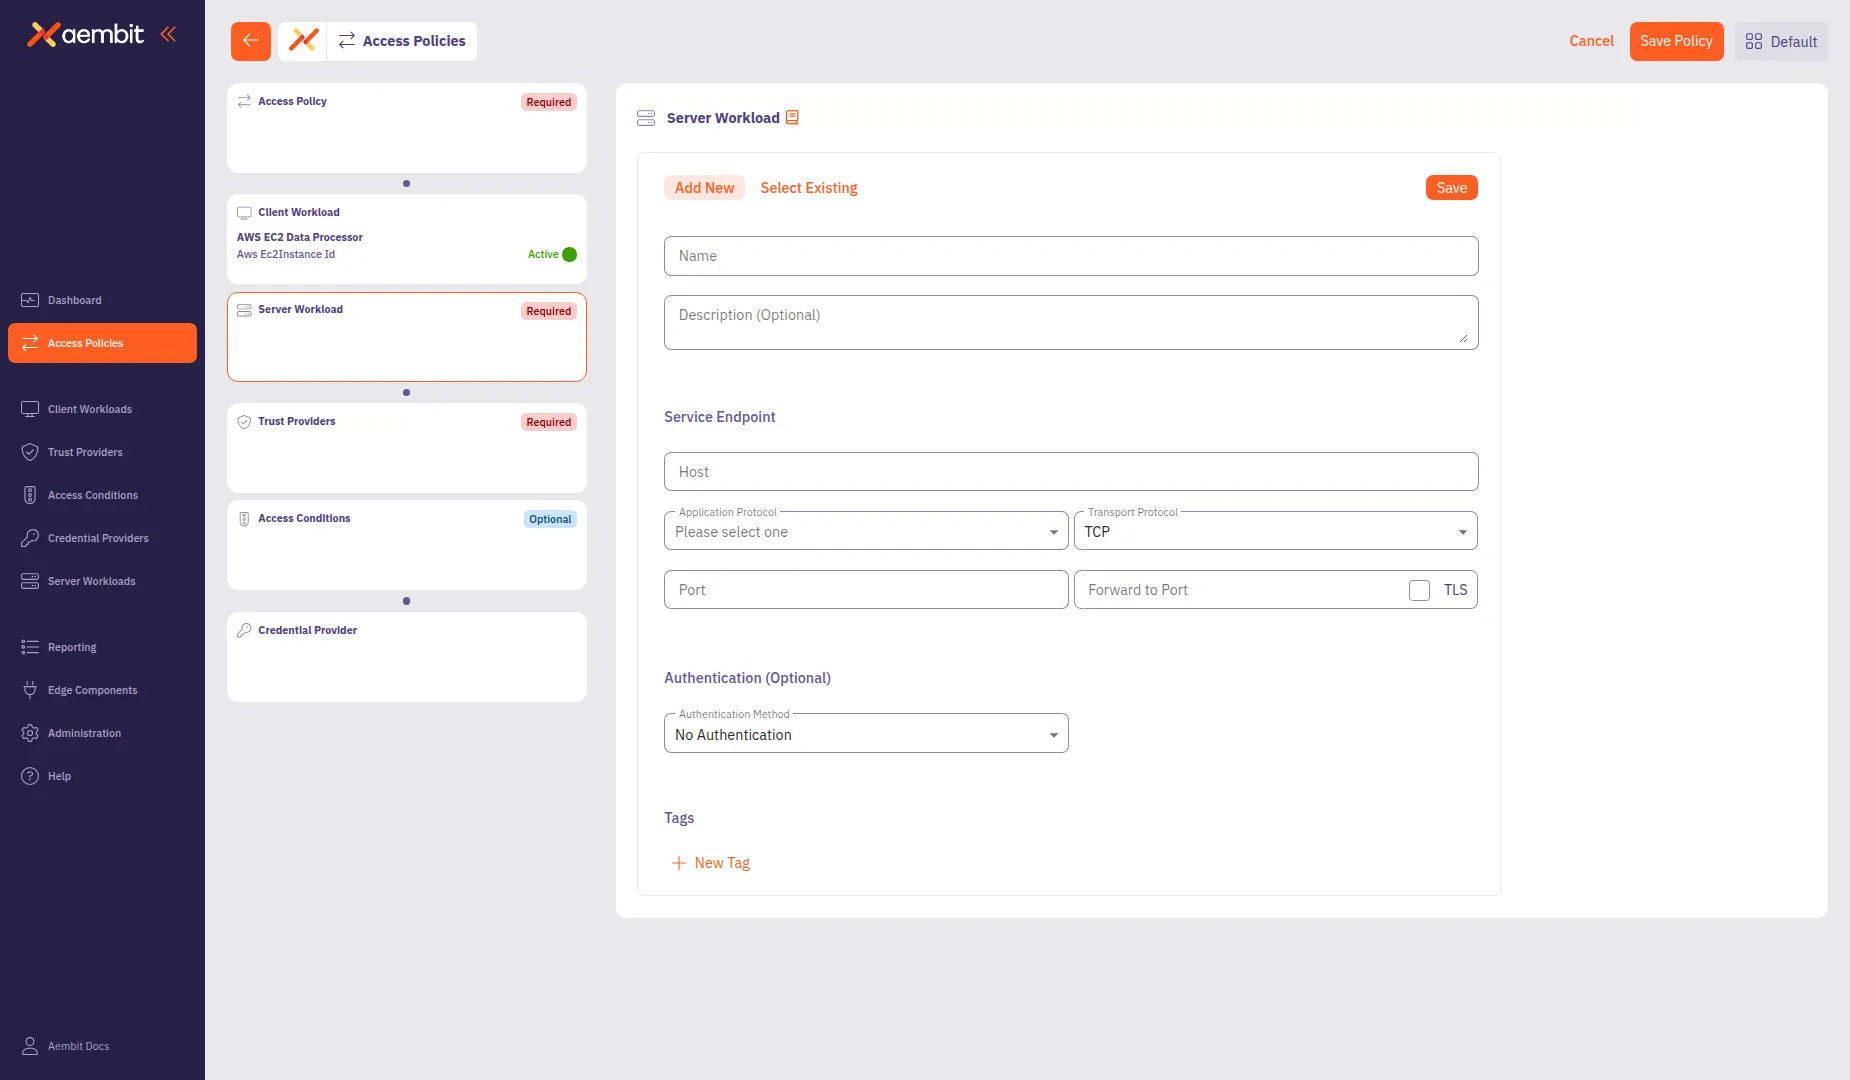
To create a new Server Workload:
-
Select the Add New tab if not already selected.
-
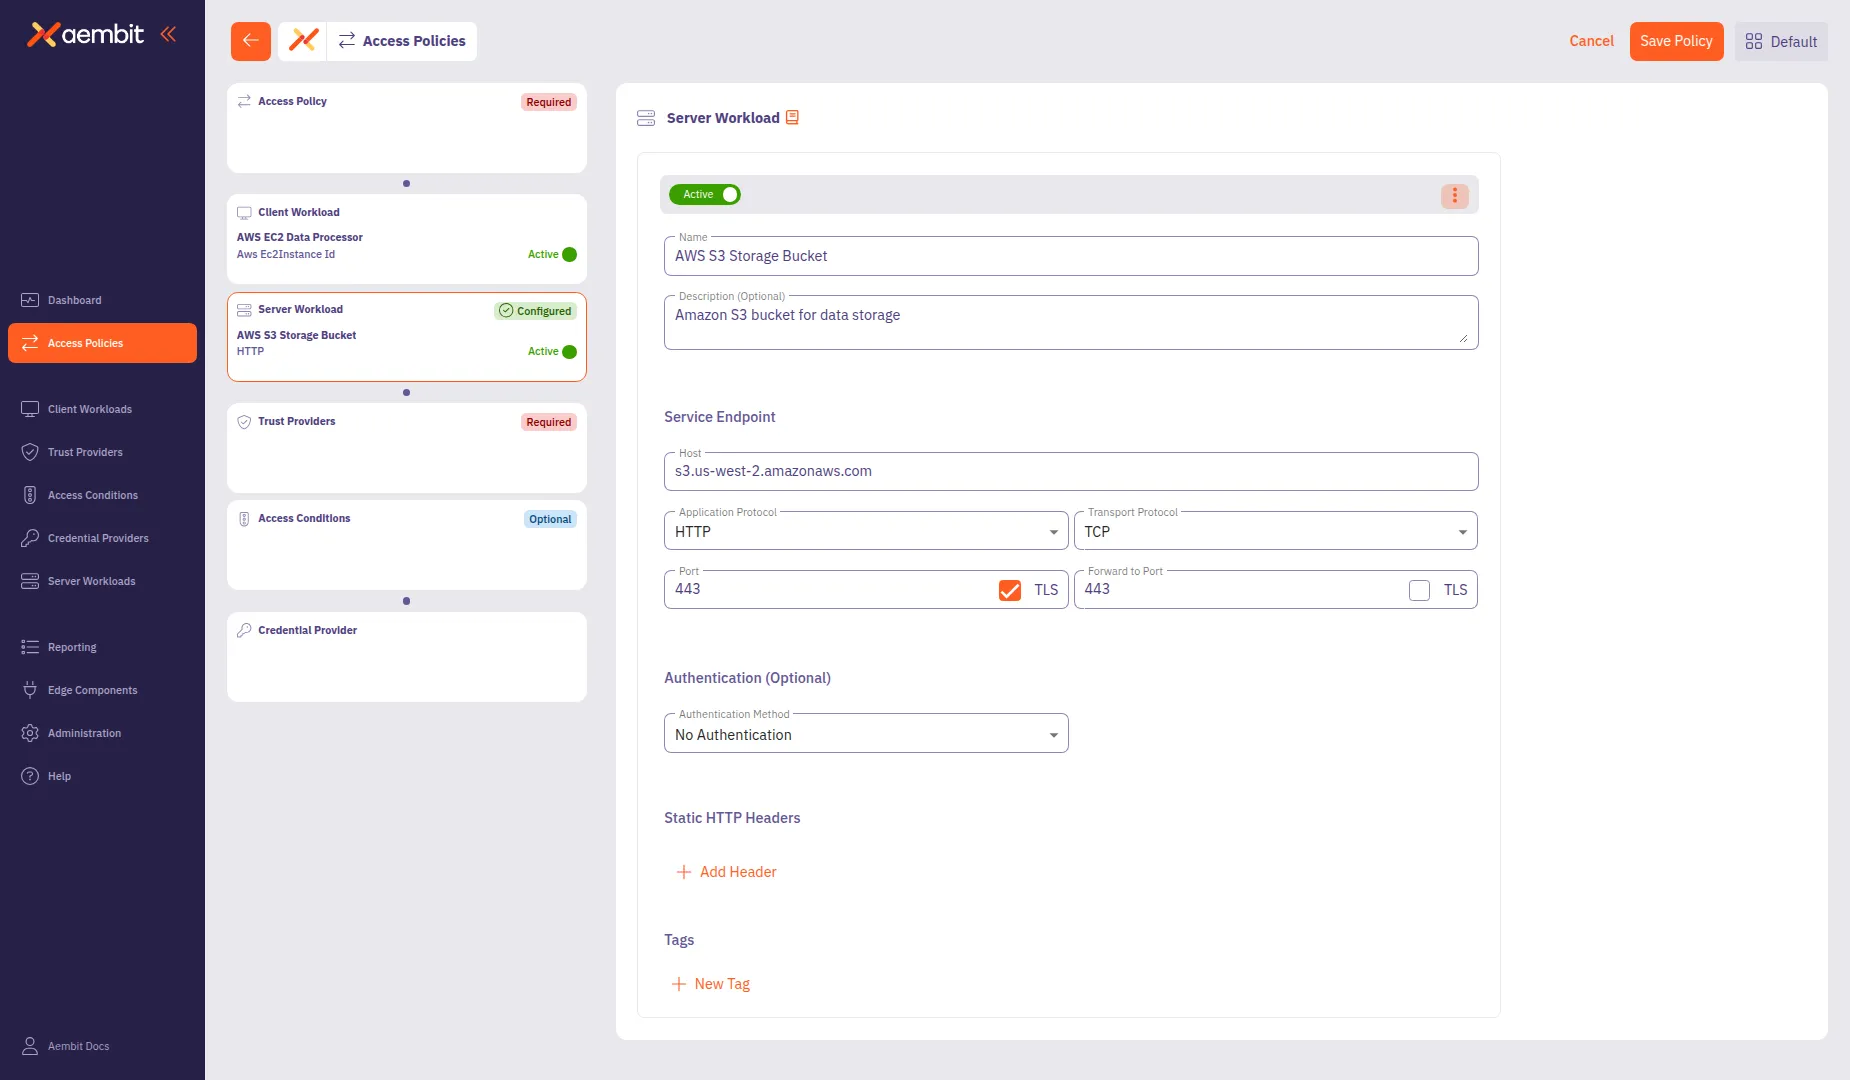
In the Name field, enter a name for the Server Workload (for example,
AWS S3 Storage Bucket). -
(Optional) In the Description field, add context about the workload.
-
In the Service Endpoint section, configure the connection details:
- Host: Enter the service hostname (for example,
s3.us-west-2.amazonaws.com). - Application Protocol: Select the protocol (for example, HTTP).
- Transport Protocol: Select TCP (default).
- Port: Enter the port number (for example,
443). This field auto-populates based on the selected protocol. - TLS: Select this checkbox for secure connections.
- Forward to Port: (Optional) Enter the destination port if different from the incoming port.
- Host: Enter the service hostname (for example,
-
(Optional) From the Authentication Method dropdown, select an authentication method if the server requires it.
-
Click Save to add the Server Workload to the policy.
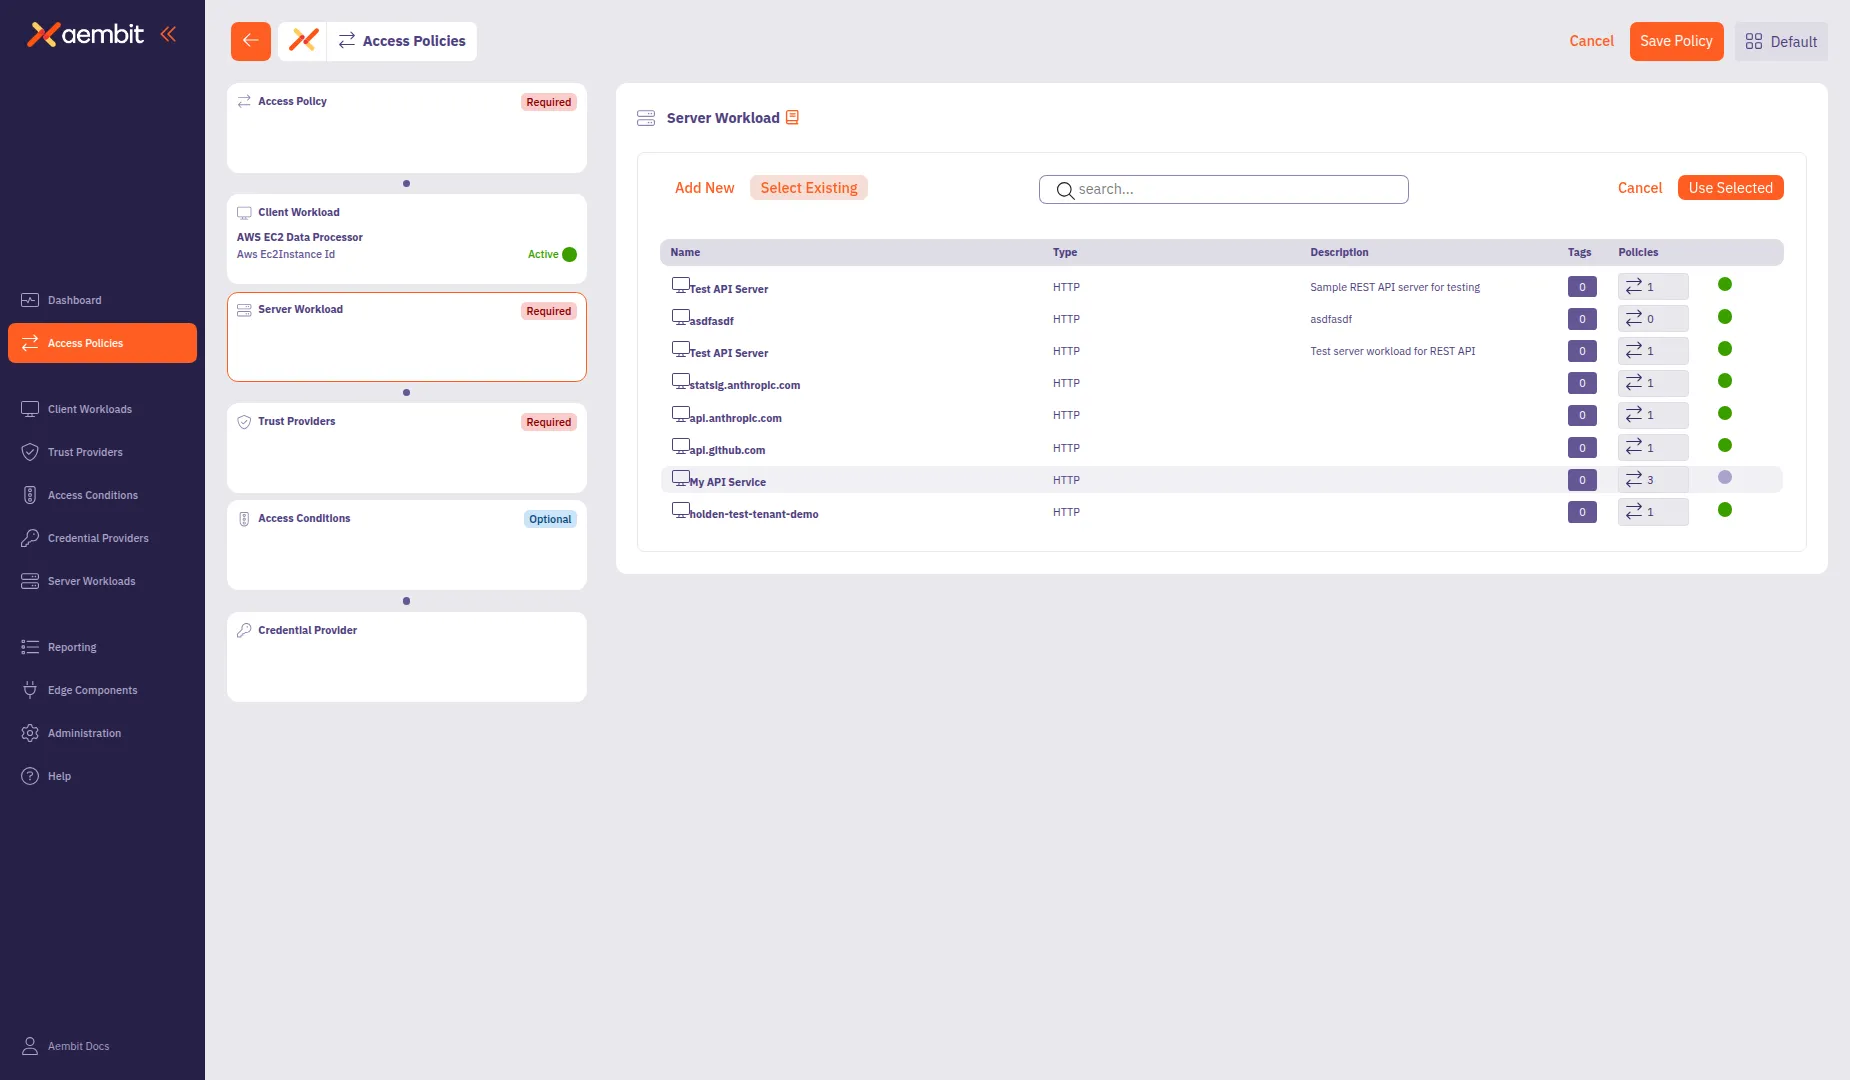
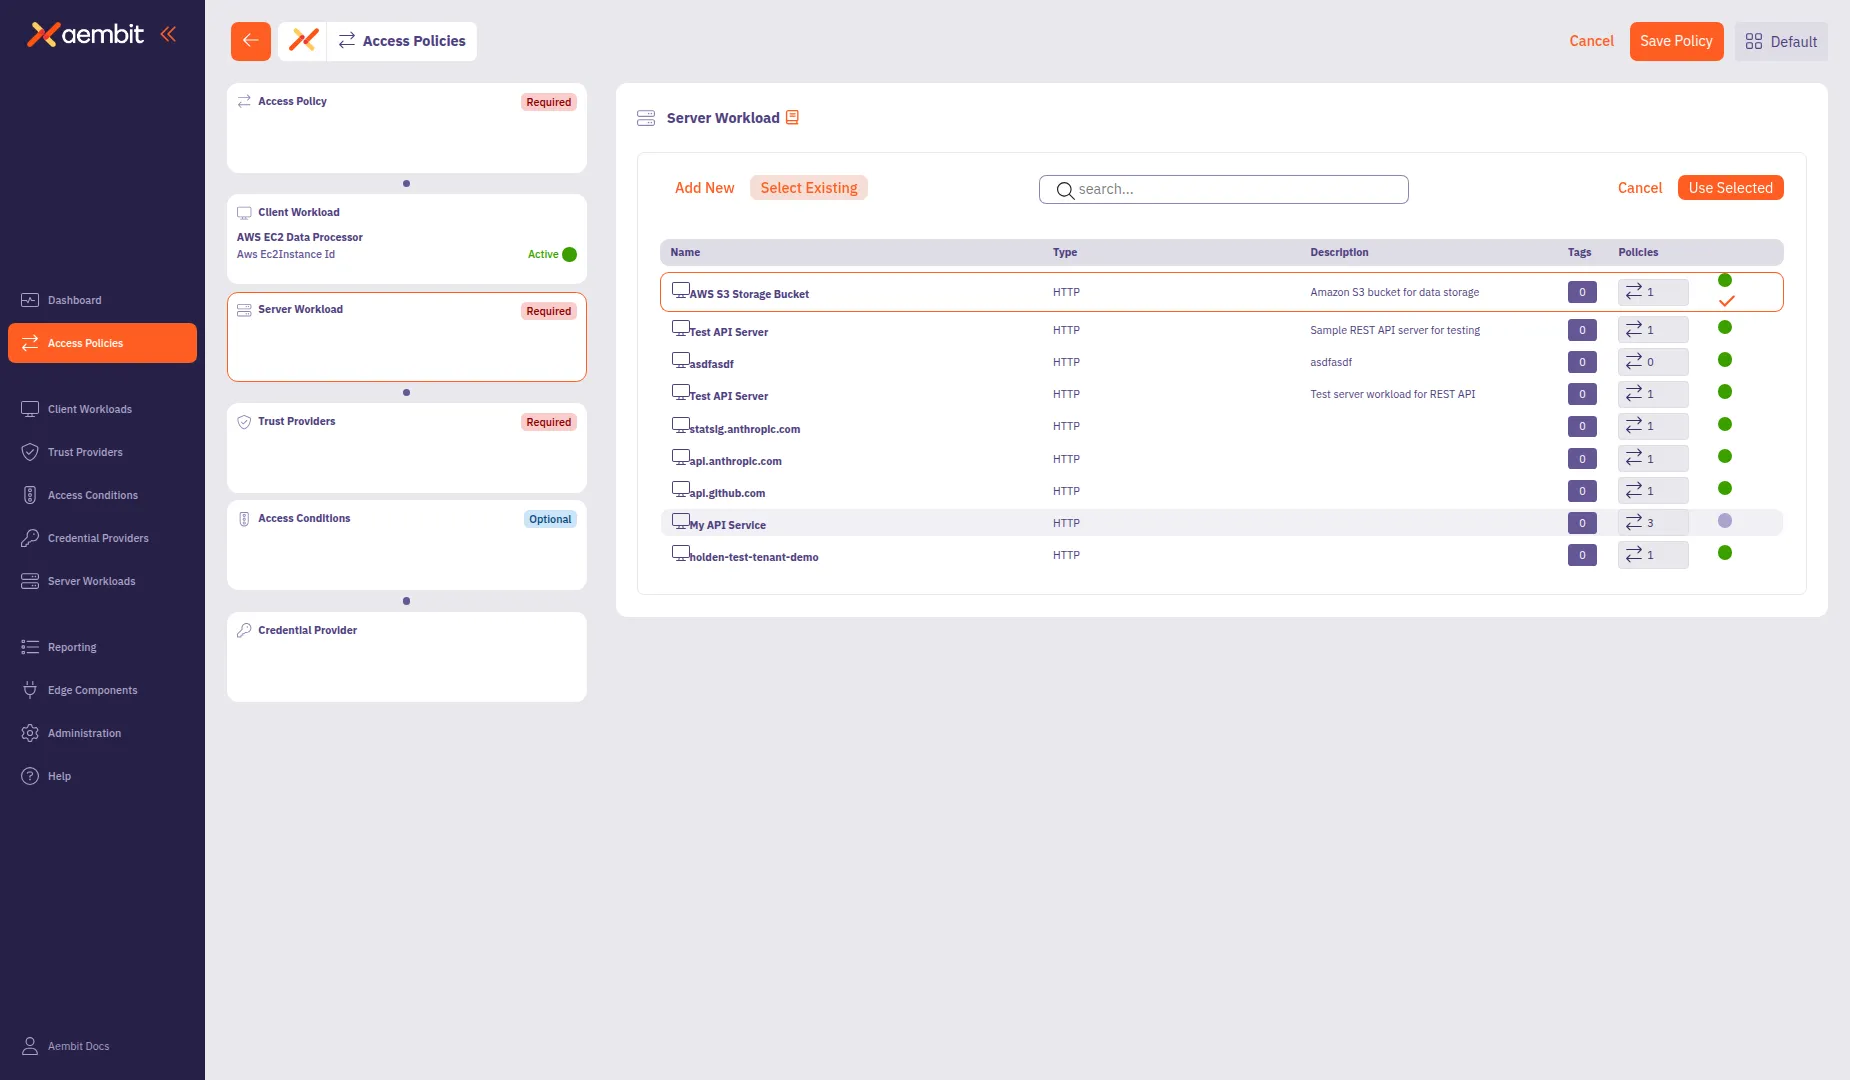
To use an existing Server Workload:
-
Select the Select Existing tab.
-
Use the search field to filter the list.
-
Click a row to select a Server Workload. The selected row highlights with an orange border.
-
Click Use Selected to add it to the policy.
Add a Trust Provider
Section titled “Add a Trust Provider”Click the Trust Providers card in the left panel to configure identity verification.
For detailed information about Trust Provider types and match rule configuration, see Trust Providers.
To create a new Trust Provider:
-
Select the Add New tab if not already selected.
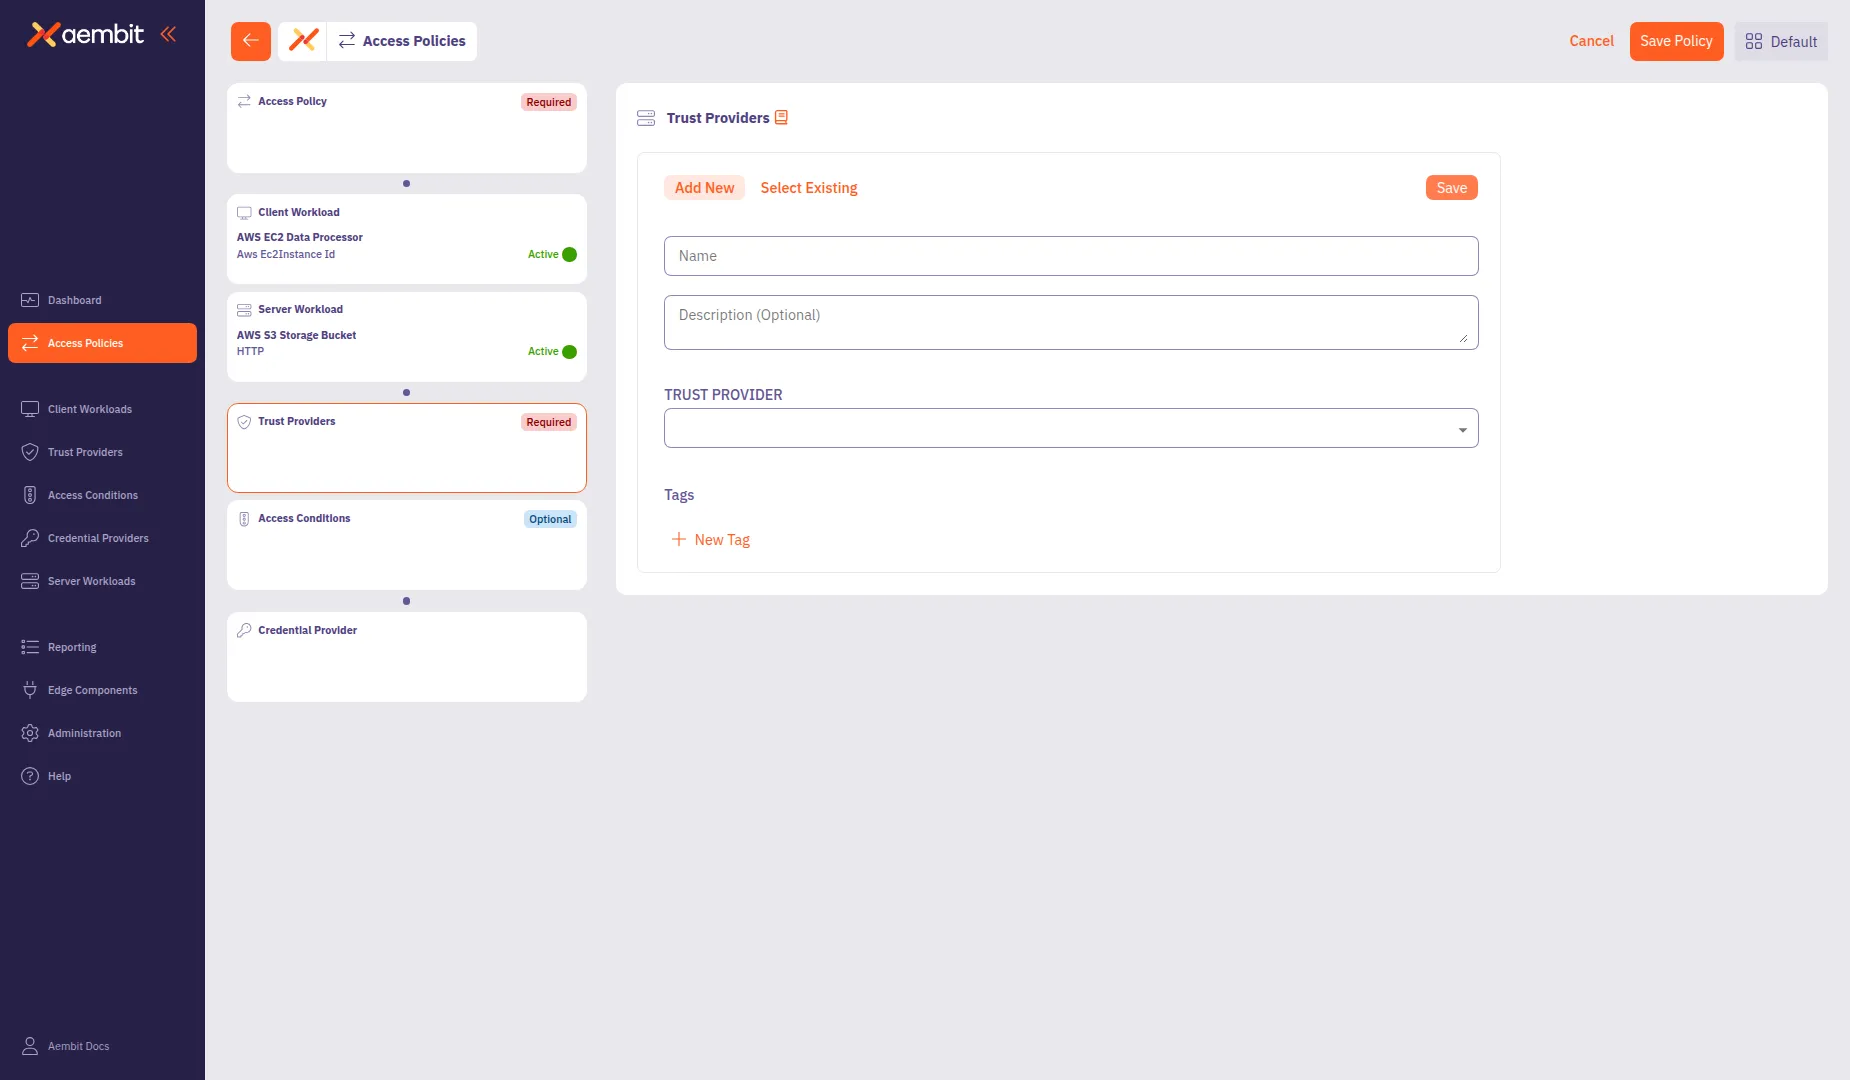
-
In the Name field, enter a name for the Trust Provider.
-
(Optional) In the Description field, add context about the provider.
-
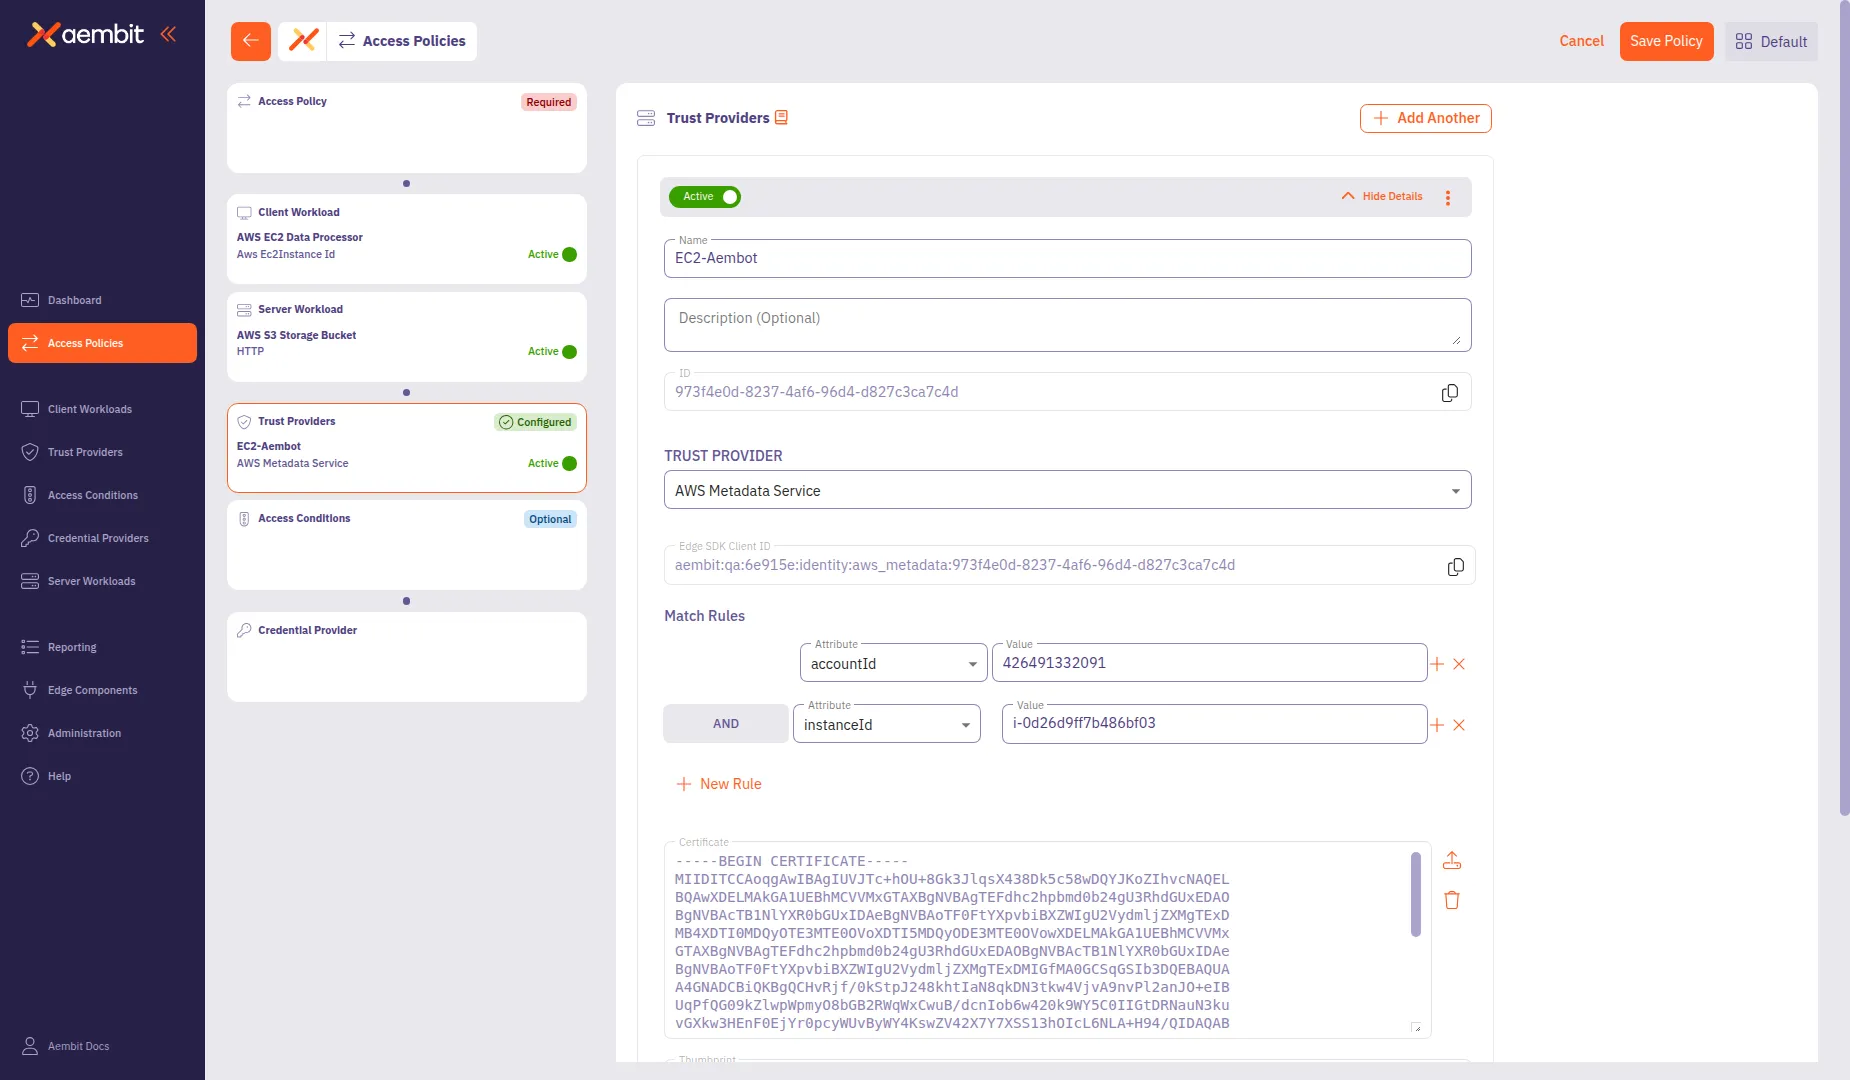
From the Trust Provider dropdown, select a provider type:
- AWS Metadata Service - For AWS EC2 instance identity verification
- AWS Role - For AWS Identity and Access Management (IAM) role-based trust
- Azure Metadata Service - For Azure Virtual Machine (VM) identity
- Certificate Signed Attestation - For cryptographically signed attestation documents
- GCP Identity Token - For Google Cloud Platform (GCP) identity
- GitHub Action ID Token - For GitHub Actions workflows
- GitLab Job ID Token - For GitLab CI/CD pipelines
- Kerberos - For Active Directory environments
- Kubernetes Service Account - For Kubernetes workload identity
- OIDC ID Token - For generic OpenID Connect (OIDC) providers
- SAMLv2 Response - For SAML identity provider responses
- Terraform Cloud Identity Token - For Terraform Cloud workspaces
-
Configure the type-specific settings. For most provider types, configure Match Rules to specify which identity claims to verify.
-
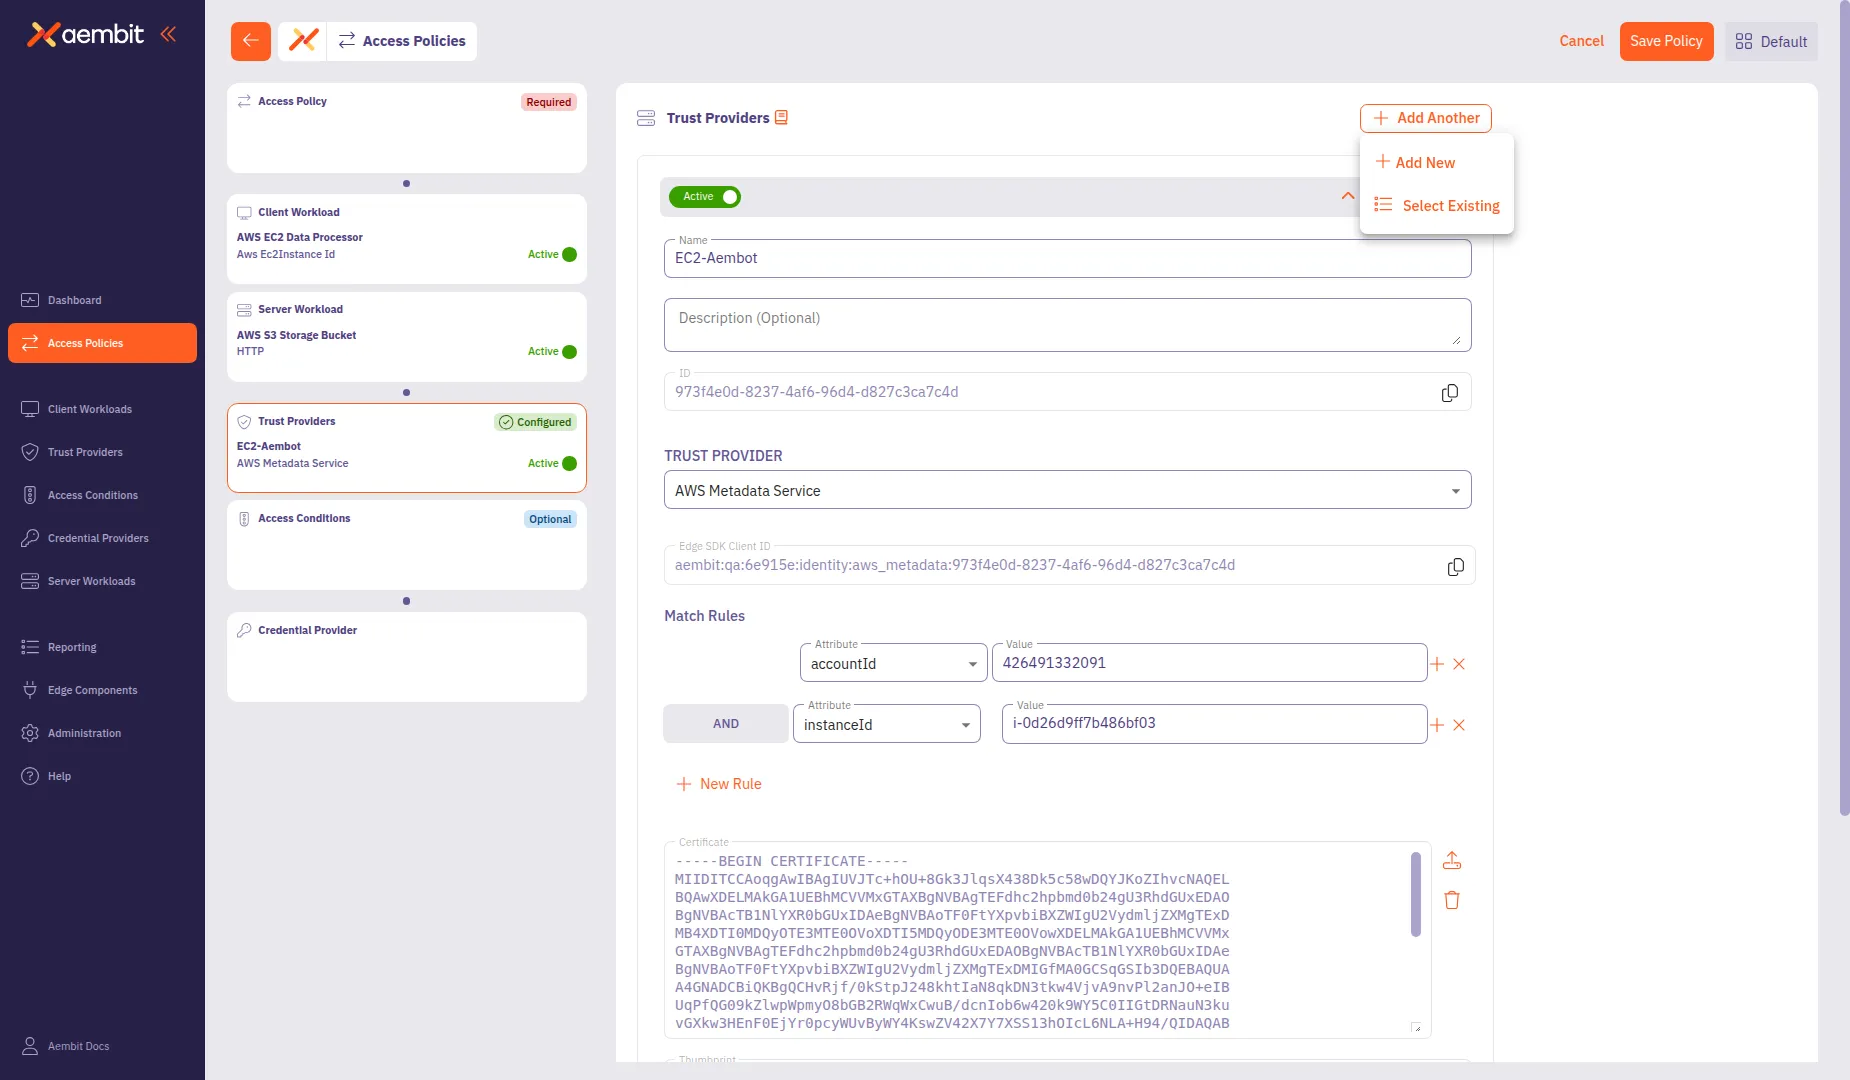
Click Save to add the Trust Provider to the policy.
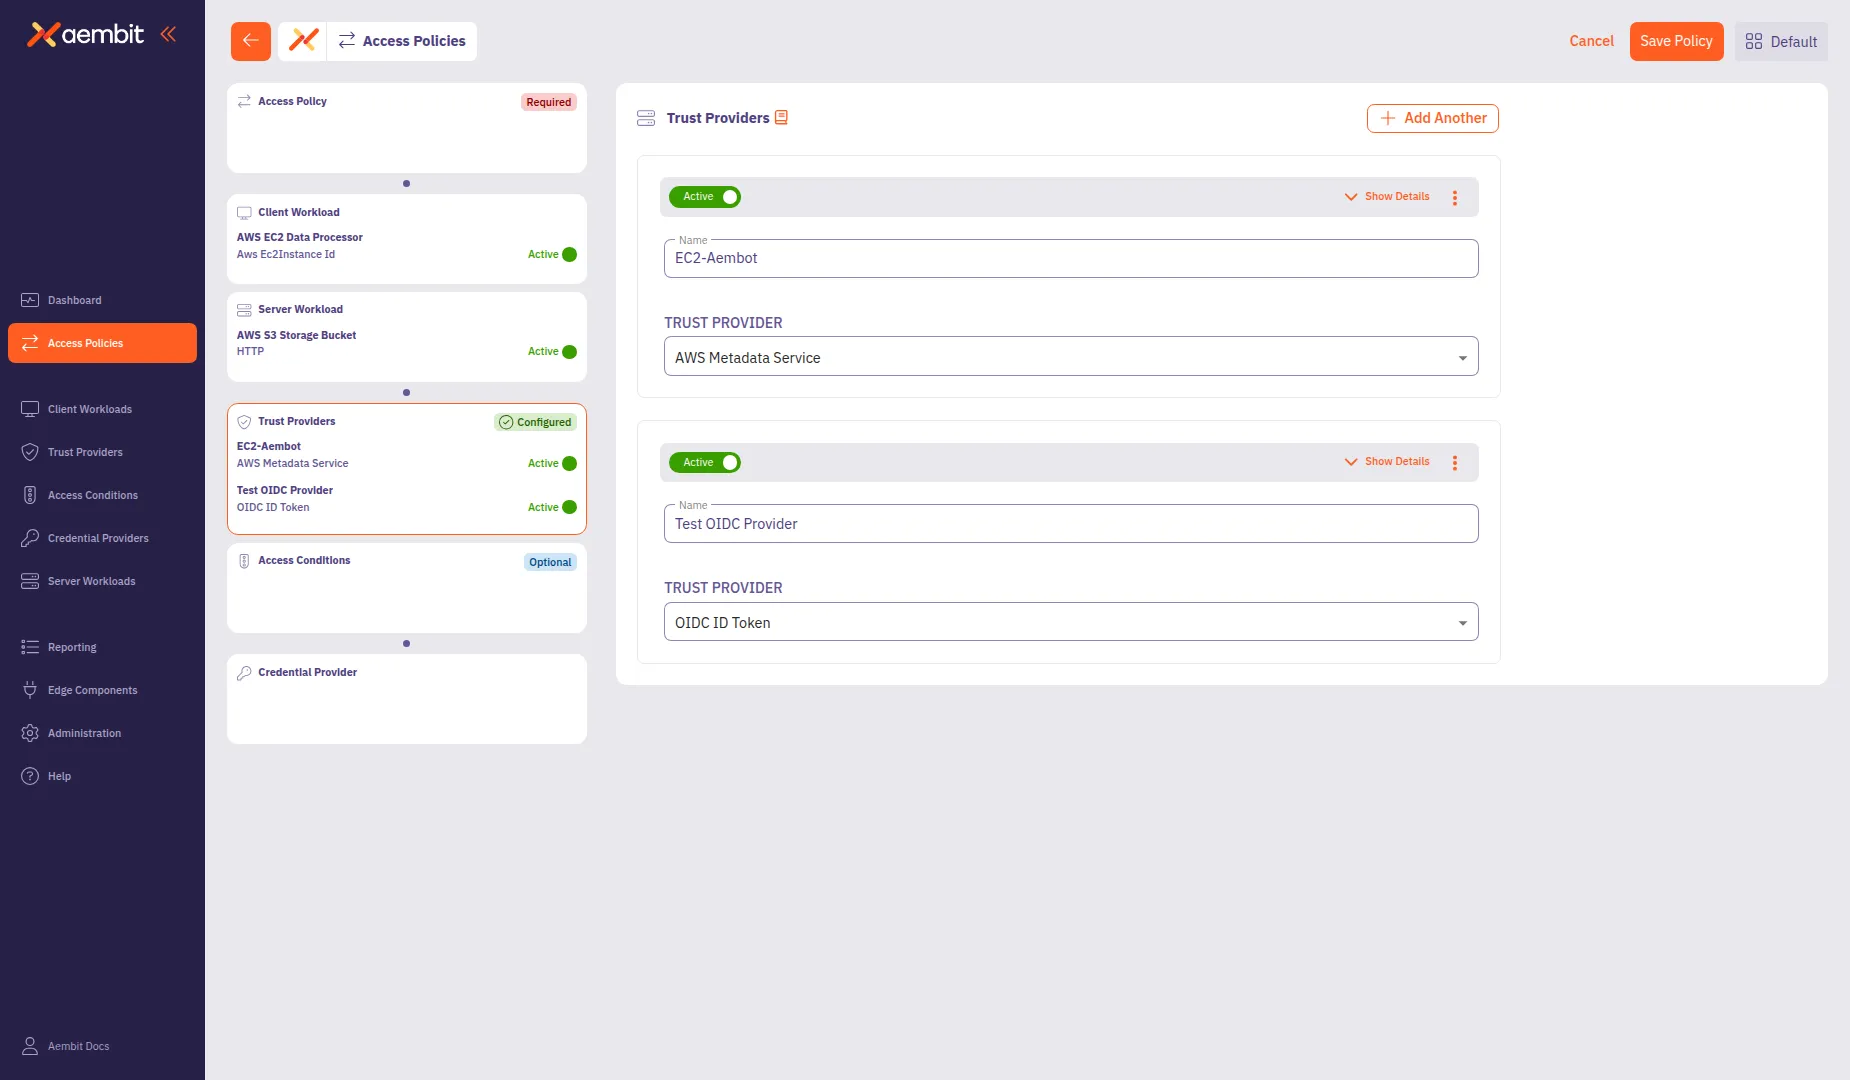
To add multiple Trust Providers, click + Add Another after saving the first one. This opens a menu where you can select Add New to create another provider or Select Existing to choose from existing providers.
To use an existing Trust Provider:
-
Select the Select Existing tab.
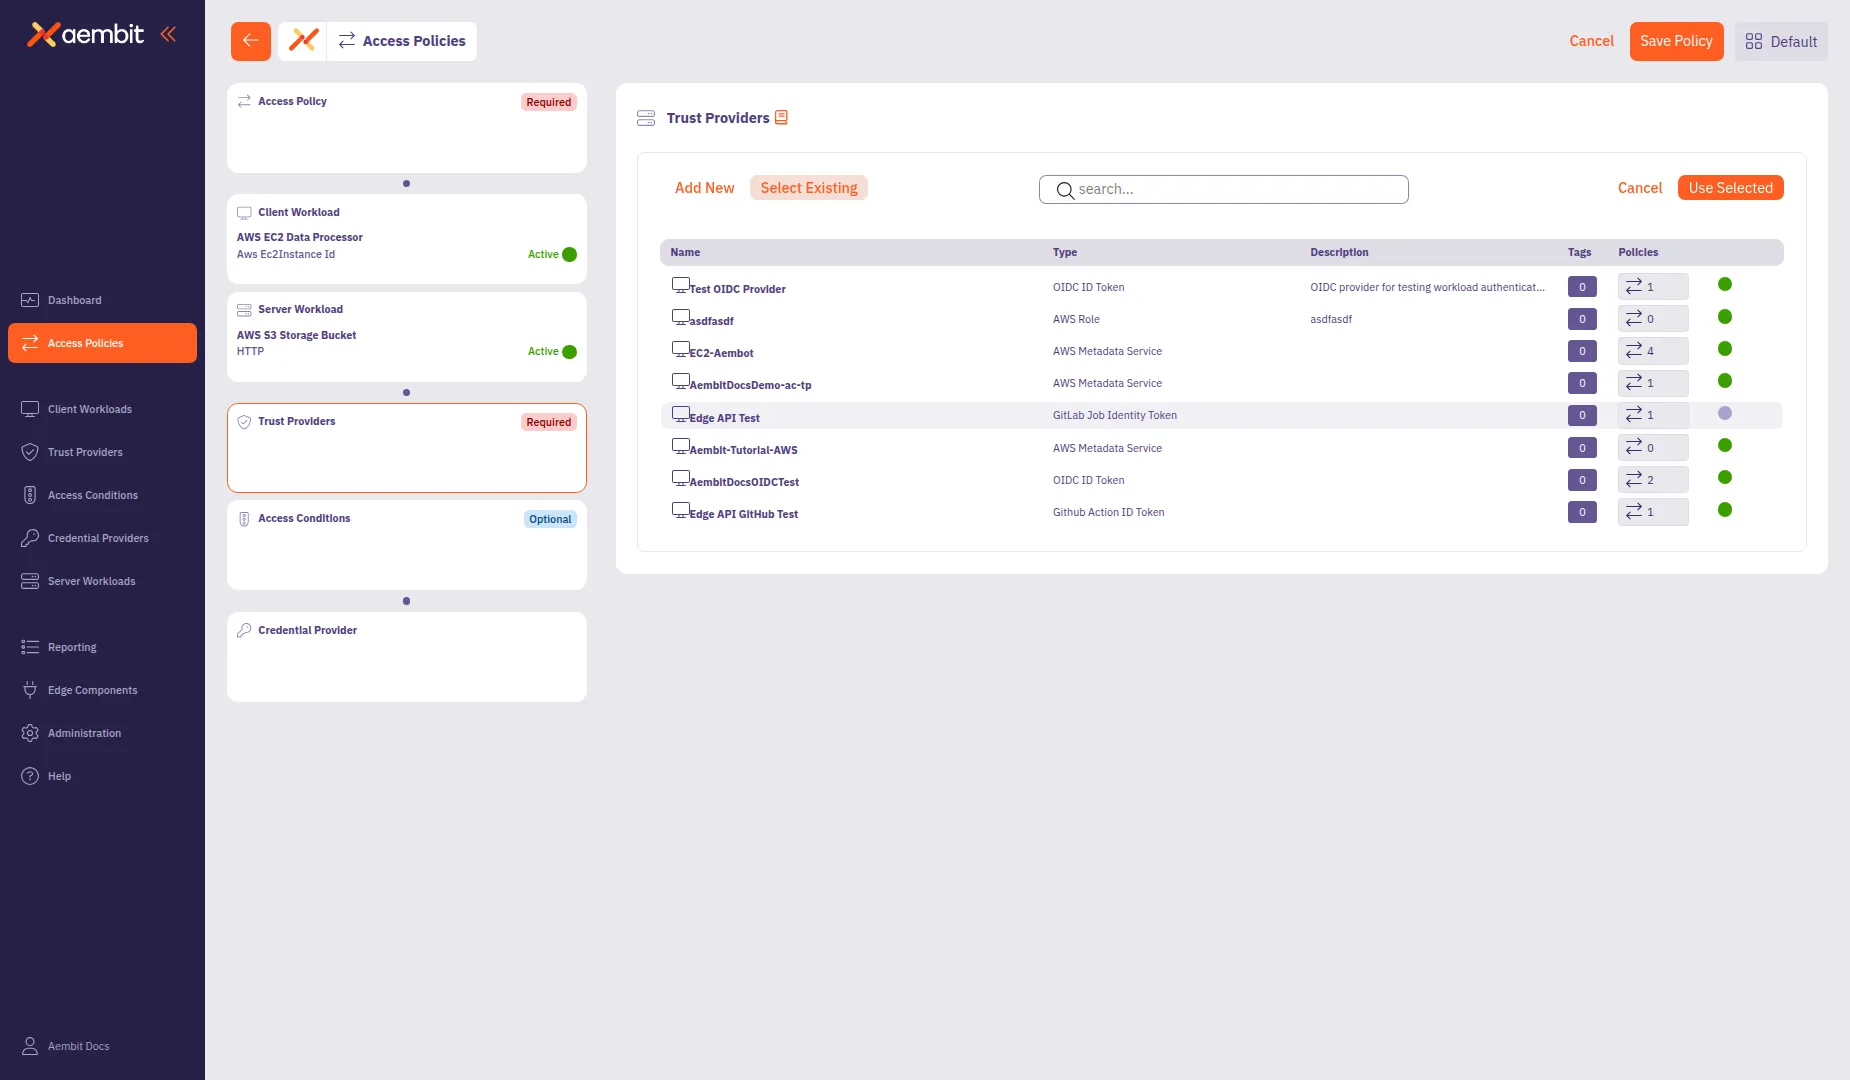
-
Use the search field to filter the list.
-
Click a row to select a Trust Provider. The selected row highlights with an orange border.
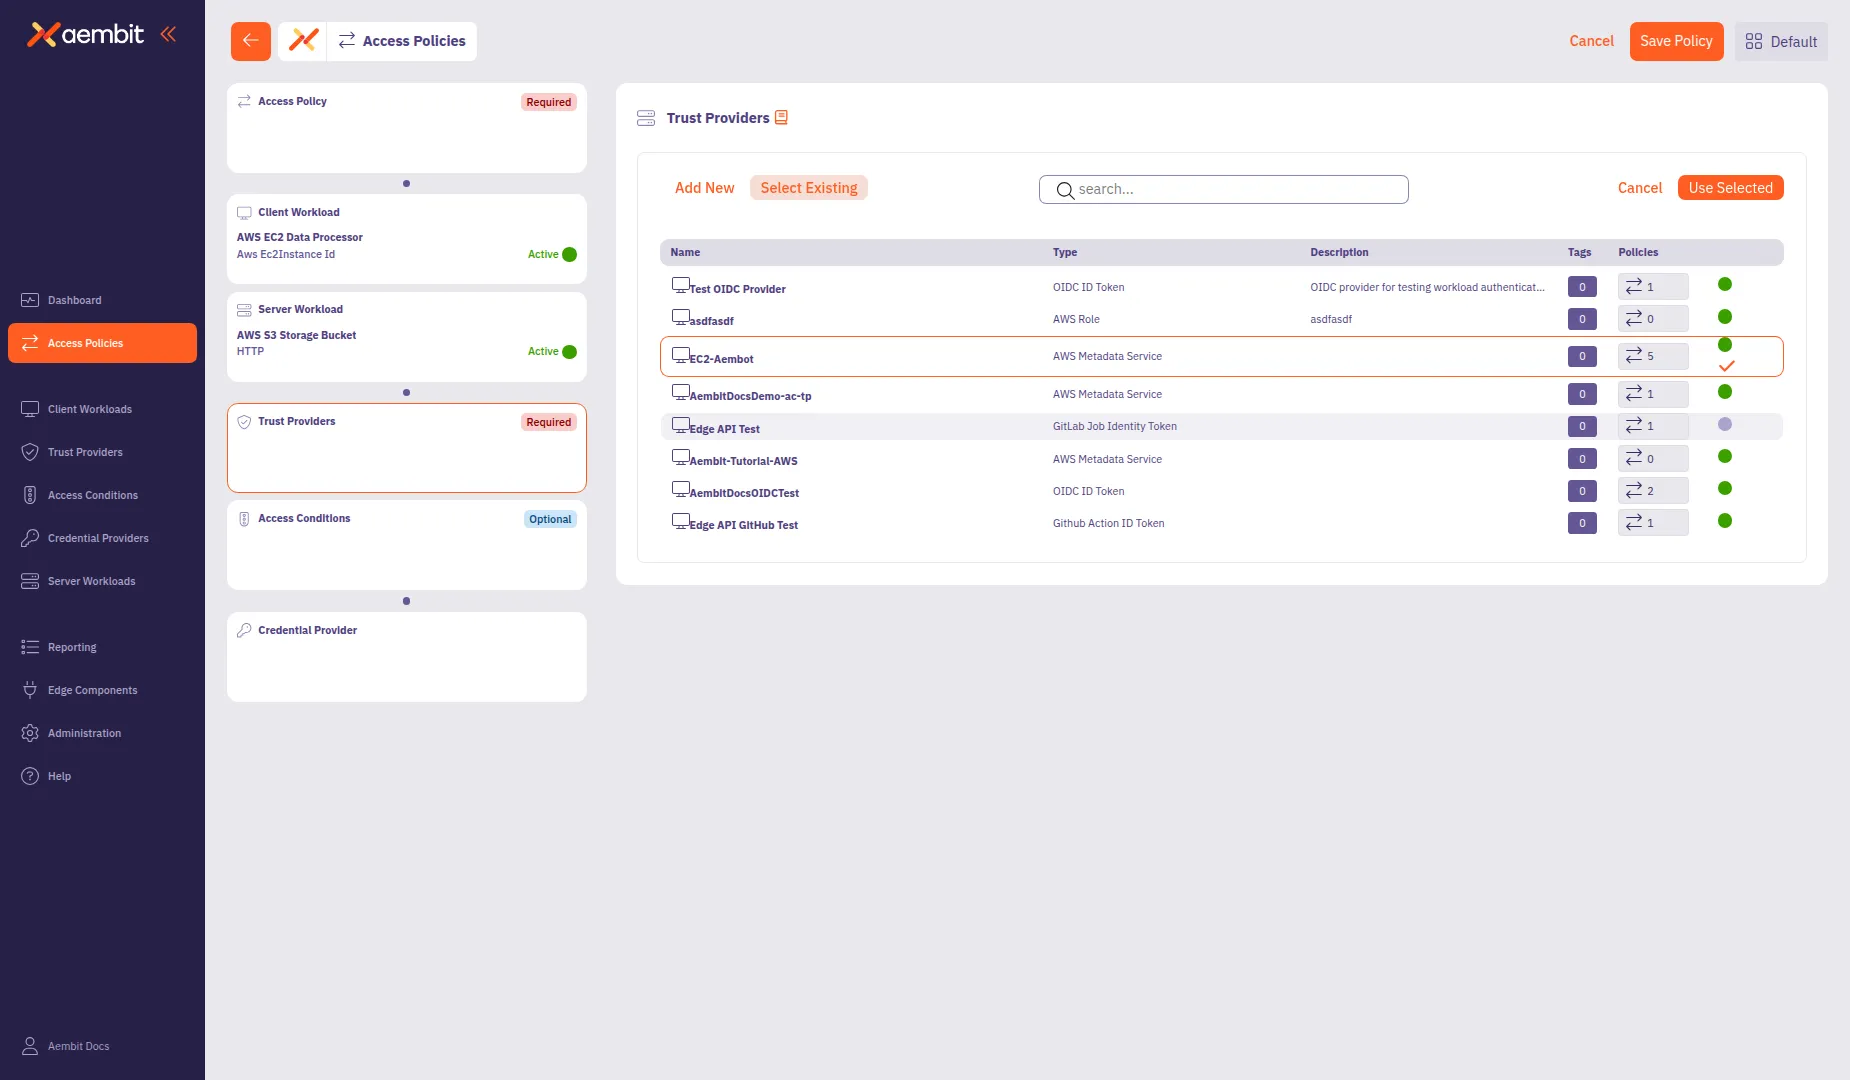
-
Click Use Selected to add it to the policy.
Add Access Conditions (optional)
Section titled “Add Access Conditions (optional)”Click the Access Conditions card in the left panel to add optional access constraints. Access Conditions provide additional security by restricting access based on factors like geographic location or time of day.
For detailed information about Access Condition types and integration options, see Access Conditions.
To create a new Access Condition:
-
Select the Add New tab if not already selected.
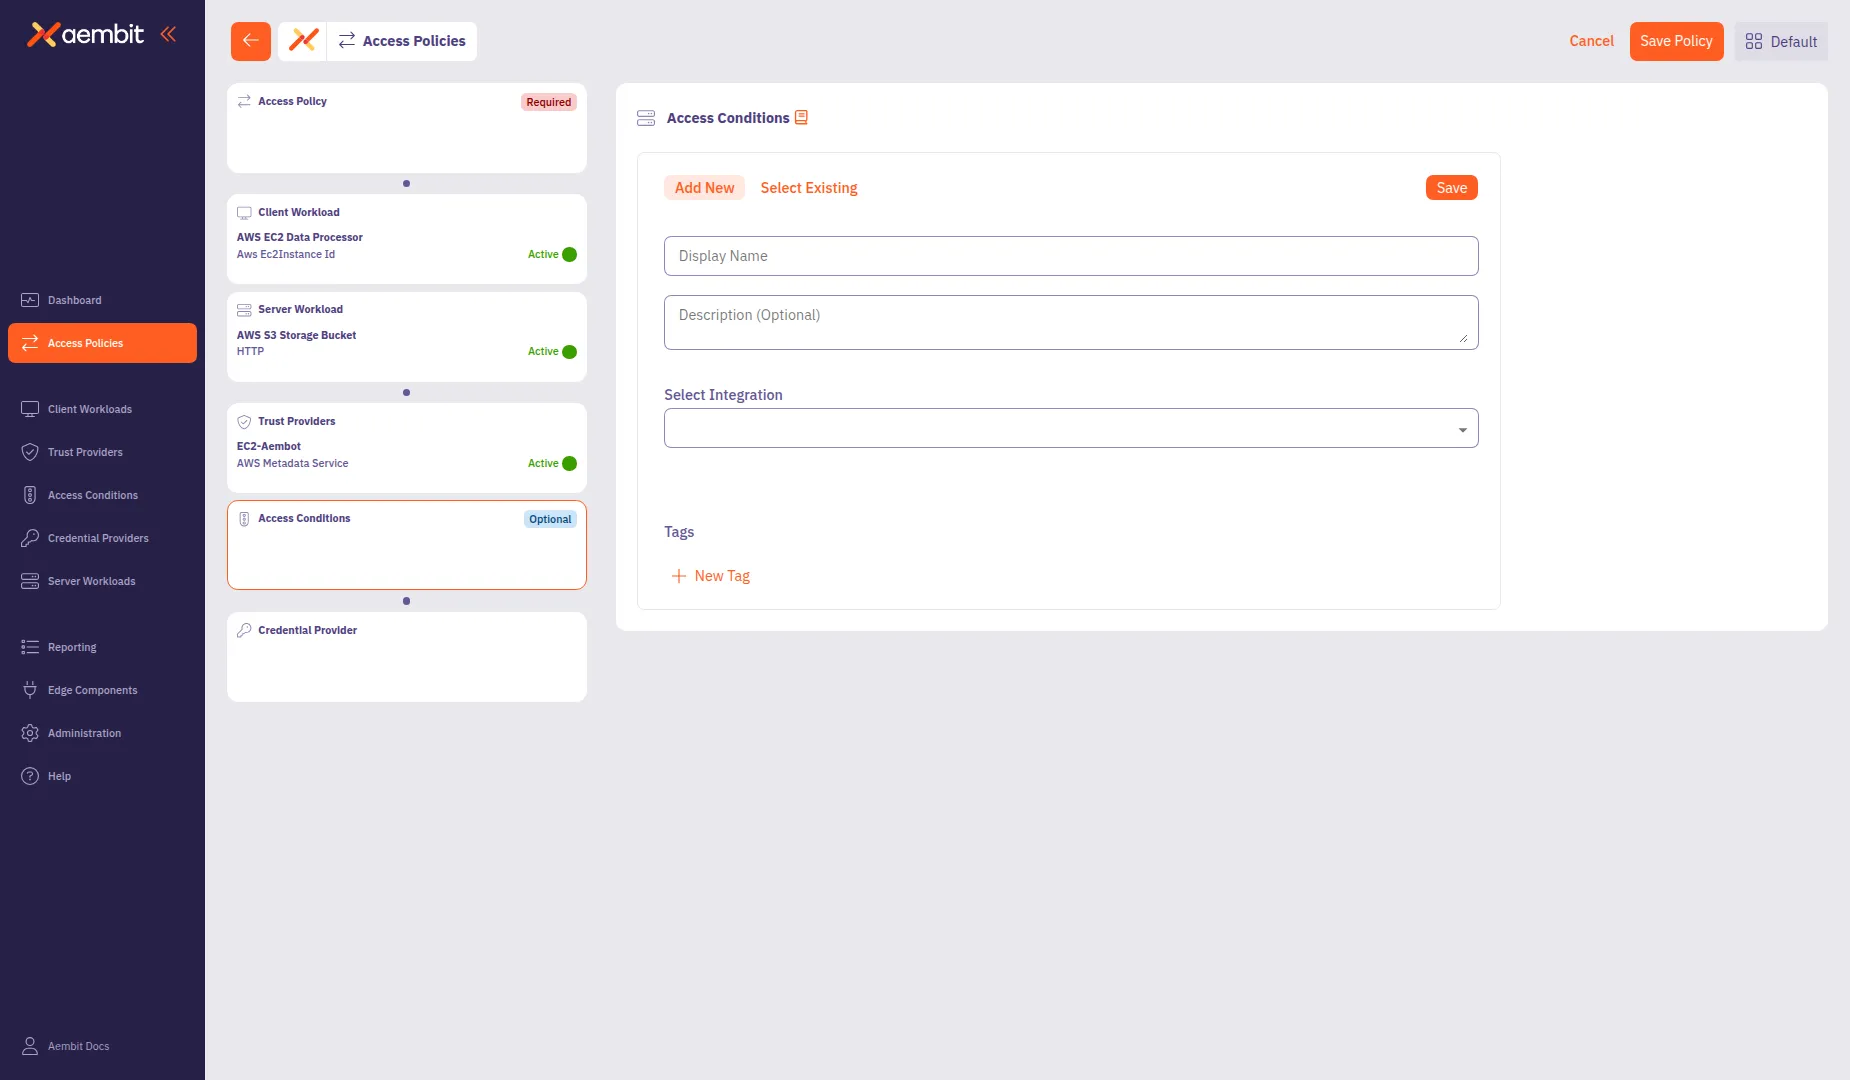
-
In the Display Name field, enter a name for the Access Condition (for example,
Washington State Location). -
(Optional) In the Description field, add context about the condition.
-
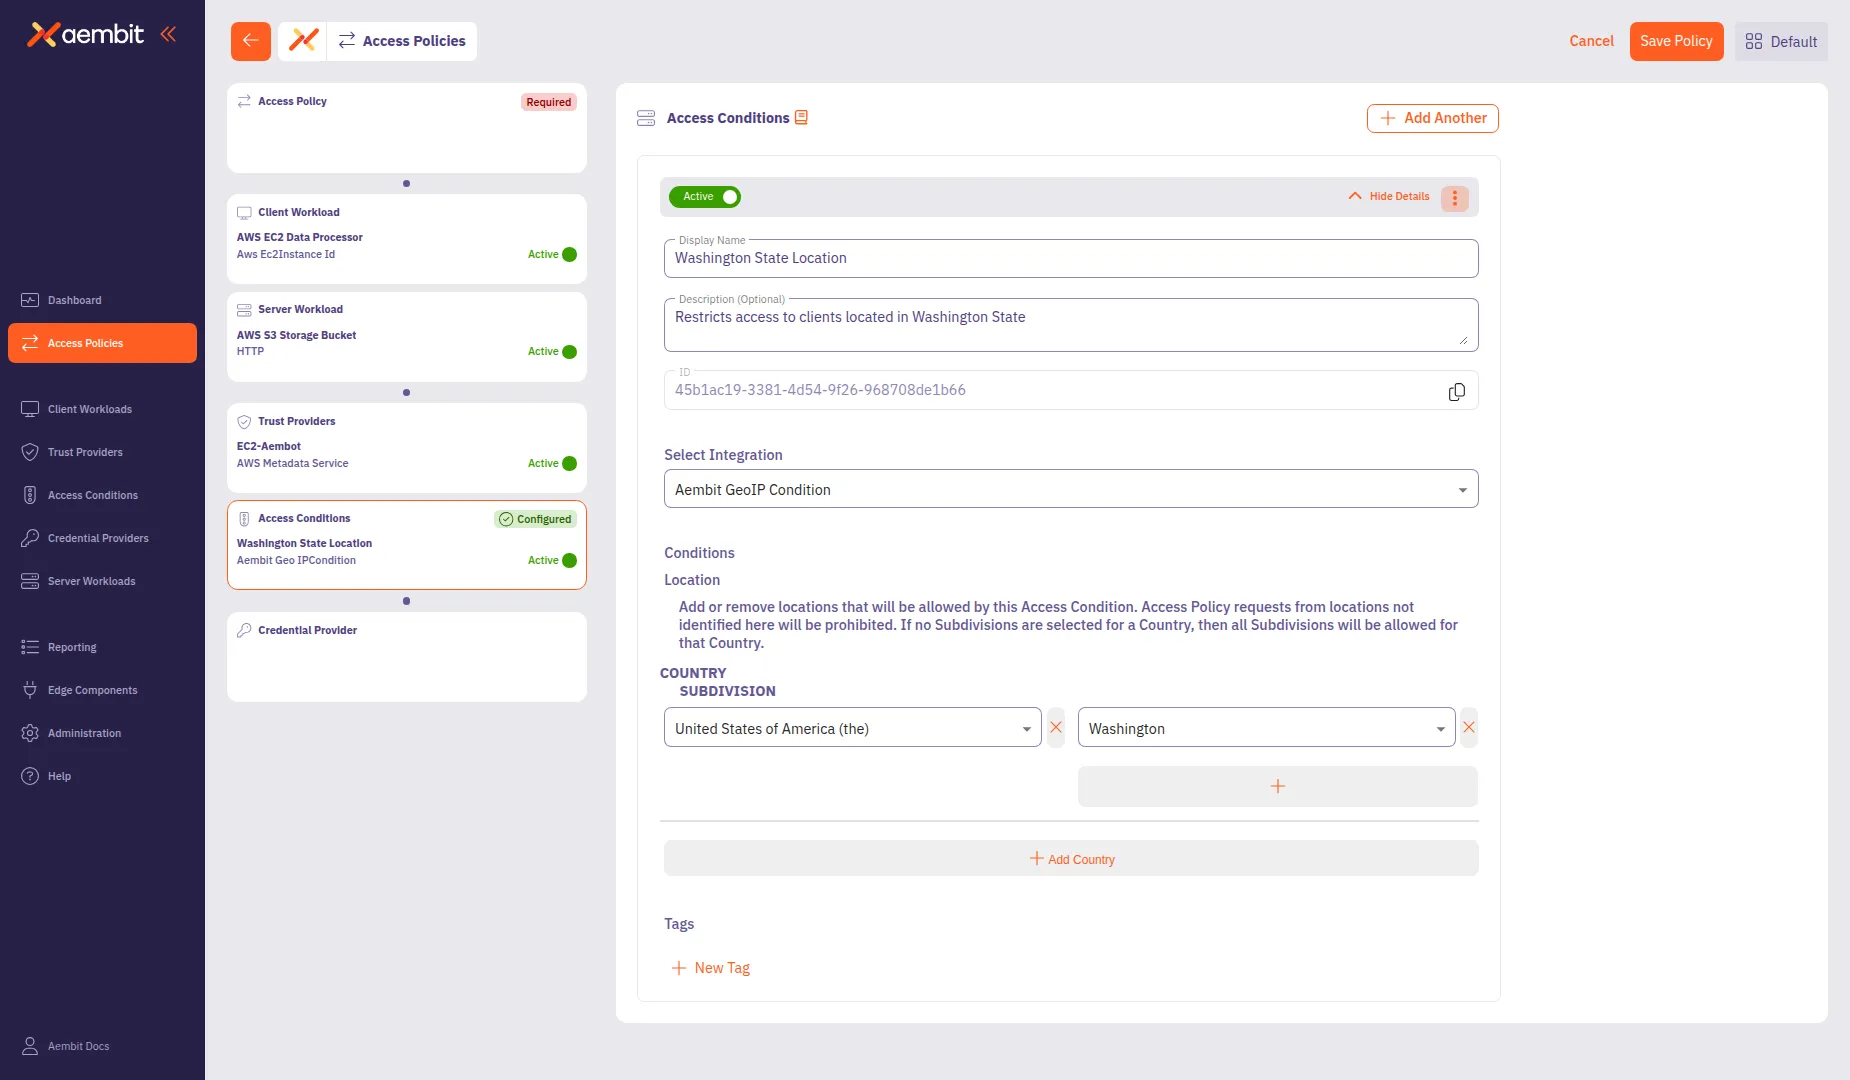
From the Integration dropdown, select a condition type:
- Aembit GeoIP Condition - Restrict access based on geographic location
- Aembit Time Condition - Restrict access based on time windows
- Other third-party integrations as configured in your tenant
-
Configure the integration-specific settings. For GeoIP conditions:
- Click Add Country to add a location rule.
- From the Country dropdown, select a country (for example,
United States of America). - (Optional) From the Subdivision dropdown, select a specific state or region (for example,
Washington).
-
Click Save to add the Access Condition to the policy.
To use an existing Access Condition:
-
Select the Select Existing tab.
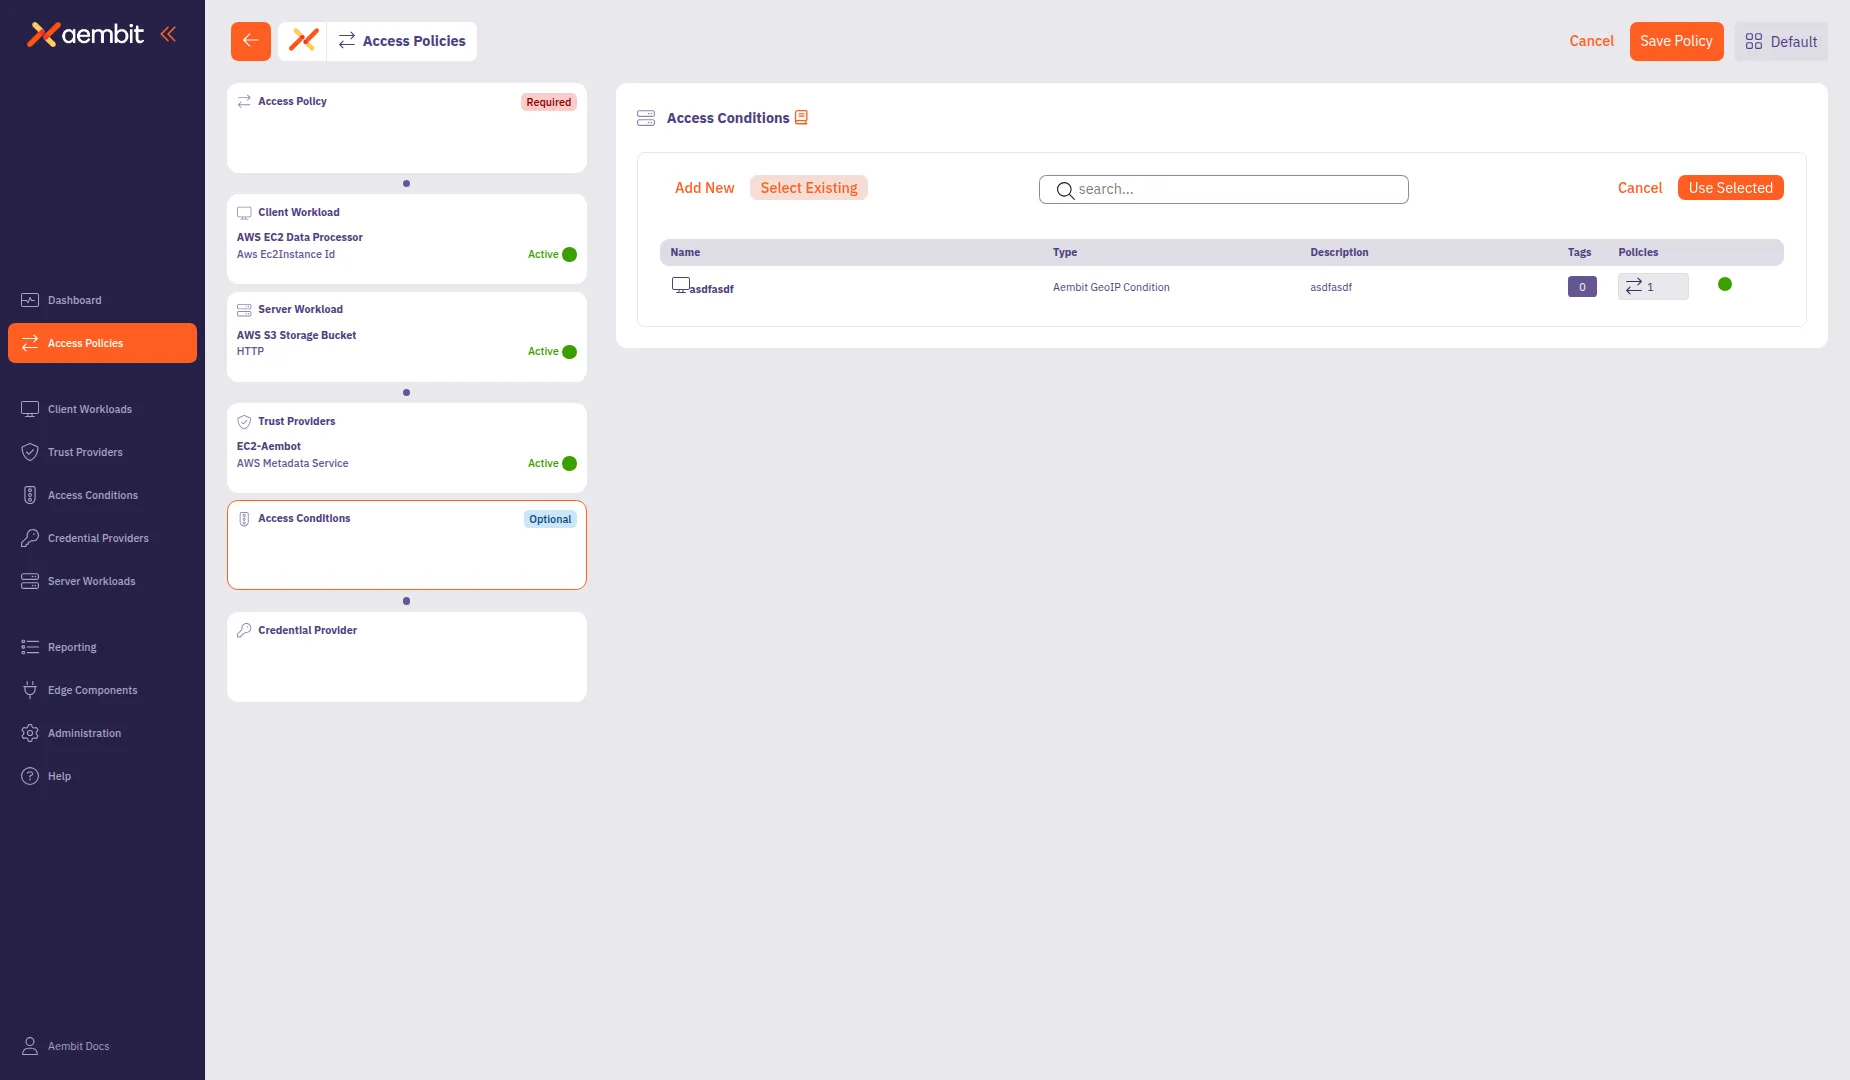
-
Use the search field to filter the list.
-
Click a row to select an Access Condition. The selected row highlights with an orange border.
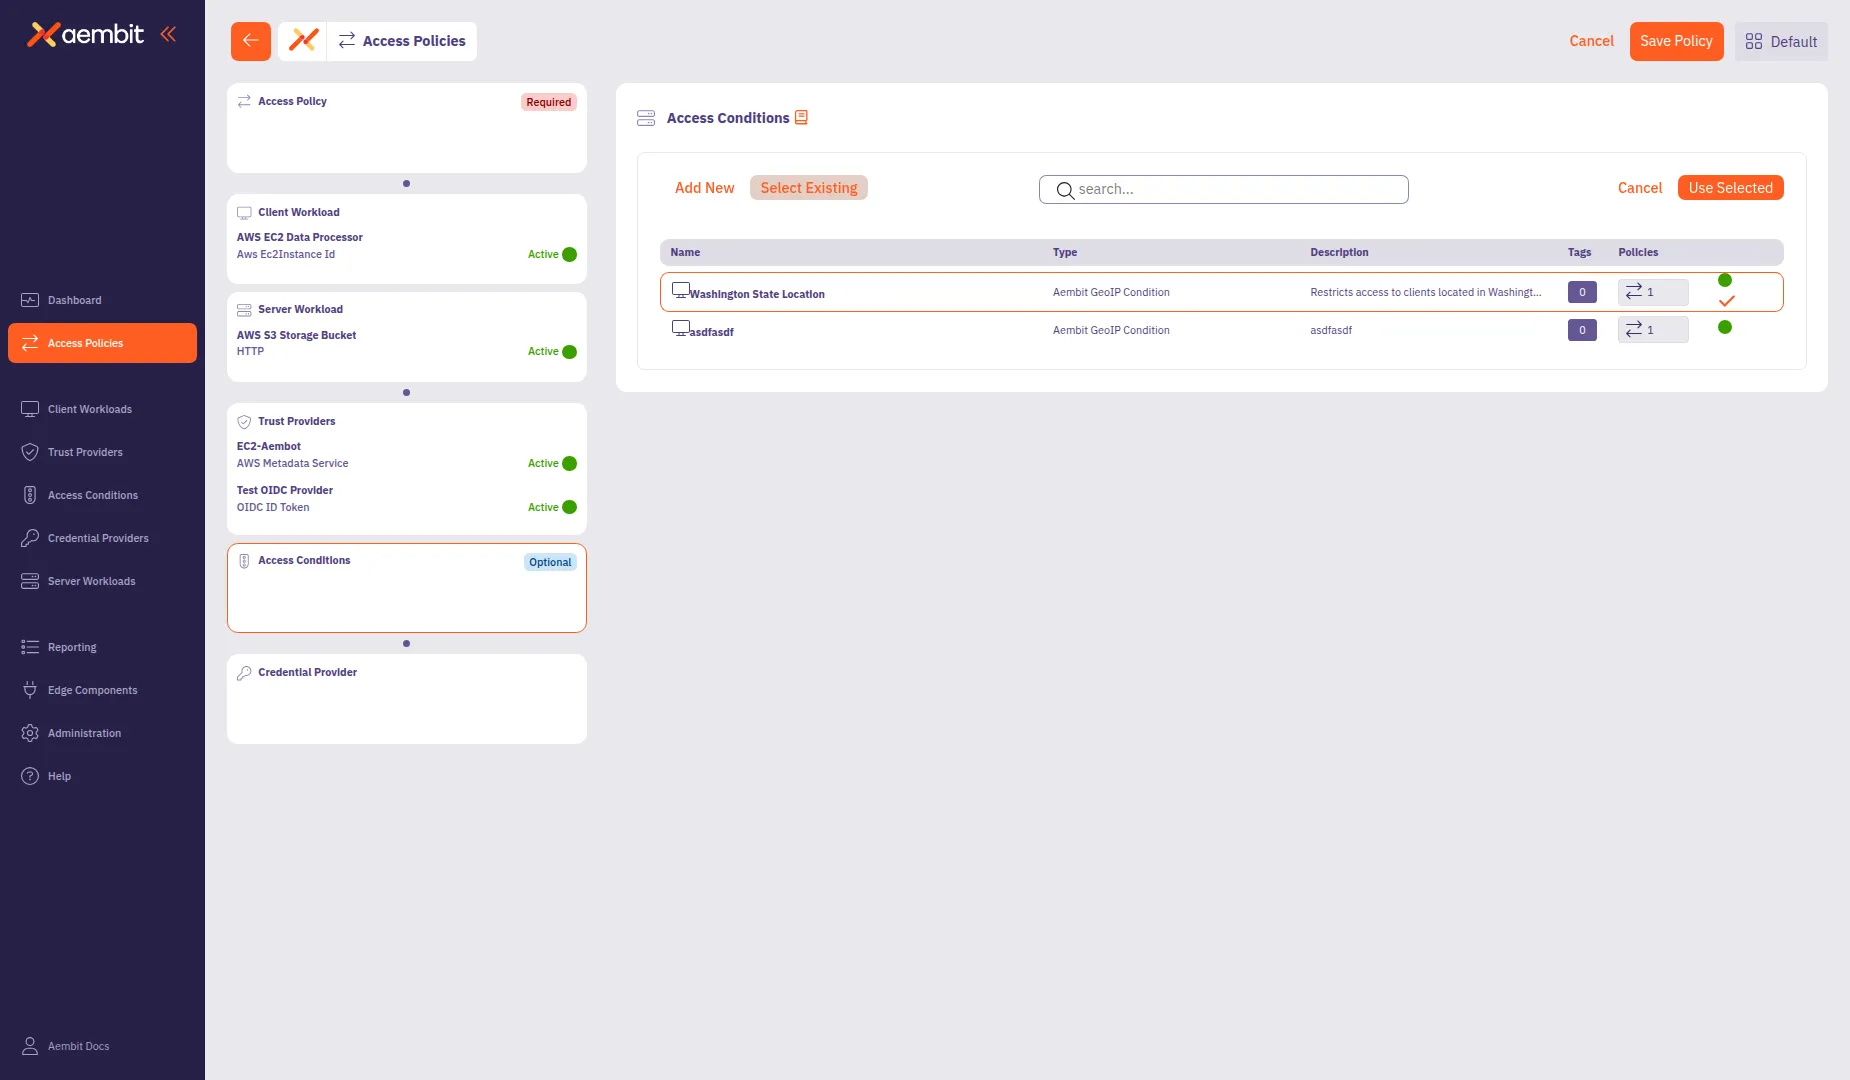
-
Click Use Selected to add it to the policy.
Add a Credential Provider
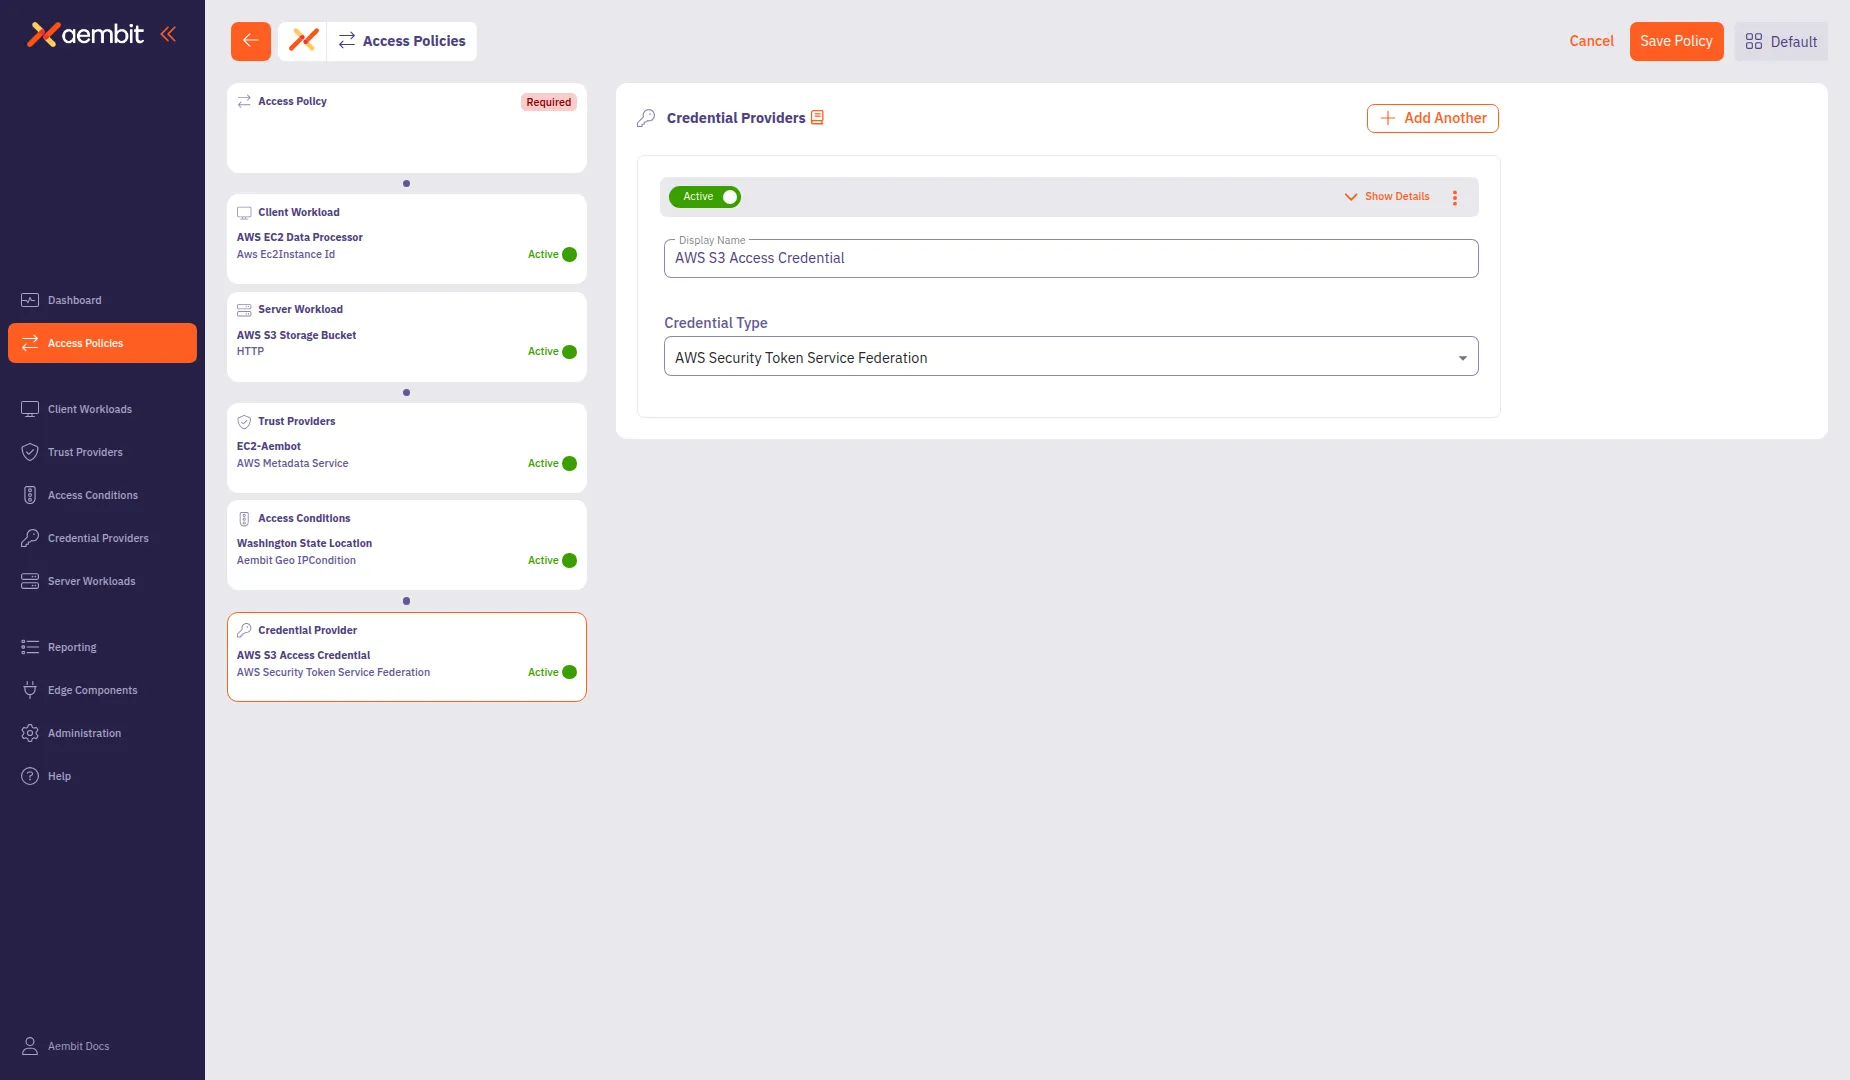
Section titled “Add a Credential Provider”Click the Credential Provider card in the left panel to configure how the policy obtains credentials for accessing the Server Workload.
For detailed information about Credential Provider types and configuration options, see Credential Providers.
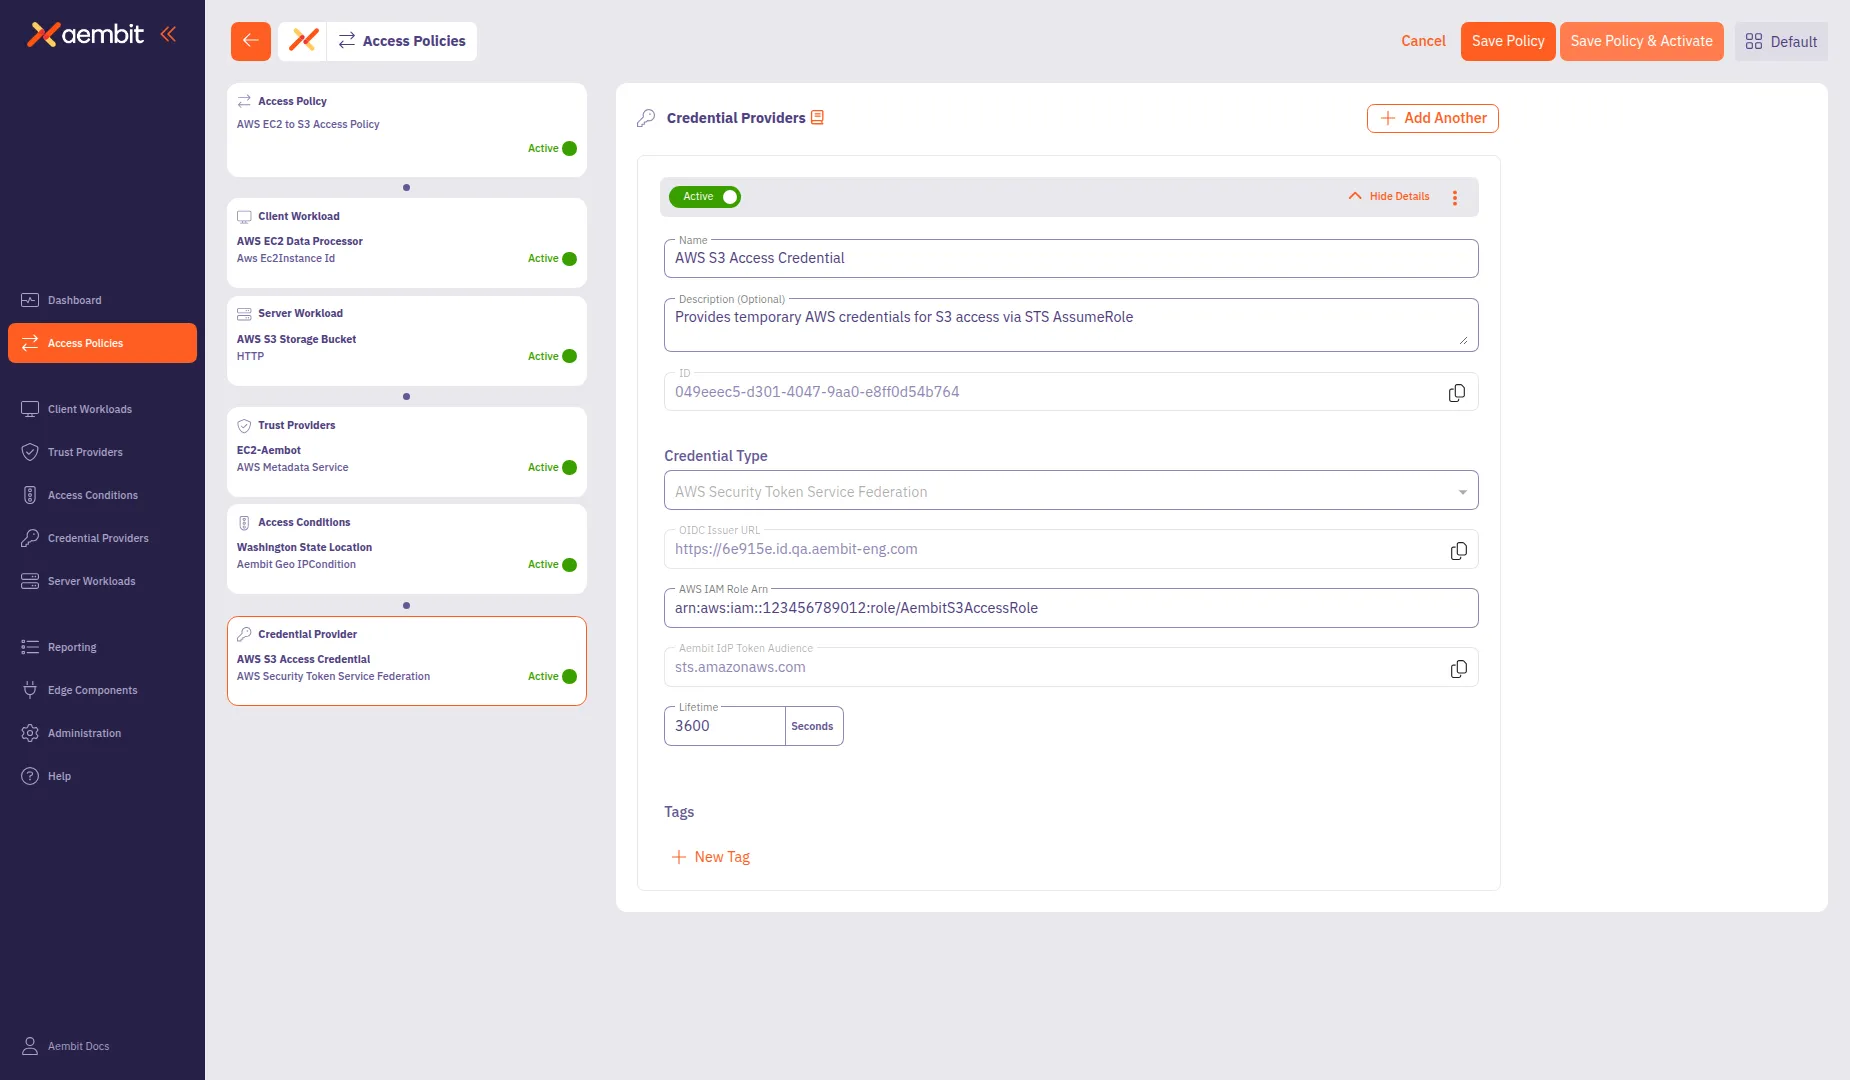
To create a new Credential Provider:
-
Select the Add New tab if not already selected.
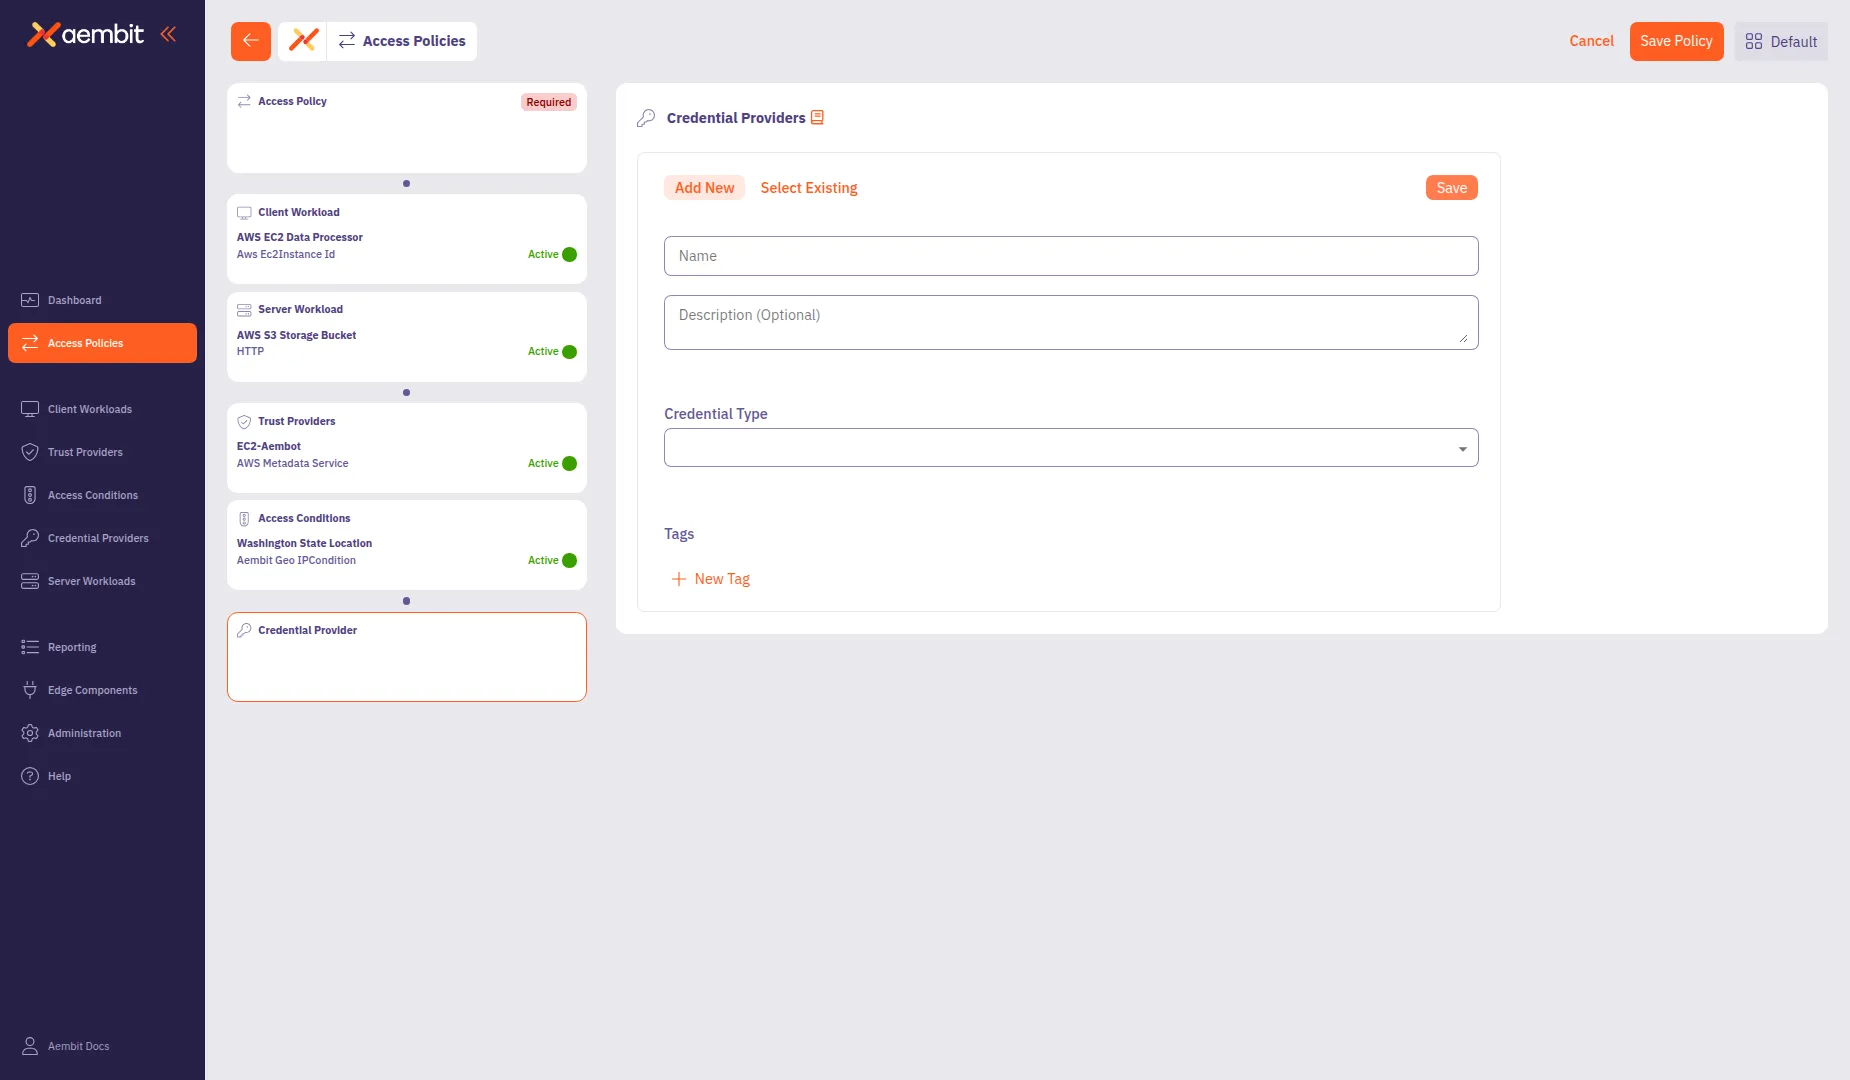
-
In the Name field, enter a name for the Credential Provider (for example,
AWS S3 Access Credential). -
(Optional) In the Description field, add context about the credential.
-
From the Credential Type dropdown, select a credential type:
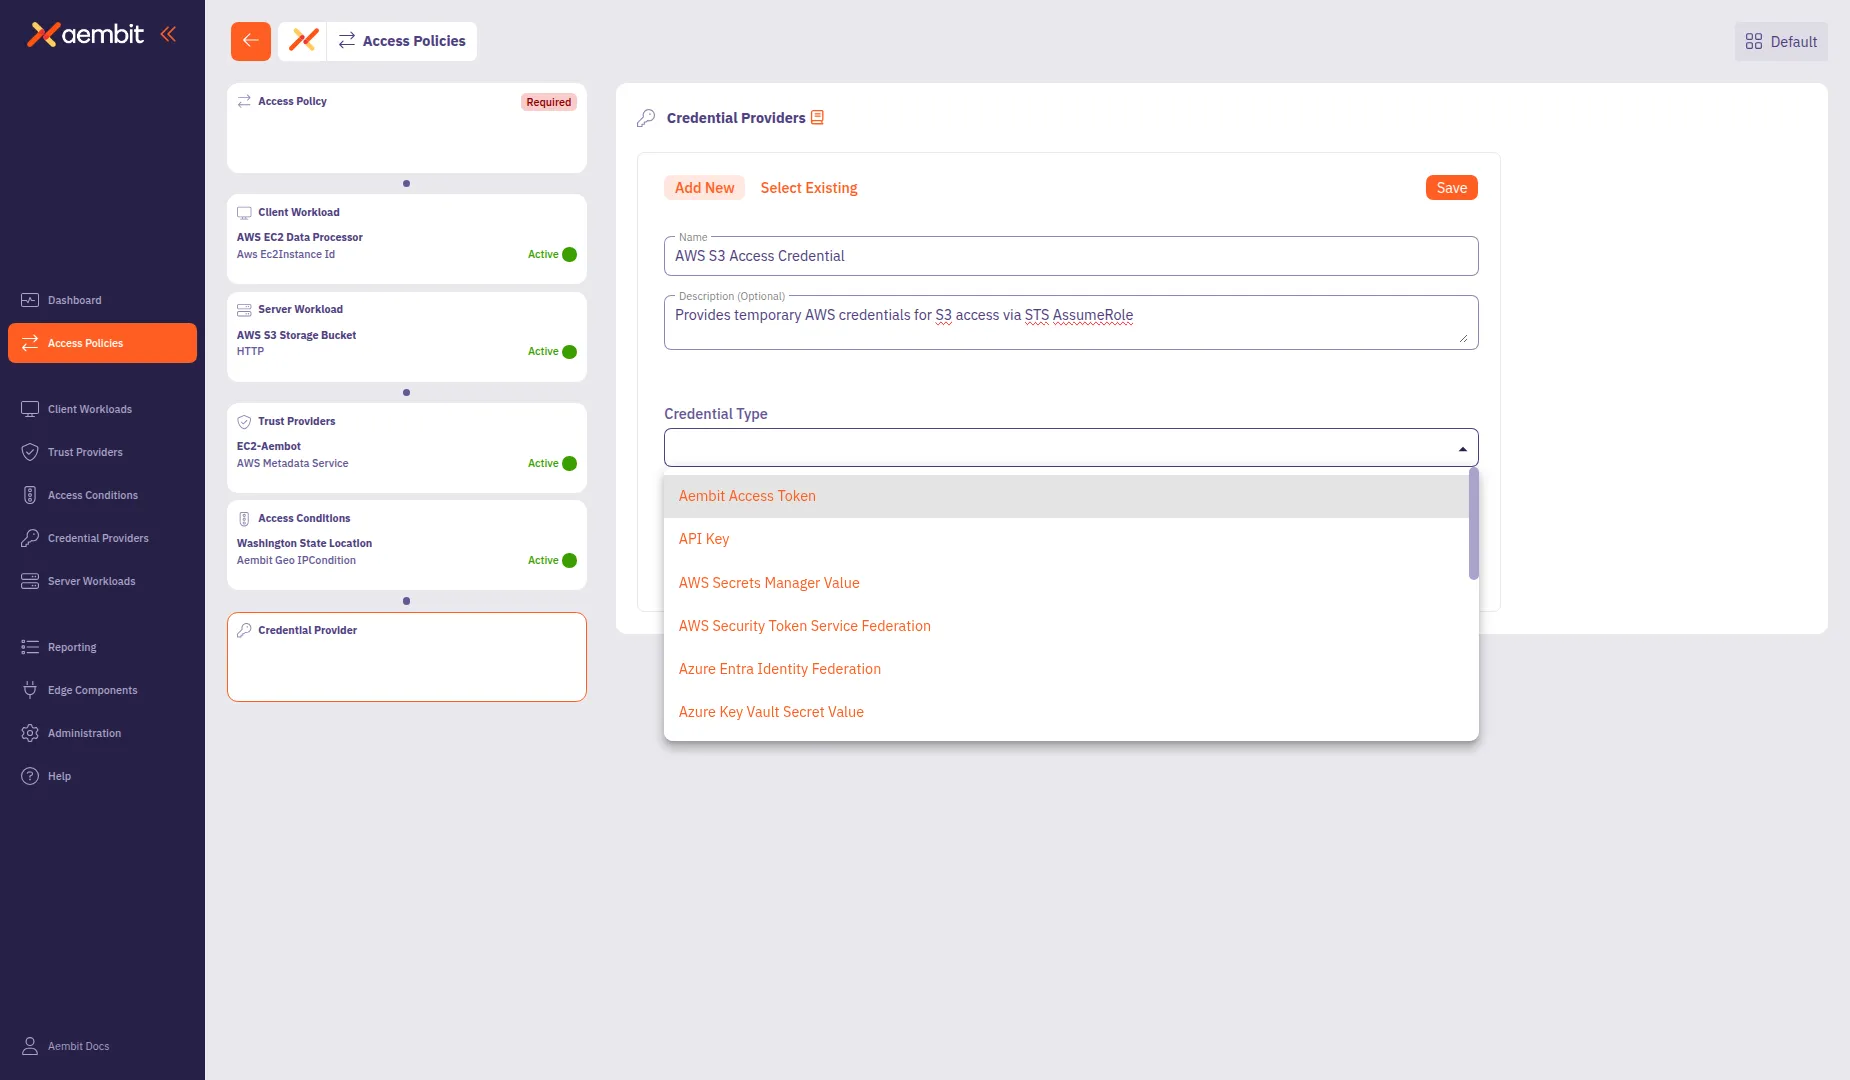
- Aembit Access Token - For Aembit-native authentication
- API Key - For static API key credentials
- AWS Secrets Manager Value - For credentials stored in AWS Secrets Manager
- AWS Security Token Service Federation - For AWS STS AssumeRole credentials
- Azure Entra Identity Federation - For Azure identity federation
- Azure Key Vault Secret Value - For credentials stored in Azure Key Vault
- Google Workload Identity Federation - For GCP identity federation
- OAuth 2.0 Client Credentials - For OAuth client credentials flow
-
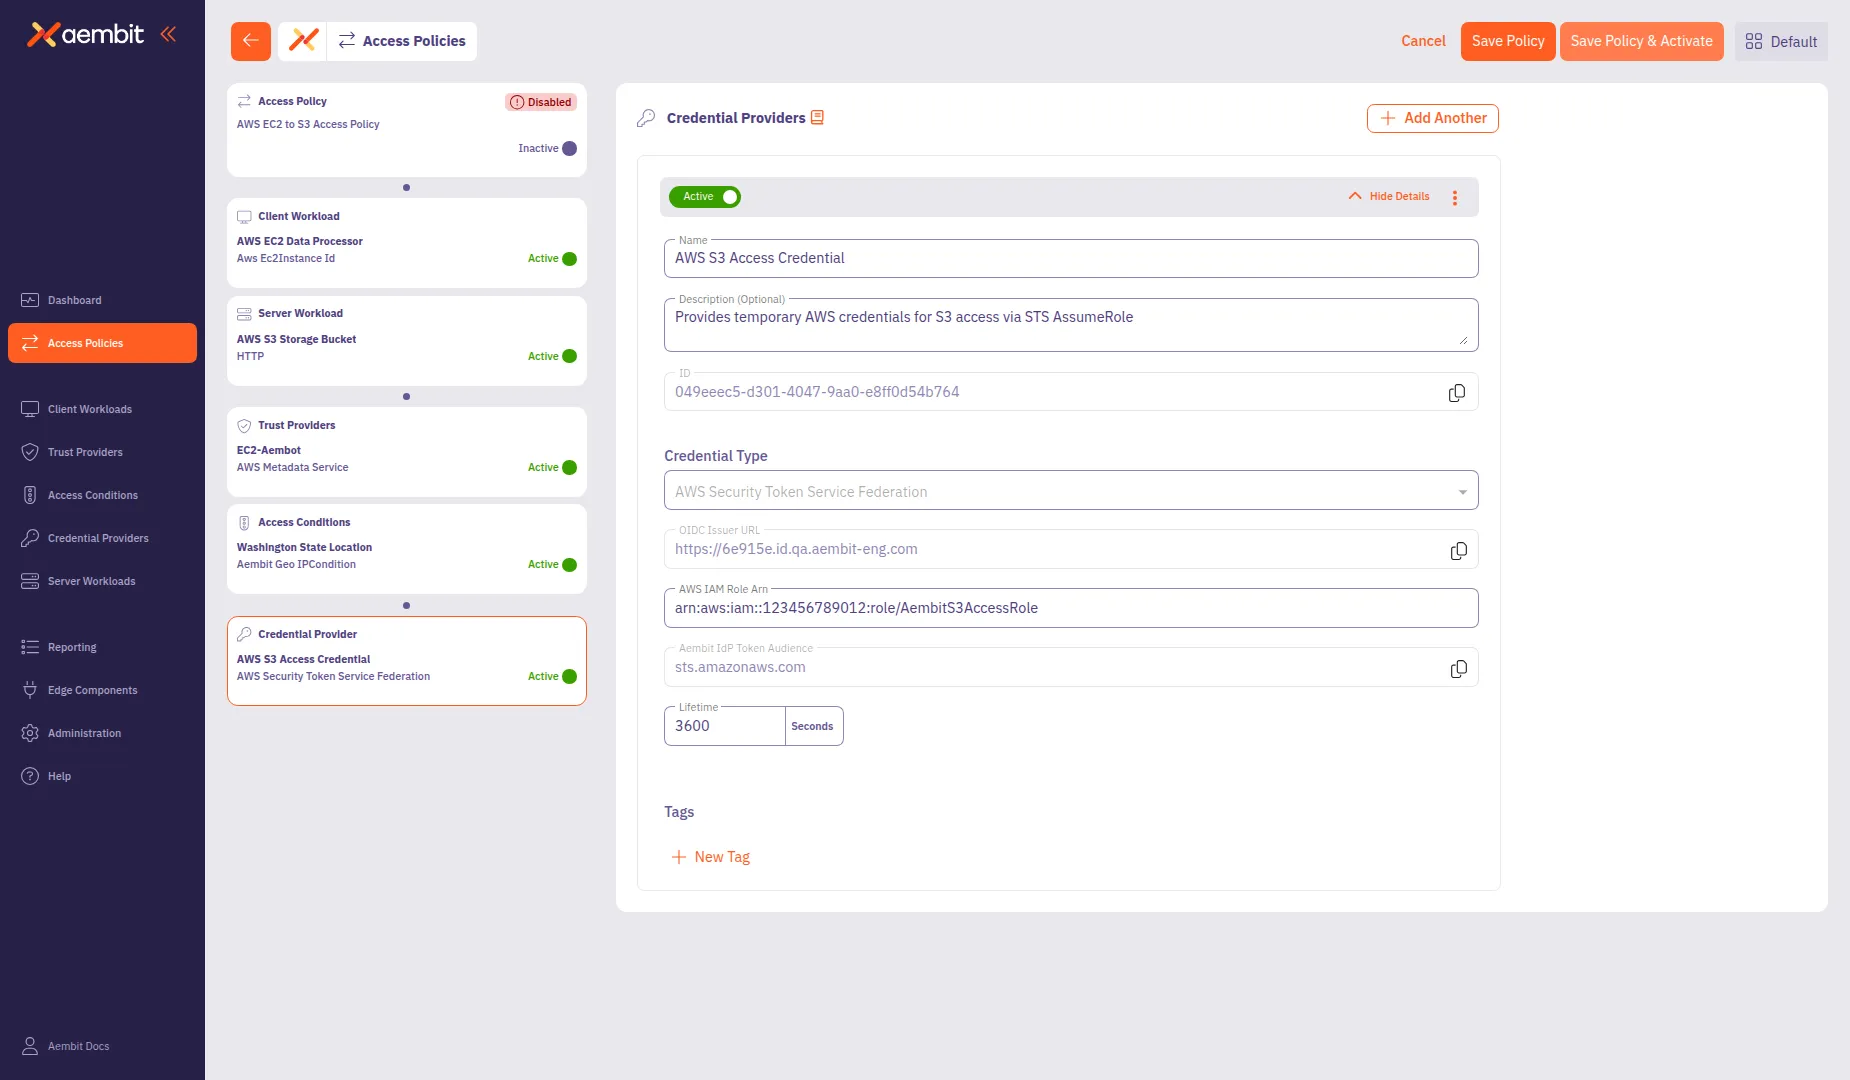
Configure the type-specific settings. For AWS Security Token Service Federation:
- OIDC Issuer URL: Auto-populated with your tenant’s identity URL.
- AWS IAM Role Arn: Enter the Amazon Resource Name (ARN) of the IAM role to assume (for example,
arn:aws:iam::123456789012:role/AembitS3AccessRole). - Aembit IdP Token Audience: The Identity Provider (IdP) token audience, auto-populated with
sts.amazonaws.com. - Lifetime: Set the credential lifetime in seconds (default:
3600).
-
Click Save to add the Credential Provider to the policy.
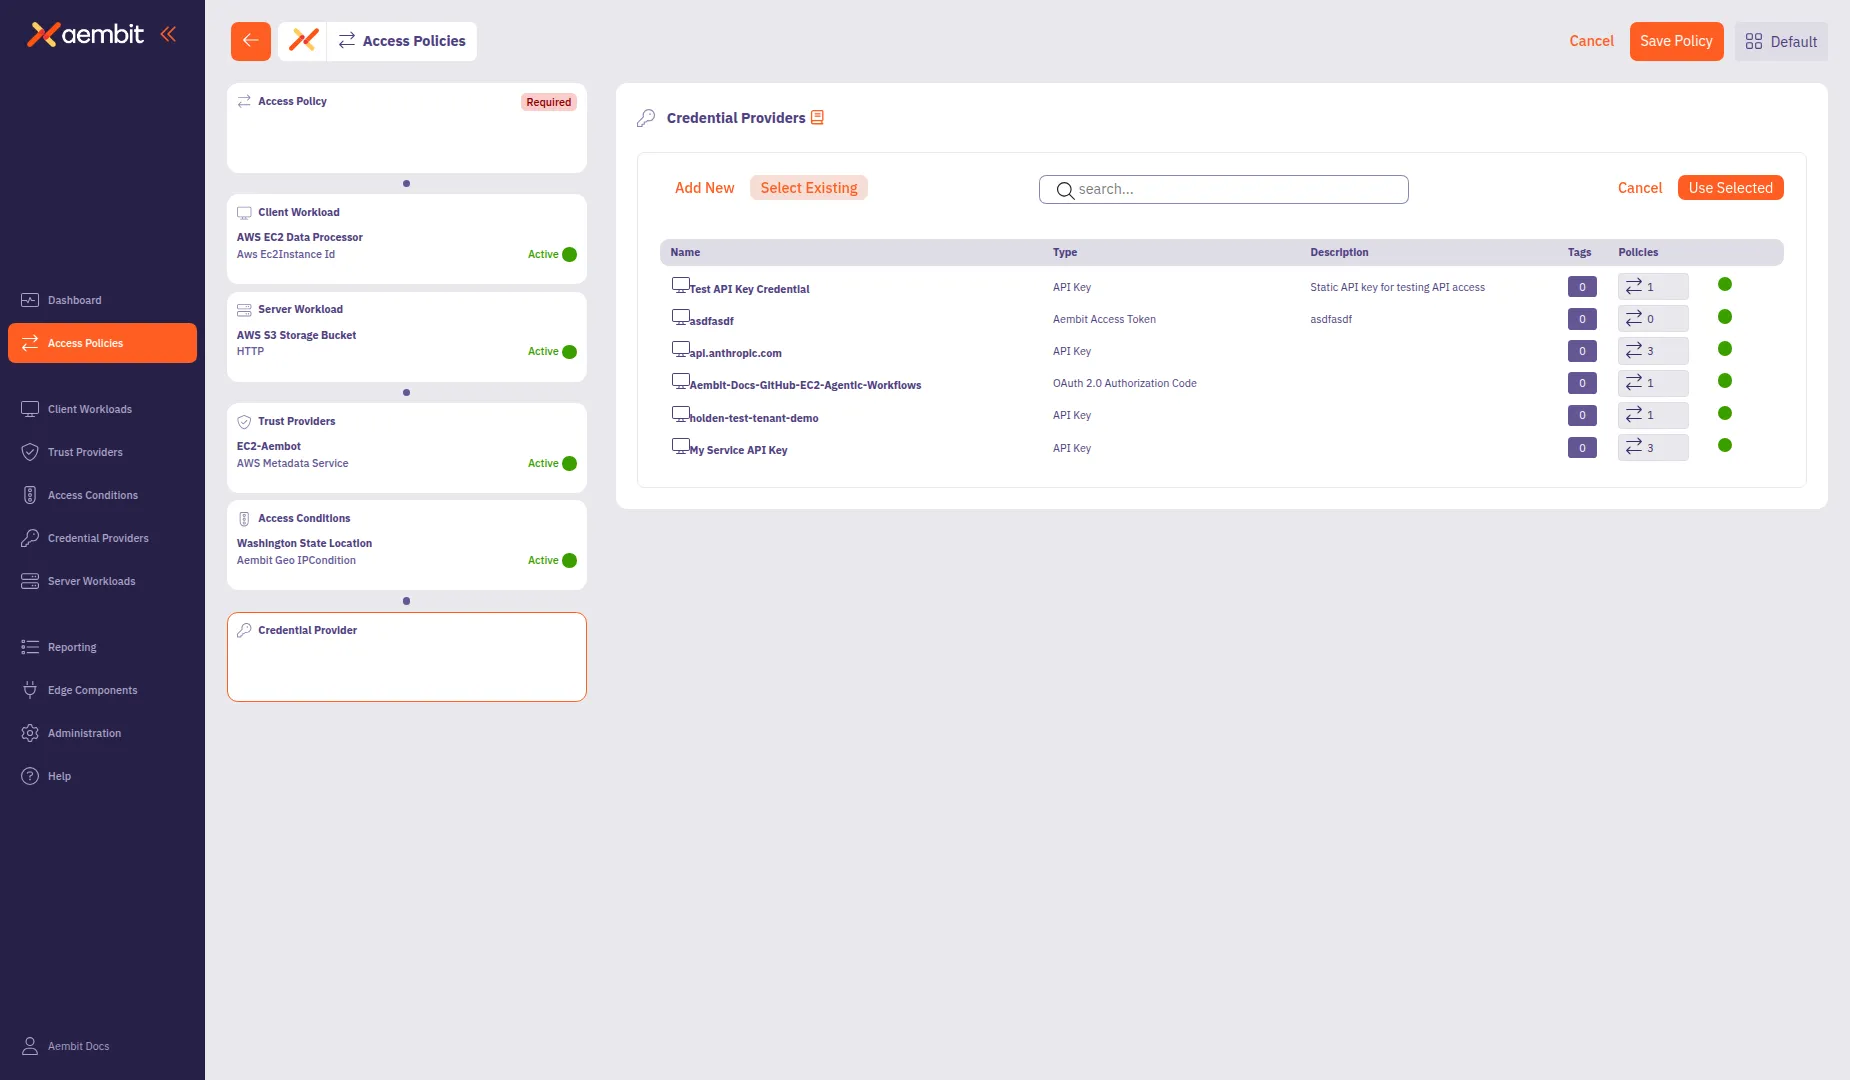
To use an existing Credential Provider:
-
Select the Select Existing tab.
-
Use the search field to filter the list.
-
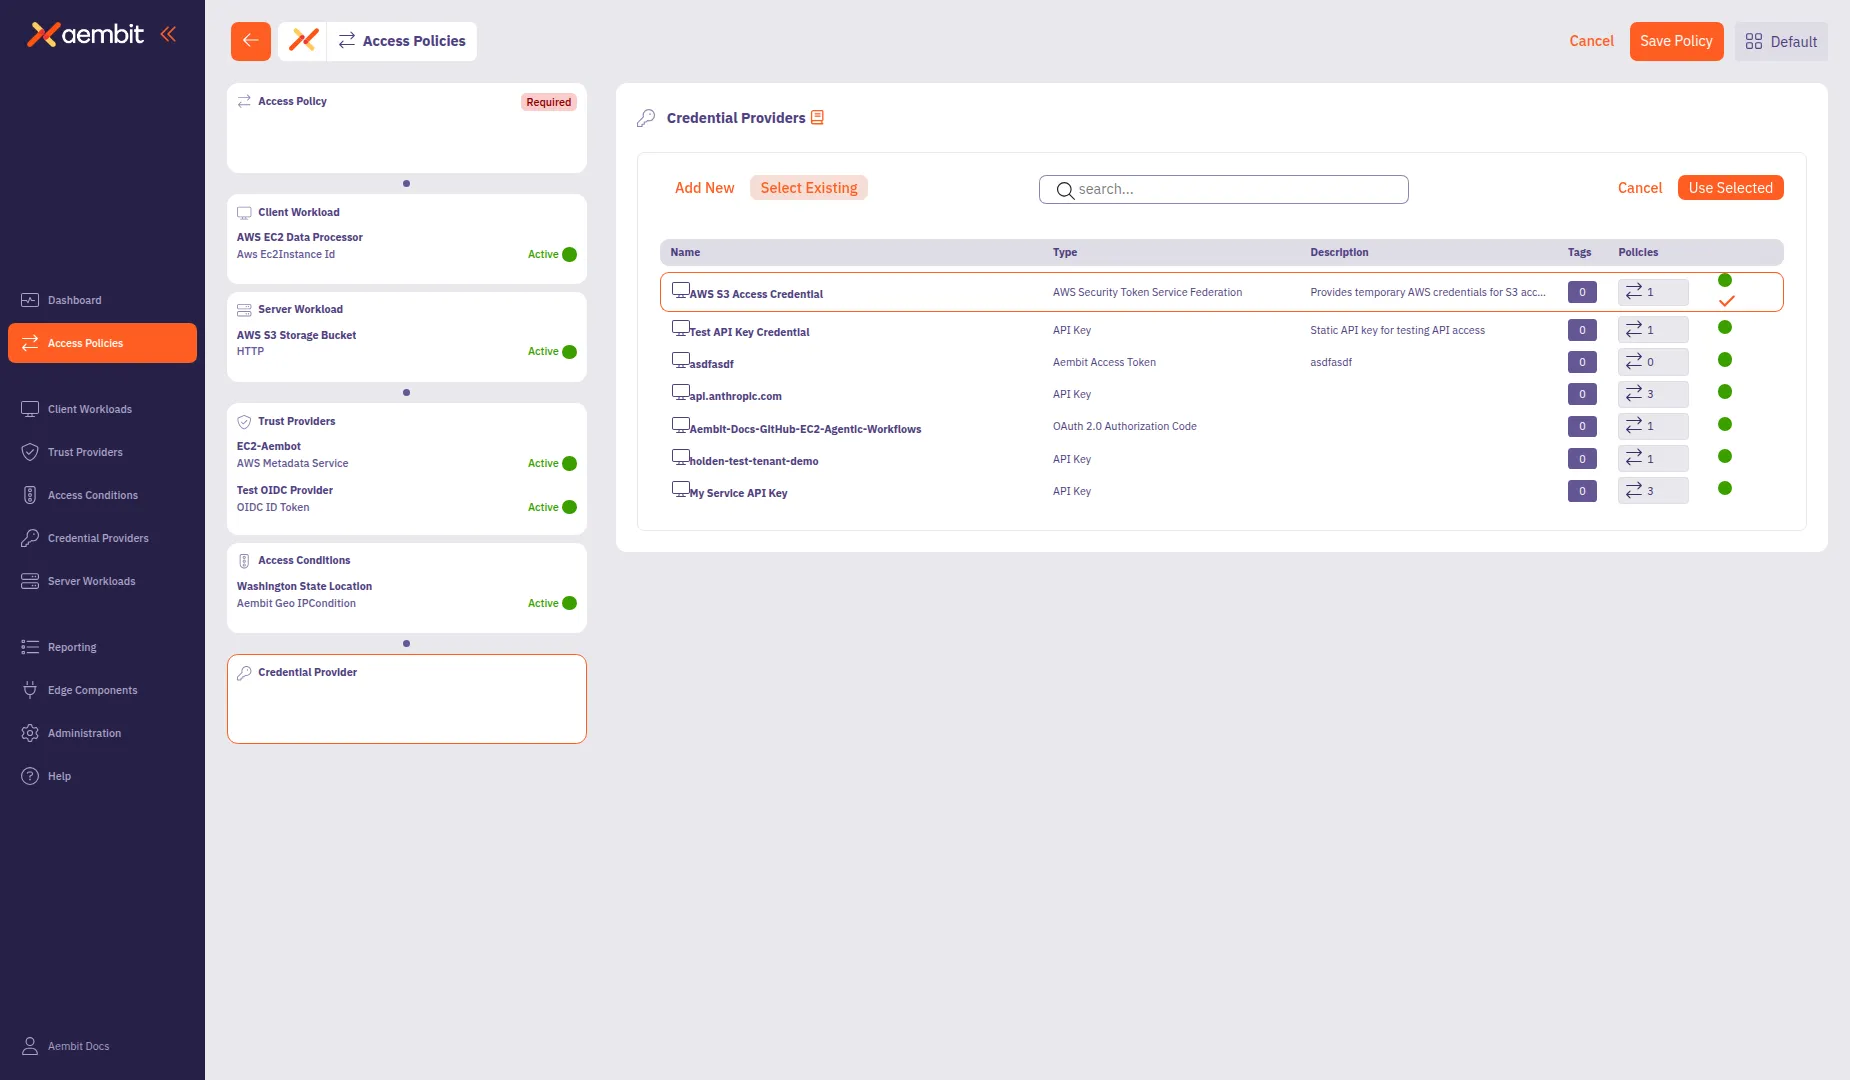
Click a row to select a Credential Provider. The selected row highlights with an orange border.
-
Click Use Selected to add it to the policy.
Save the Access Policy
Section titled “Save the Access Policy”After configuring all required components, you can save the Access Policy.
-
Review the left panel to verify all required components are configured. Hover over or select each compliance item card to see a green checkmark indicating the component is configured:
- Access Policy (name configured)
- Client Workload
- Server Workload
- Trust Providers
- Credential Provider
-
Click Save Policy in the header bar to create the Access Policy.
-
(Optional) To activate the policy immediately, enable the Active toggle.
The Access Policy now governs access from the configured Client Workload to the Server Workload based on the Trust Provider verification, Access Conditions, and Credential Provider settings.