Atlassian
Atlassian is a cloud-based service offering that facilitates collaborative work and project management for teams by providing a suite of tools, which include:
- Jira for project tracking
- Confluence for document collaboration
- Bitbucket for version control; and
- other integrated applications
Below you can find the Aembit configuration required to work with the Atlassian Cloud service as a Server Workload using the Atlassian REST APIs. Aembit supports multiple authentication/authorization methods for Atlassian. This page describes scenarios where the Credential Provider is configured for Atlassian via:
OAuth 2.0 Authorization Code
Section titled “OAuth 2.0 Authorization Code”Server Workload Configuration
Section titled “Server Workload Configuration”- Create a new Server Workload.
- Name - Choose a user-friendly name.
- Configure the service endpoint:
- Host -
<domain>.atlassian.net - Application Protocol - HTTP
- Port - 443 with TLS
- Forward to Port - 443 with TLS
- Authentication method - HTTP Authentication
- Authentication scheme - Bearer
Credential Provider Configuration
Section titled “Credential Provider Configuration”-
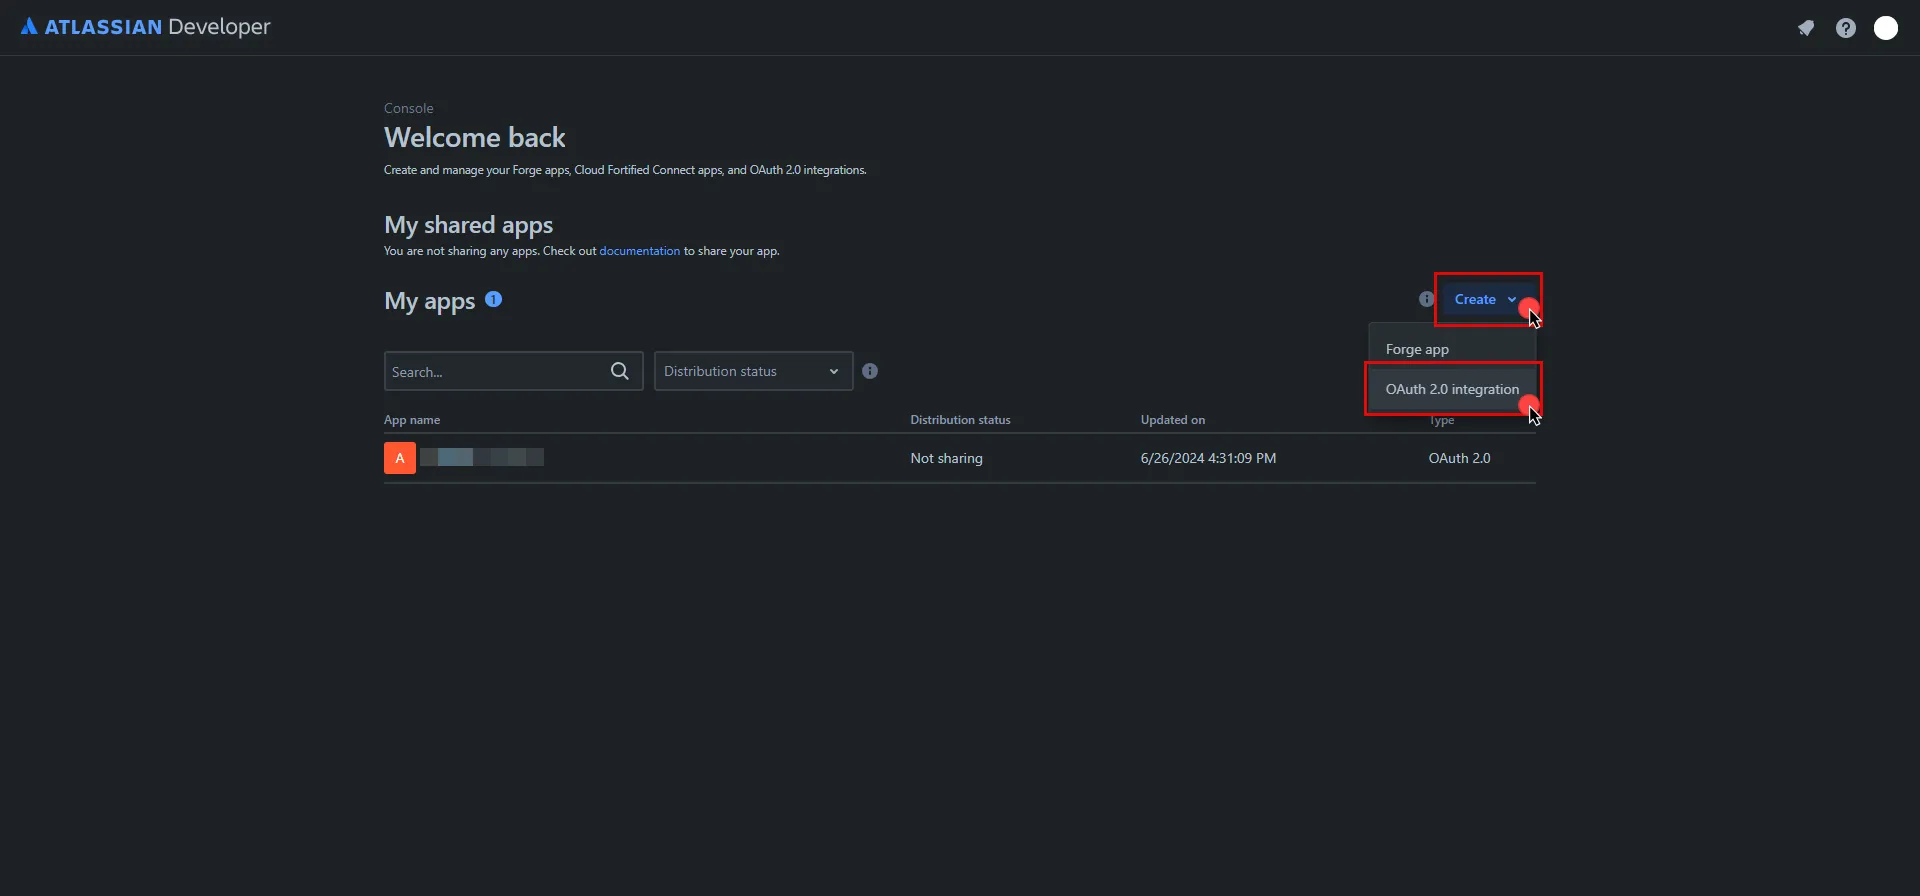
Log into to the Atlassian Developer Console.
-
Click on Create and select the OAuth 2.0 integration option.
-
Provide a name for your app, check the agreement box, and click Create .
-
In the left pane, select Authorization, and then click Add under the Action column.
-
Switch to the Aembit UI to create a new Credential Provider, selecting the OAuth 2.0 Authorization Code credential type. After setting up the Credential Provider, copy the auto-generated Callback URL.
-
Return to Atlassian and paste the copied URL into the Callback URL field.
-
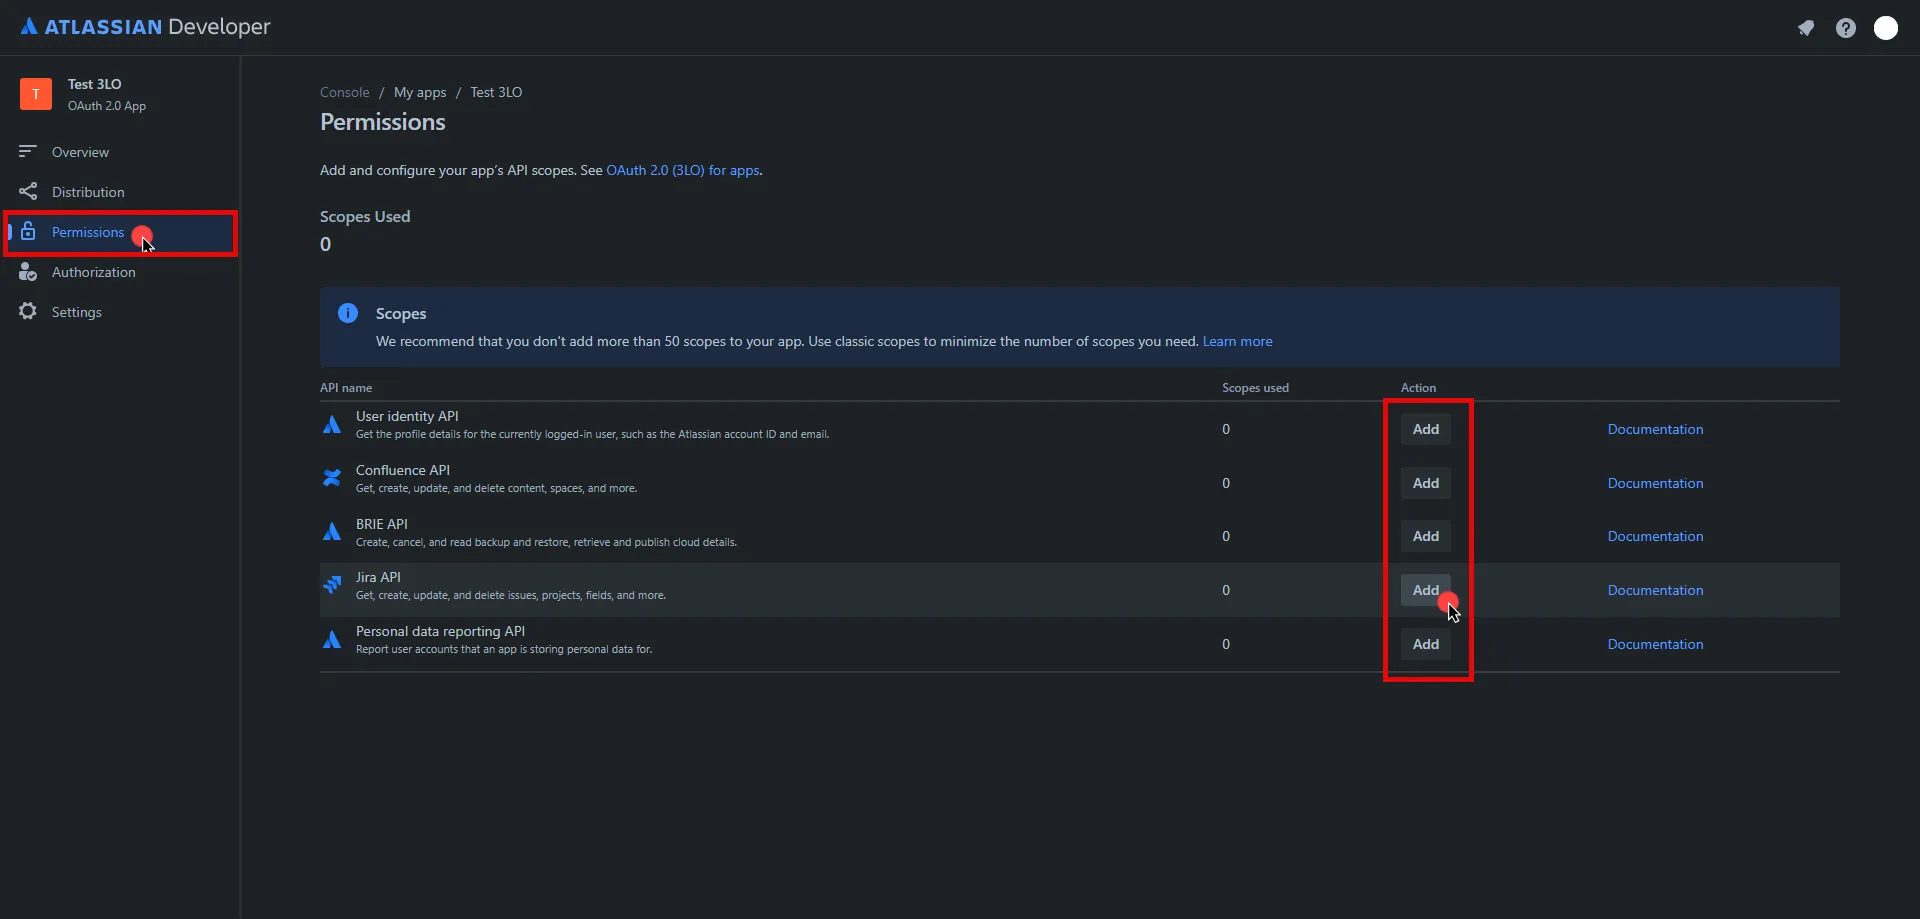
In the left pane, select Permissions, and then click Add under the Action column of the API that best suits your project needs. After clicking Add, it will change to Configure; click Configure to edit.
-
On the redirected page, click Edit Scopes, add the necessary scopes for your application, and then click Save Copy the Code version of all selected scopes and save this information for future use.
-
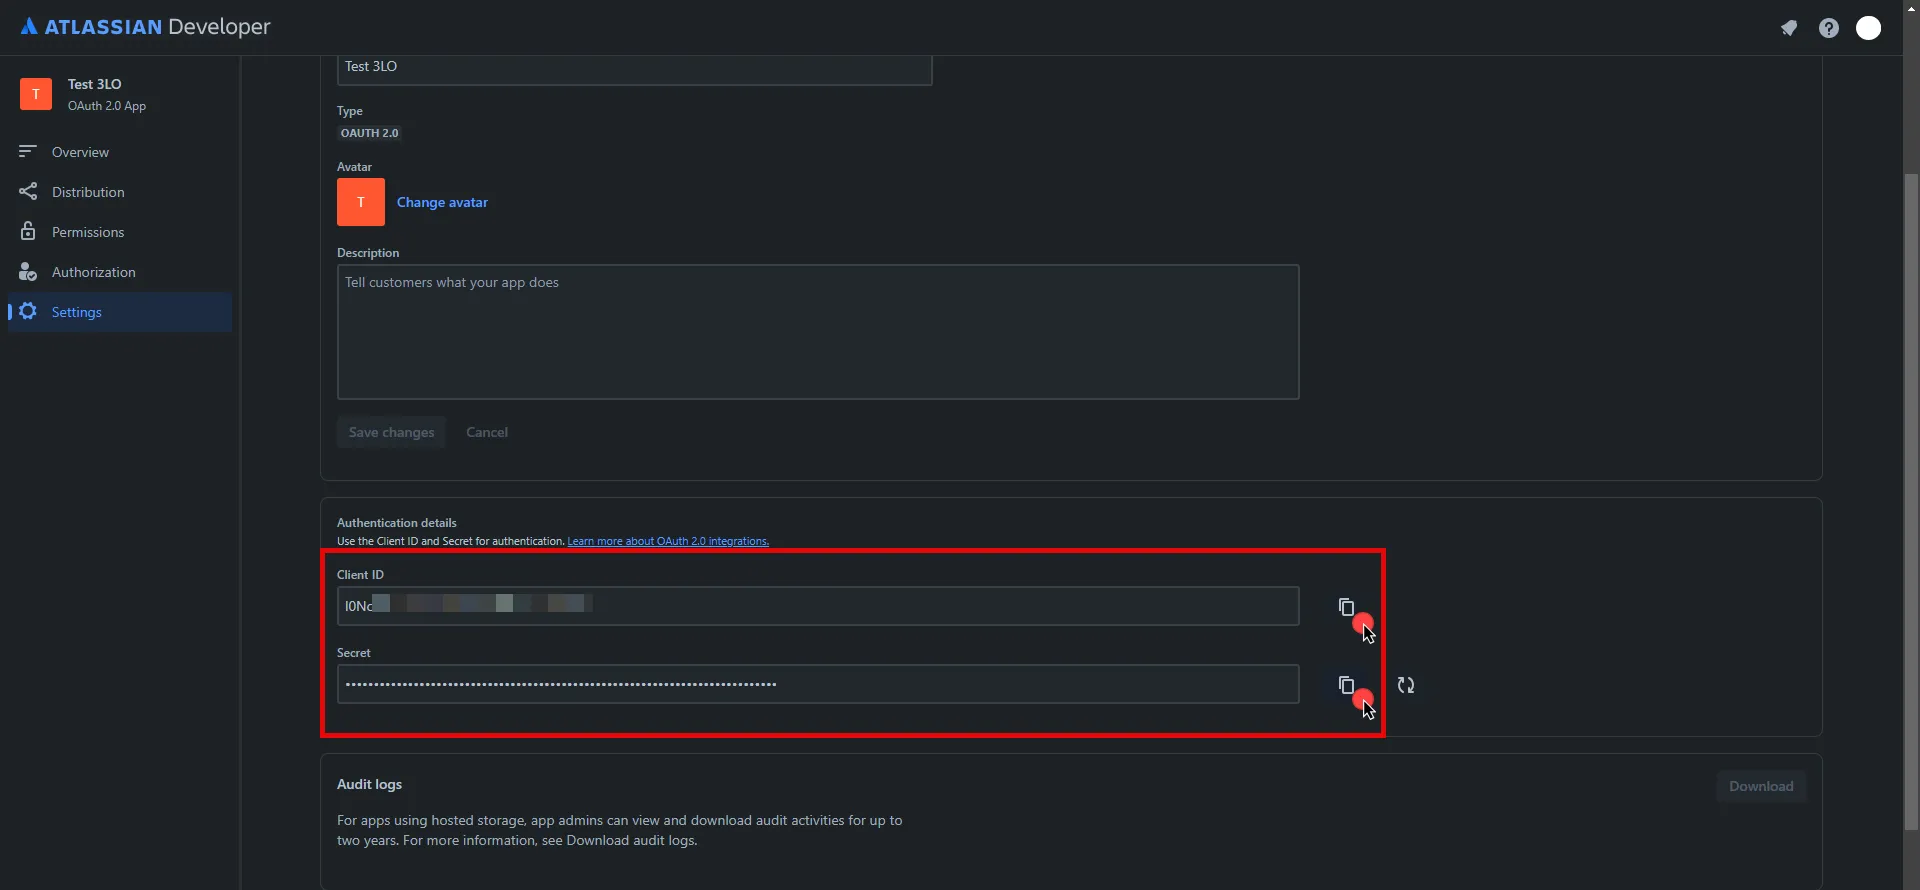
In the left pane, select Settings, scroll down to the Authentication details, and copy both the Client ID and the Secret. Store them for later use in the tenant configuration.
- Edit the existing Credential Provider created in the previous steps.
- Name - Choose a user-friendly name.
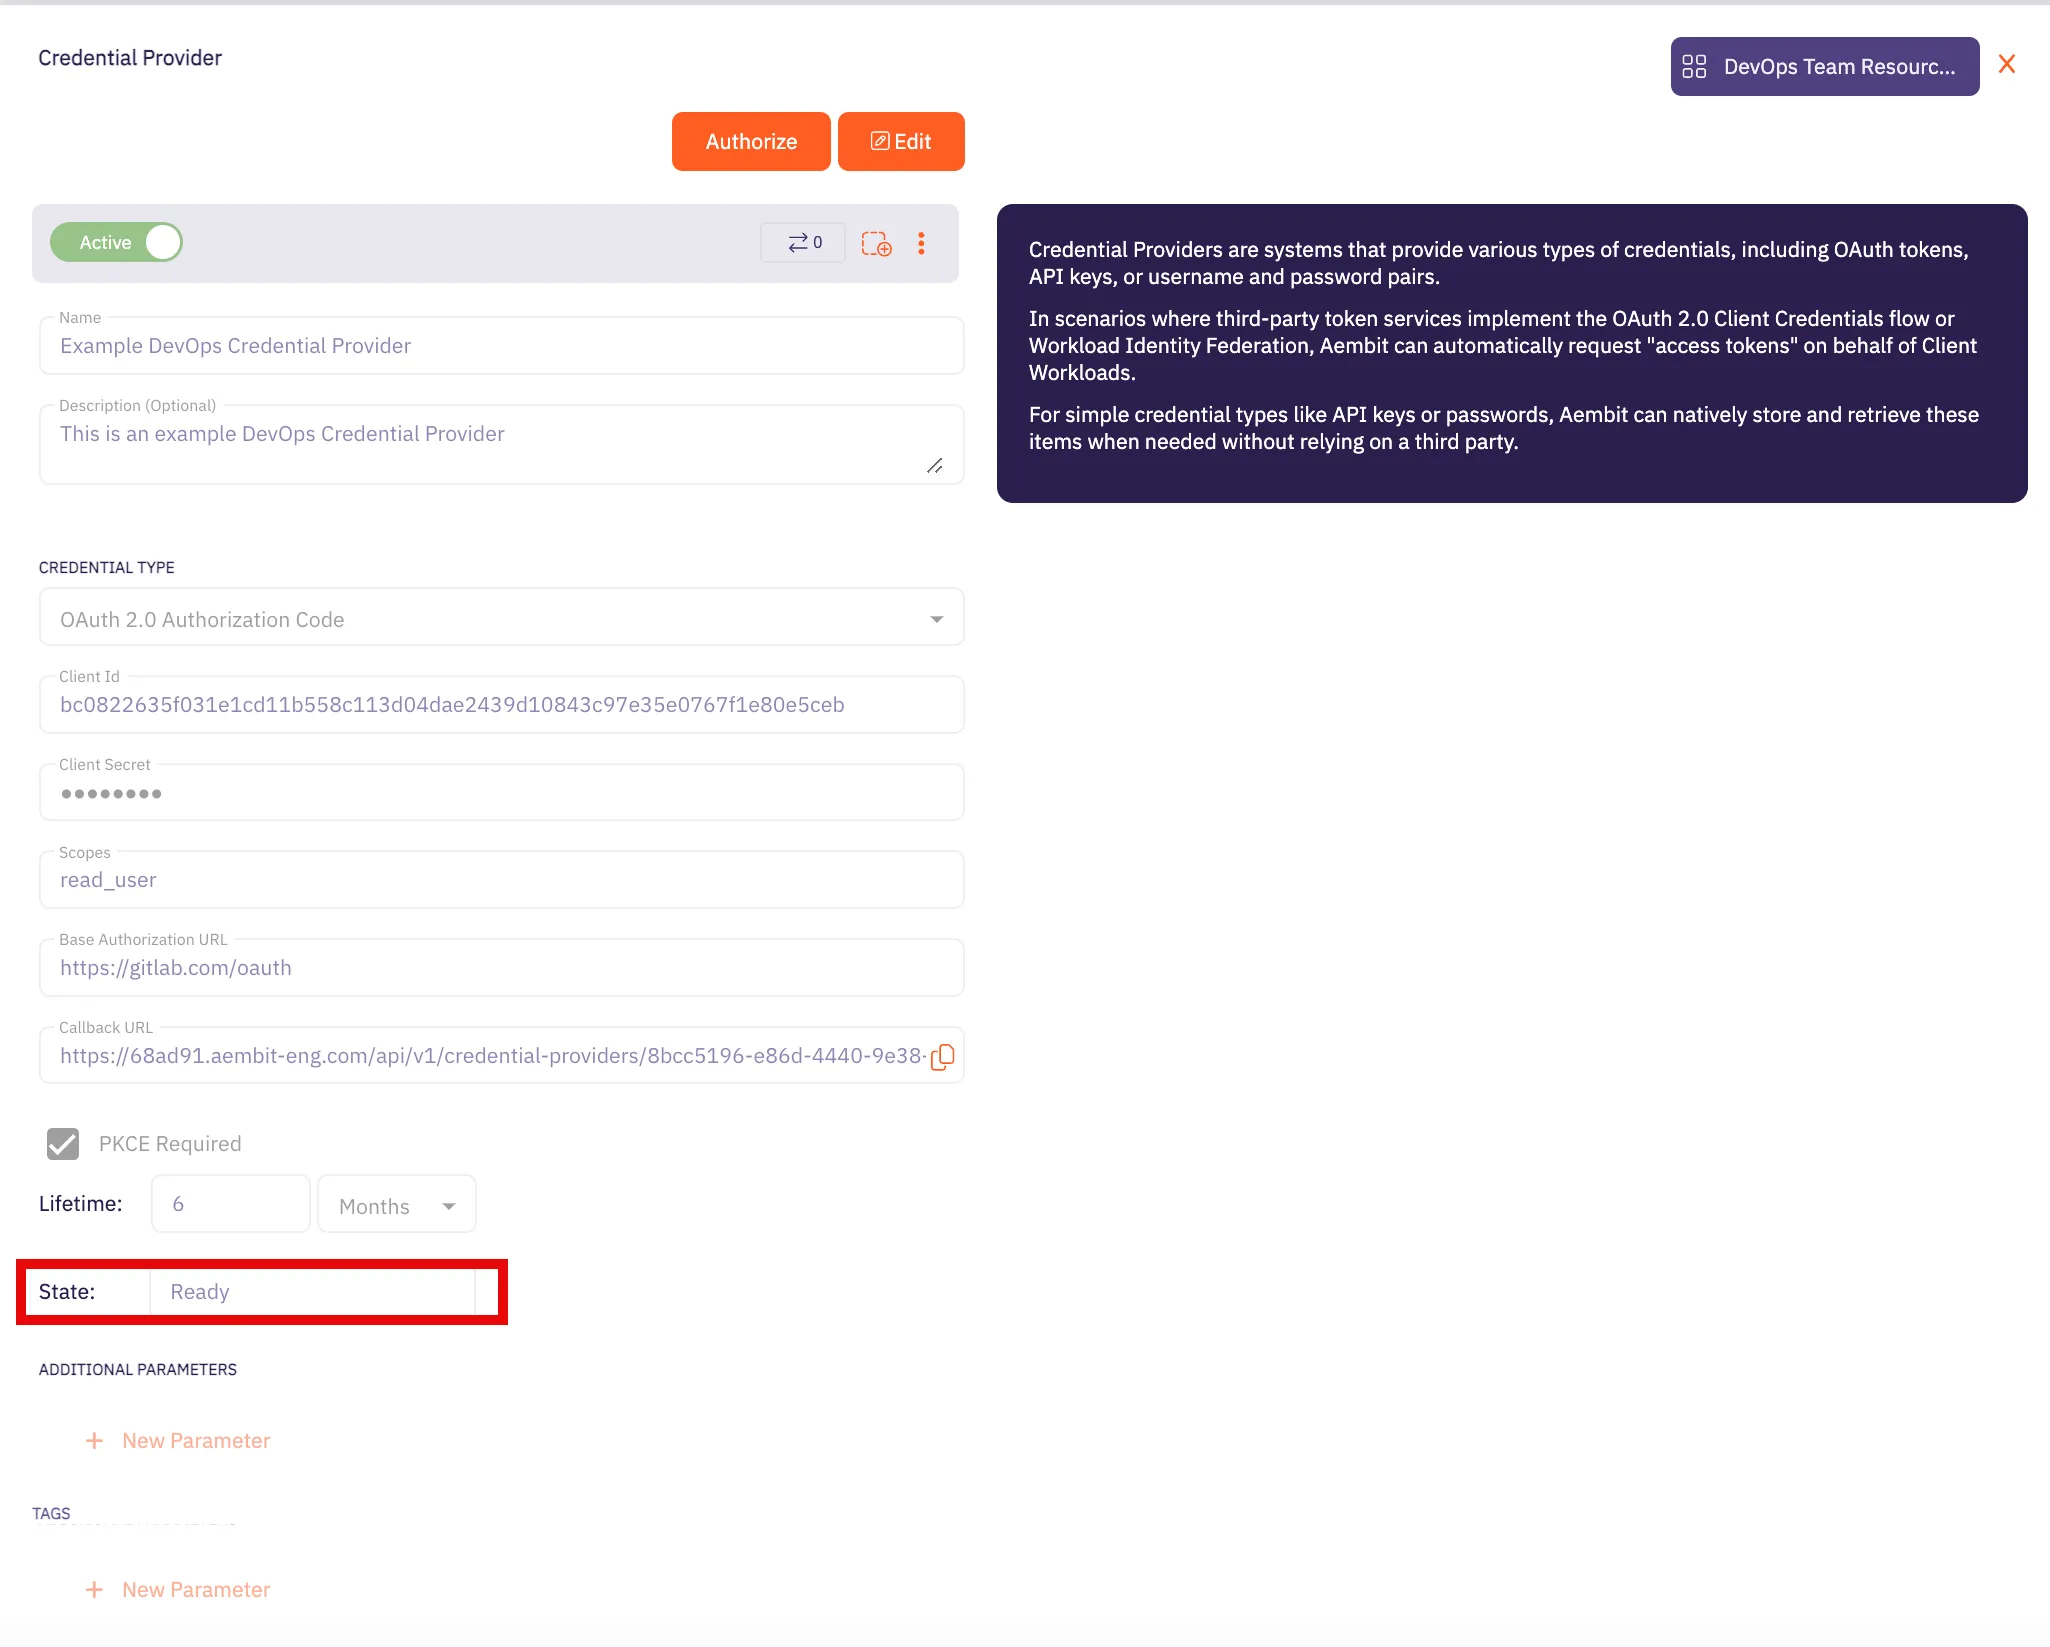
- Credential Type - OAuth 2.0 Authorization Code
- Callback URL (Read-Only) - An auto-generated Callback URL from Aembit Admin.
- Client Id - Provide the Client ID copied from Atlassian.
- Client Secret - Provide the Secret copied from Atlassian.
- Scopes - Enter the scopes you use, space delimited. Must include the
offline_accessscope required for the refresh token (e.g.offline_access read:jira-work read:servicedesk-request) - OAuth URL -
https://auth.atlassian.com
Click on URL Discovery to populate the Authorization and Token URL fields, which can be left as populated.
- PKCE Required - Off (PKCE is not supported by Atlassian, so leave this field unchecked).
- Lifetime - 1 year (Absolute expiry time according to Atlassian)
For more information on rotating the refresh token, please refer to the official Atlassian documentation.
-
Click Save to save your changes on the Credential Provider.
-
In Aembit UI, click the Authorize button. You are be directed to a page where you can review the access request. Click Accept to complete the OAuth 2.0 Authorization Code flow. You should see a success page and be redirected to Aembit automatically. You can also verify that your flow is complete by checking the State value in the Credential Provider. After completion, it should be in a Ready state.
API Key
Section titled “API Key”Server Workload Configuration
Section titled “Server Workload Configuration”- Create a new Server Workload.
- Name - Choose a user-friendly name.
- Configure the service endpoint:
- Host -
<domain>.atlassian.net - Application Protocol - HTTP
- Port - 443 with TLS
- Forward to Port - 443 with TLS
- Authentication method - HTTP Authentication
- Authentication scheme - Basic
Credential Provider Configuration
Section titled “Credential Provider Configuration”-
Sign into your Atlassian account.
-
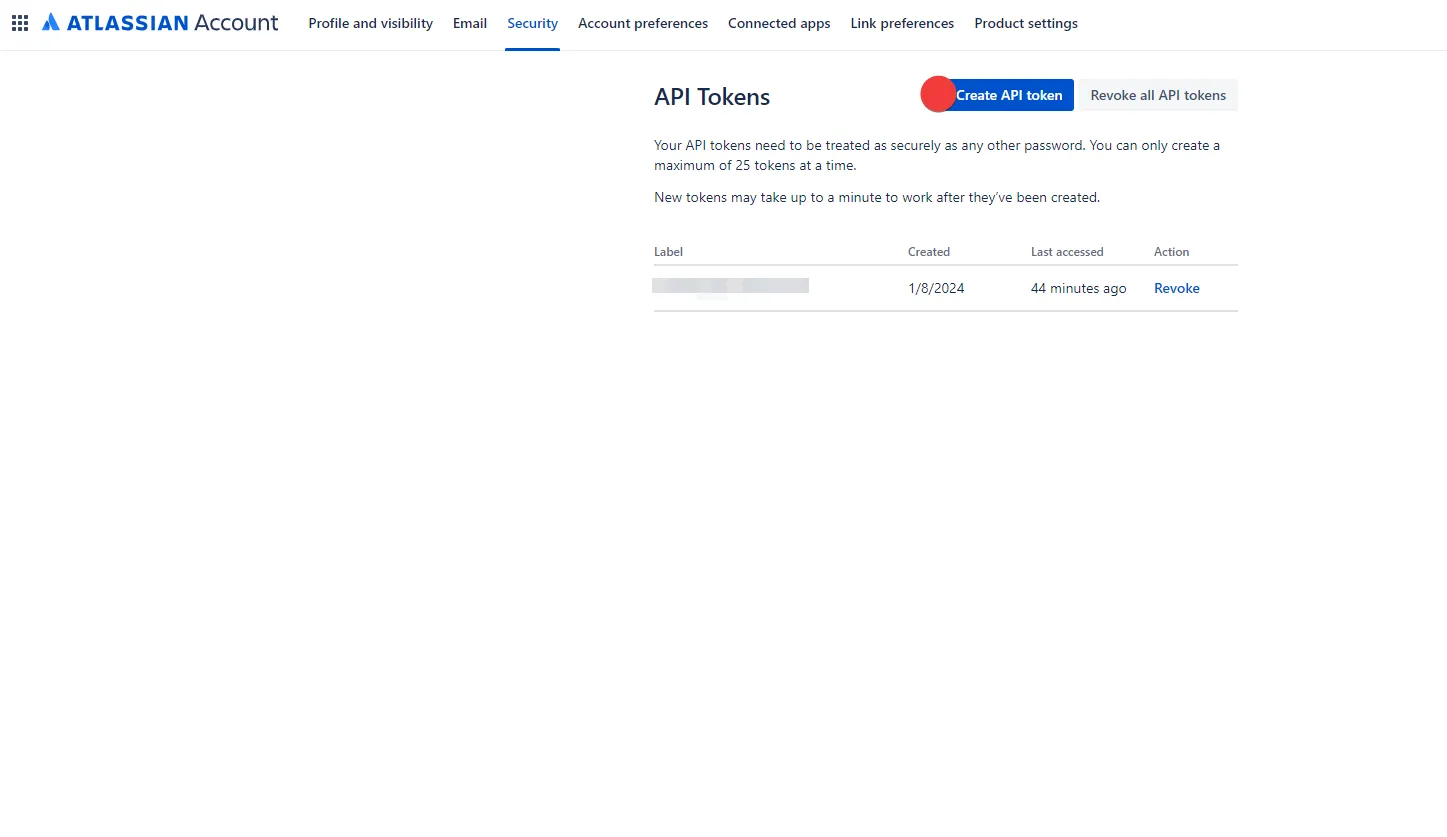
Navigate to the Atlassian account - API Tokens page.
-
Click on Create API token.
-
In the dialog that appears, enter a memorable and concise label for your token, and then click Create.
-
Click Copy to clipboard and securely store the token for later use in the configuration on the tenant. For more information on how to store your API token, please refer to the official Atlassian documentation.
-
Create a new Credential Provider.
- Name - Choose a user-friendly name.
- Credential Type - Username & Password
- Username - Your email address for the Atlassian account used to create the token.
- Password - Provide the token copied from Atlassian.
Client Workload Configuration
Section titled “Client Workload Configuration”Aembit now handles the credentials required to access the Server Workload, eliminating the need for you to manage them directly. You can safely remove any previously used credentials from the Client Workload.
If you access the Server Workload through an SDK or library, it is possible that the SDK/library may still require credentials to be present for initialization purposes. In this scenario, you can provide placeholder credentials. Aembit will overwrite these placeholder credentials with the appropriate ones during the access process.
Access Policy
Section titled “Access Policy”- Create an Access Policy for a Client Workload to access the Atlassian Server Workload. Assign the newly created Credential Provider to this Access Policy.
Required Features
Section titled “Required Features”- You will need to configure the TLS Decrypt feature to work with the Atlassian Server Workload.