Apigee
Overview
Google Apigee is a full lifecycle API management platform that enables organizations to design, secure, deploy, monitor, and scale APIs. With its comprehensive set of features and scalable architecture, Google Apigee empowers developers to build efficient, reliable, and secure APIs that drive business growth.
Below you can find the Aembit configuration required to work with the Google Apigee service as a Server Workload using the REST APIs.
Prerequisites
Before proceeding with the configuration, ensure you have an active Google Cloud account, as well as an existing API Proxy and App set up in the Google Apigee platform. If you have not created a proxy before, you can follow the steps in the next section. For more information on creating an API Proxy, please refer to the official Google documentation.
Create Apigee API Proxy
-
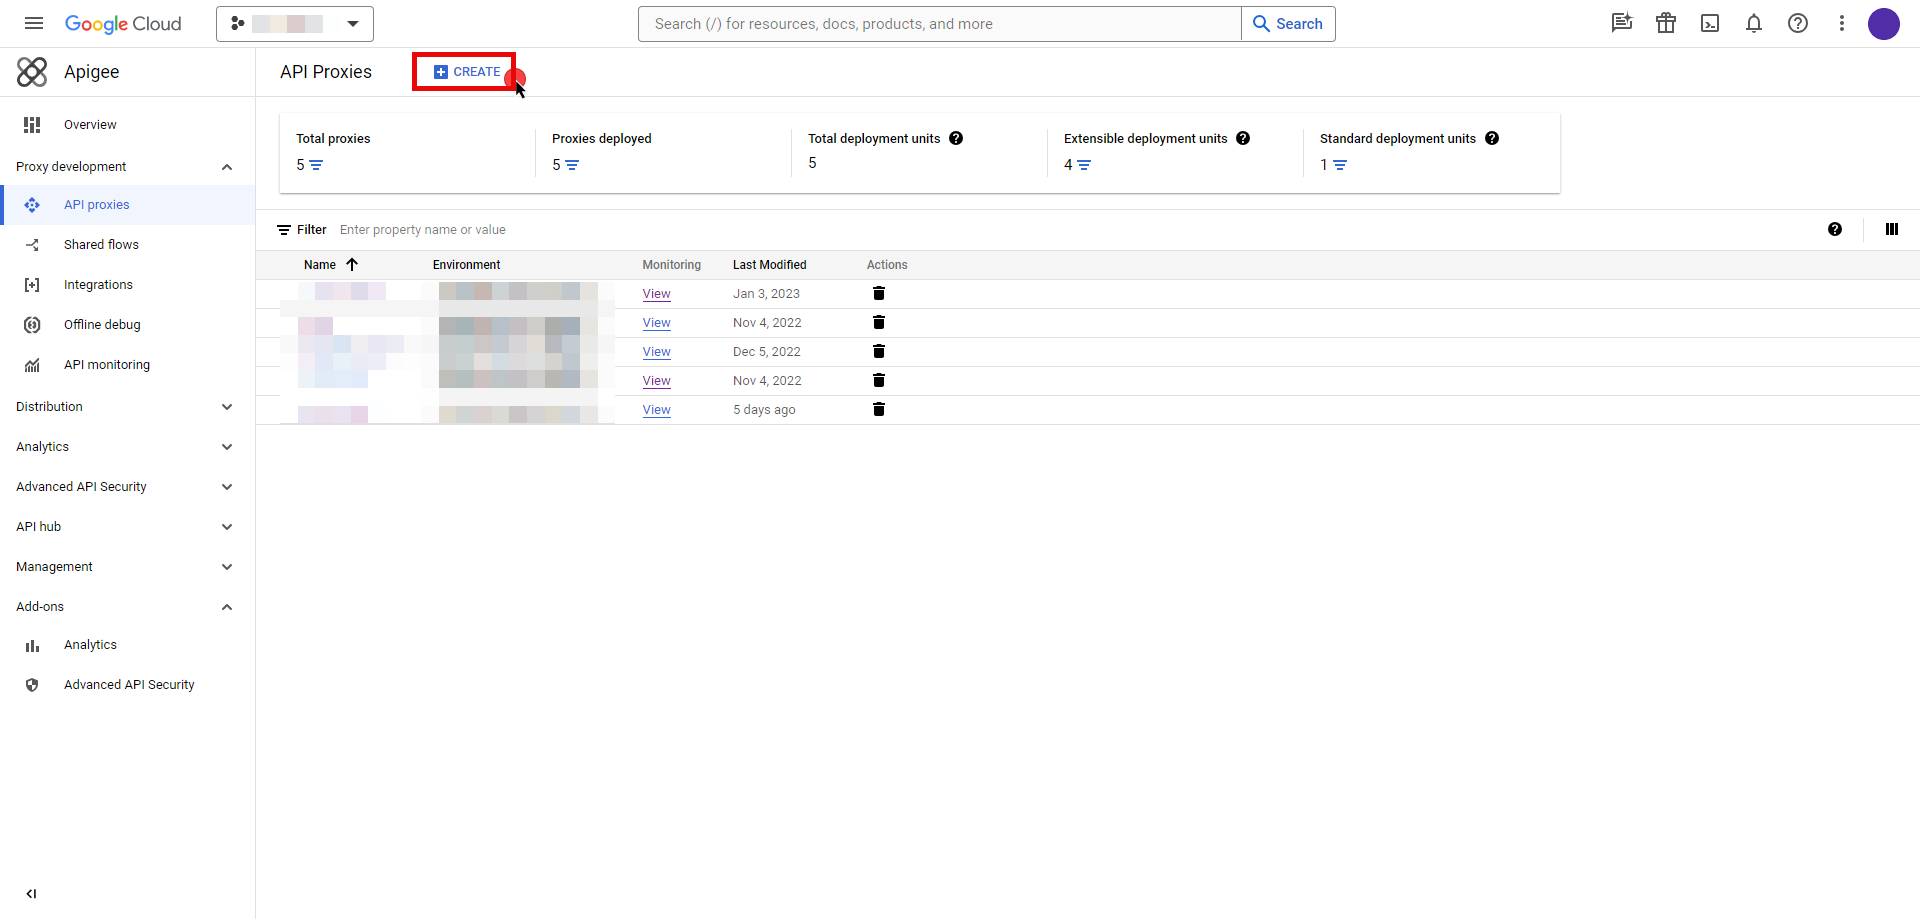
Navigate to the Apigee UI in Cloud console and sign in with your Google Cloud account.
-
In the left navigation pane, select API Proxies under the Proxy development section.
-
On the API Proxies dashboard, click Create in the top left corner.
-
You will be prompted to choose a proxy type; keep the default Reverse proxy option and provide the any other required information.
-
Once you have configured your proxy, deploy it to make the API proxy active.
Server Workload Configuration
To locate the environment group hostname for your proxy in the Apigee UI, follow these steps:
-
Navigate to the Apigee UI and sign in with your Google Cloud account.
-
In the Apigee UI, go to Management > Environments > Groups.
-
Identify the row displaying the environment where your proxy is deployed.
-
Copy the endpoint for later use in the tenant configuration.
- Create a new Server Workload.
- Name - Choose a user-friendly name.
- Configure the service endpoint:
- Host - your-environment-group-hostname.com (Provide the endpoint copied from Apigee UI)
- Application Protocol - HTTP
- Port - 443 with TLS
- Forward to Port - 443 with TLS
- Authentication method - API Key
- Authentication scheme - Query Parameter
- Query Parameter - apikey
Credential Provider Configuration
-
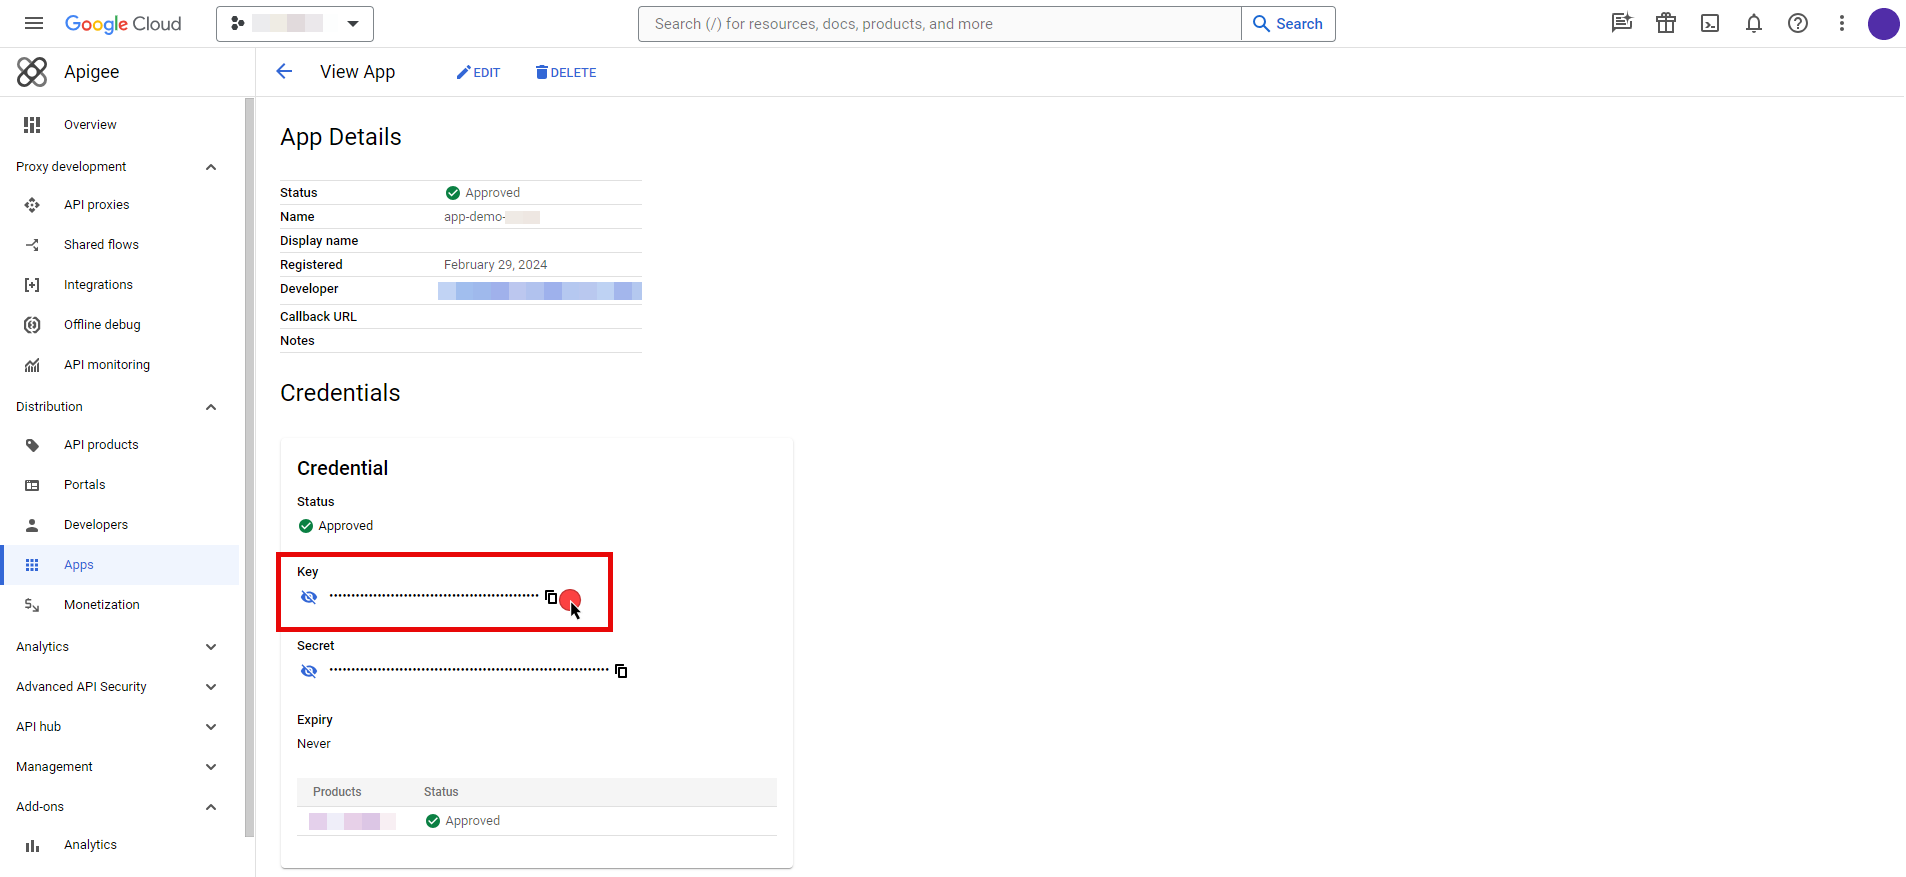
Navigate to the Apigee UI in Cloud console and sign in with your Google Cloud account.
-
In the left navigation pane, select Apps to access a list of your applications.
-
Click on the name of the app to view its details.
-
Within the Credentials section, click the icon to Copy to clipboard next to Key and securely store the key for later use in the tenant configuration.
- Create a new Credential Provider.
- Name - Choose a user-friendly name.
- Credential Type - API Key
- API Key - Provide the key copied from Google Cloud Apigee console.
Client Workload Configuration
Aembit now handles the credentials required to access the Server Workload, eliminating the need for you to manage them directly. You can safely remove any previously used credentials from the Client Workload.
If you access the Server Workload through an SDK or library, it is possible that the SDK/library may still require credentials to be present for initialization purposes. In this scenario, you can provide placeholder credentials. Aembit will overwrite these placeholder credentials with the appropriate ones during the access process.
Access Policy
- Create an Access Policy for a Client Workload to access the Apigee Server Workload. Assign the newly created Credential Provider to this Access Policy.
Required Features
- You will need to configure the TLS Decrypt feature to work with the Apigee Server Workload.