Add Client Workload In Kubernetes
Overview
After you have signed up for an Aembit account and activated your account in the email provided to you, you may now start setting up your configuration. The first step in this process to add an Access Policy, which is described in the steps below.
Add a Client Workload
To add a Client Workload, follow the steps listed below.
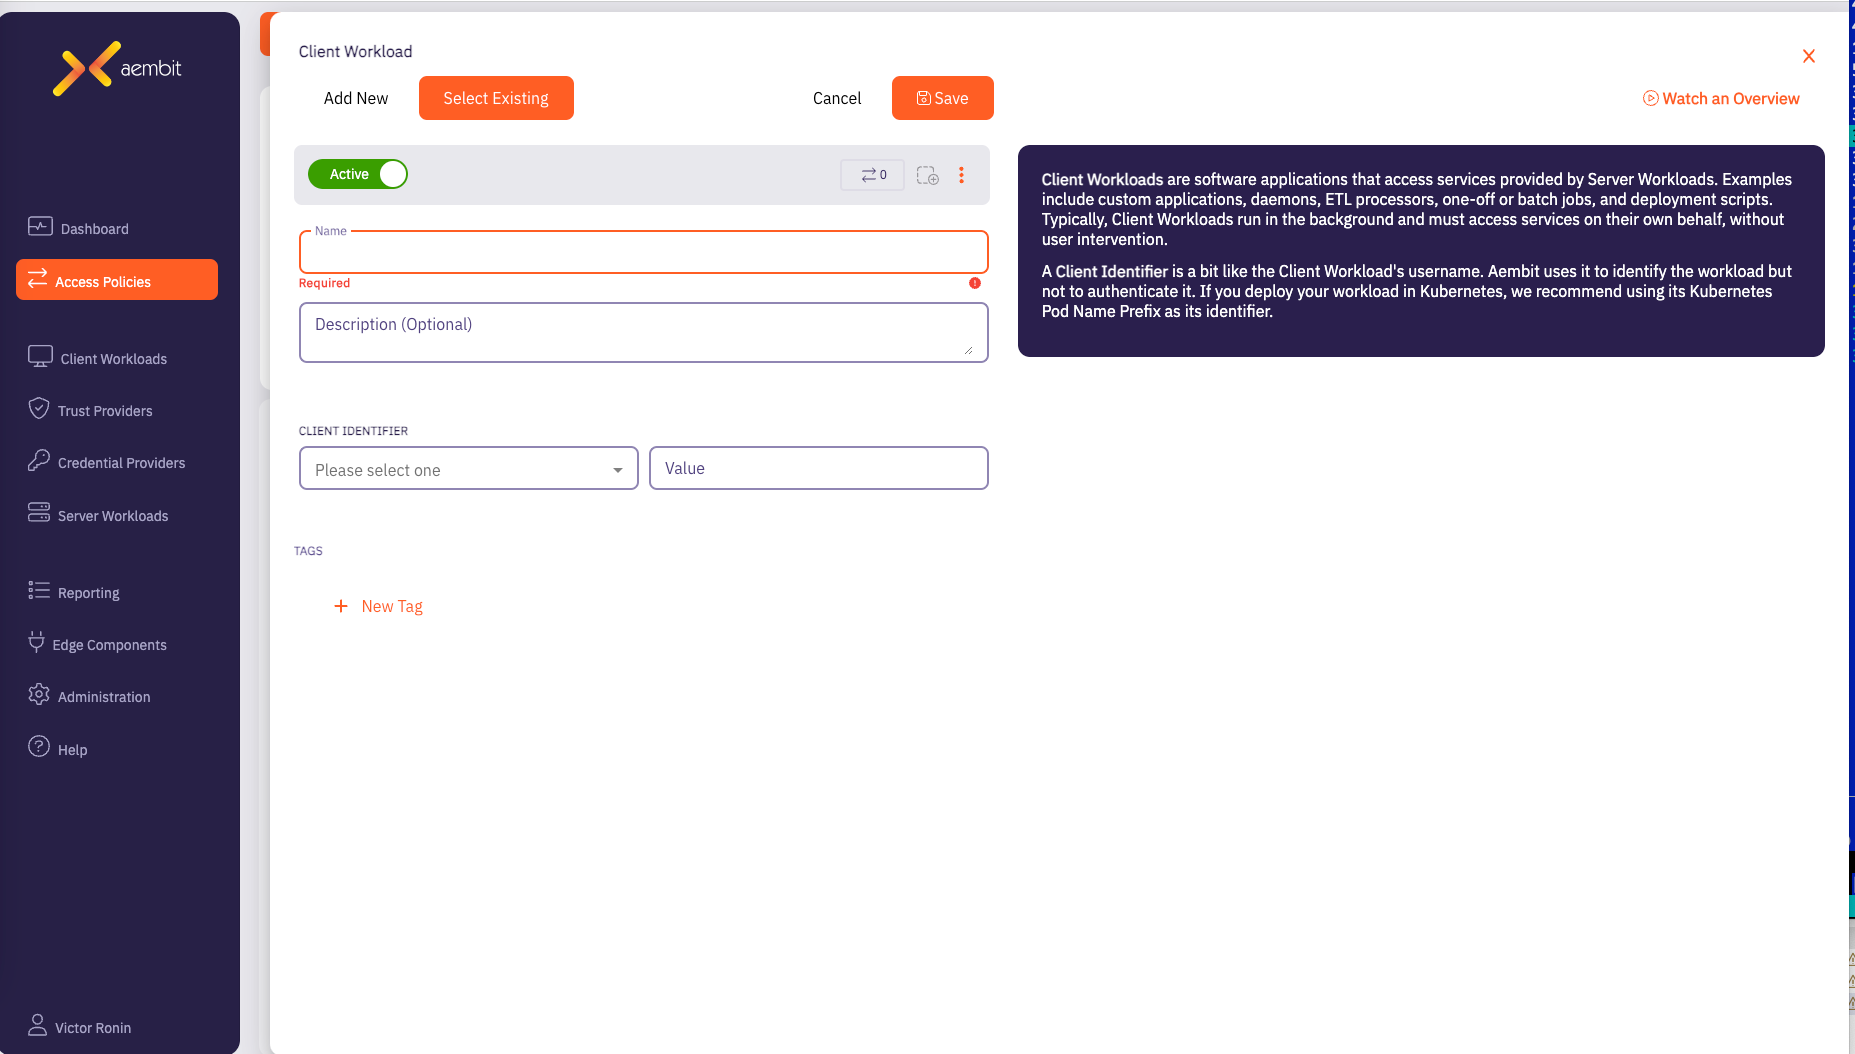
- In the Access Policy view, click + Add Client Workload. You will see the Client Workload page displayed.
Be sure to:
- Give your Client Workload a name and description (optional).
- Choose a Client Identifier – we currently support the following options:
- Aembit Client ID (fallback identification method)
- When selected, Aembit will generate a unique ID, which should be supplied to the Aembit Edge component (Agent/Proxy) associated with your Client Workload.
- AWS ECS Task Family
- Hostname
- Kubernetes Pod Name
- Kubernetes Pod Name Prefix (recommended for Kubernetes deployments)
- By default, Kubernetes pod names are formatted as: deployment-name/replicasetid/podid
- You need to specify the first part of the pod name (deployment name) in the "Value" field.
- Process Name
- Process User Name
- Source IP Address ((generally used for deployments outside of Kubernetes where the host has a static IP address))
- Aembit Client ID (fallback identification method)
- When finished, click Save to save your configuration.